
Introduction
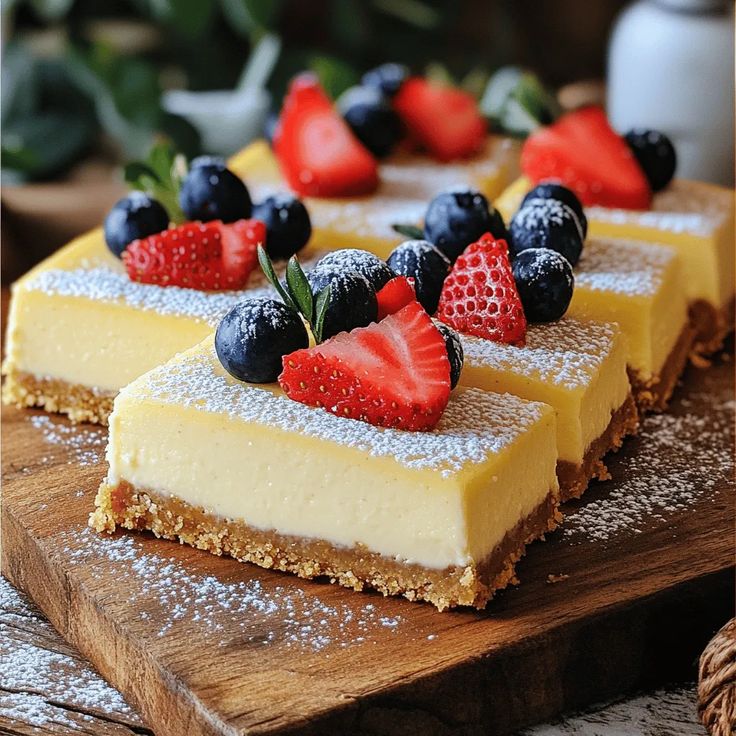
Get ready for a dessert that’s pure bliss in every bite! Our Philadelphia Cheesecake Bars are the epitome of creamy, dreamy indulgence. Imagine a rich, smooth cheesecake filling resting on a perfectly crisp graham cracker crust. It’s a classic for a reason, offering that delightful balance of sweet and tangy that makes your taste buds sing.
The best part? These bars are incredibly simple to make, perfect for even the most novice bakers. Forget fussy water baths or complicated techniques. This recipe focuses on straightforward steps and readily available ingredients. You’ll be amazed at how quickly you can whip up a dessert that looks and tastes like it came from a professional bakery.
So, whether you’re planning a party, need a comforting treat, or just want to satisfy a sweet craving, these cheesecake bars are your answer. They’re impressive yet effortless, and guaranteed to be a crowd-pleaser. Let’s dive into making some magic!
Cooking Time & Prep Time
- Prep Time: 20 minutes
- Cooking Time: 35 minutes
- Total Time: 55 minutes
Small tip: To save a few minutes, you can crush your graham crackers in a food processor while the oven preheats.
Ingredients
This recipe makes approximately 16 delicious bars.
For the Graham Cracker Crust:
- 1 ½ cups (about 10-12 full sheets) graham cracker crumbs
- ¼ cup granulated sugar
- 6 tablespoons unsalted butter, melted
For the Philadelphia Cheesecake Filling:
- 2 (8-ounce) packages full-fat Philadelphia cream cheese, softened
- ¾ cup granulated sugar
- 2 large eggs
- 1 teaspoon pure vanilla extract
- 1 tablespoon fresh lemon juice (optional, for extra tang)
Step-by-Step Instructions
-
Step 1: Prepare Your Pan and Preheat Oven
Preheat your oven to 350°F (175°C). Line an 8×8-inch baking pan with parchment paper, leaving an overhang on two sides. This makes it super easy to lift the bars out later.
Small tip: Spray the pan lightly with cooking spray before adding parchment paper to help it stick in place.
-
Step 2: Make the Graham Cracker Crust
In a medium bowl, combine the graham cracker crumbs and ¼ cup granulated sugar. Pour in the melted butter and mix well until all the crumbs are moistened. It should resemble wet sand.
-
Step 3: Press the Crust into the Pan
Press the crumb mixture evenly into the bottom of your prepared 8×8-inch pan. Use the back of a spoon or your fingers to create a firm, compact layer. Bake for 8 minutes, then remove from the oven and set aside.
Small tip: A flat-bottomed measuring cup can help you press the crust down very firmly and evenly.
-
Step 4: Prepare the Cream Cheese Mixture
In a large mixing bowl, beat the softened Philadelphia cream cheese with an electric mixer on medium speed until it’s smooth and creamy. Make sure there are no lumps.
Small tip: Ensure your cream cheese is at true room temperature. This prevents lumps and ensures a smooth filling. You can soften it quickly by unwrapping and microwaving for 15-20 seconds.
-
Step 5: Add Sugar and Eggs
Gradually add ¾ cup granulated sugar to the cream cheese, beating until just combined. Then, add the eggs one at a time, beating on low speed until each egg is fully incorporated. Do not overmix once the eggs are in.
-
Step 6: Incorporate Vanilla and Lemon
Stir in the vanilla extract and the optional lemon juice. Mix gently until everything is just combined. The lemon juice adds a lovely brightness that cuts through the richness.
-
Step 7: Pour Filling Over Crust
Pour the smooth cheesecake filling evenly over the partially baked graham cracker crust in the pan. Gently spread it with a spatula if needed to ensure an even layer.
-
Step 8: Bake the Cheesecake Bars
Return the pan to the oven and bake for 25-30 minutes. The edges should be set, but the center will still have a slight jiggle. This is perfectly normal!
Small tip: Avoid opening the oven door too often during baking, as this can cause cracks.
-
Step 9: Cool and Chill
Remove the pan from the oven and let the cheesecake bars cool completely on a wire rack at room temperature. Once cool, cover the pan with plastic wrap and refrigerate for at least 4 hours, or preferably overnight. Chilling is crucial for setting the bars.
-
Step 10: Slice and Serve
Once thoroughly chilled, use the parchment paper overhangs to lift the entire cheesecake slab out of the pan. Place it on a cutting board and slice into 16 even bars. Clean your knife between cuts for neat edges. Enjoy!
Tips & Variations
- Gluten-Free Option: Simply swap out regular graham crackers for gluten-free graham crackers in the crust. The rest of the recipe is naturally gluten-free!
- Vegan Option: Replace traditional cream cheese with a high-quality vegan cream cheese alternative. Use plant-based butter for the crust and an egg replacer (like flax eggs or commercial egg replacers) for the eggs in the filling.
- Fruit Swirl Variation: Before baking, dollop 1/2 cup of fruit preserves (raspberry, strawberry, or cherry work wonderfully) over the cheesecake filling. Use a knife or skewer to gently swirl the preserves into the cream cheese for a beautiful marbled effect.
- Chocolate Lover’s Dream: Mix 1/2 cup of mini chocolate chips into the cheesecake filling before pouring it over the crust. You can also sprinkle a few more on top before baking.
- Spiced Crust: Add 1/2 teaspoon of ground cinnamon or a pinch of nutmeg to your graham cracker crust mixture for a warm, aromatic twist. This pairs beautifully with the creamy cheesecake.
Nutritional Information
Approximate values per serving (based on 16 servings):
- Calories: 250 kcal
- Protein: 4g
- Carbohydrates: 22g
- Fat: 17g
Please note that nutritional values may vary depending on the specific brands and ingredients used.
Health Benefits
While these Philadelphia Cheesecake Bars are certainly a delicious treat, some of their core ingredients offer small health benefits when enjoyed in moderation.
- Cream Cheese: As a dairy product, cream cheese provides calcium, which is essential for strong bones and teeth. It also contains some protein, contributing to muscle repair and growth.
- Eggs: Eggs are a fantastic source of high-quality protein, containing all nine essential amino acids. They also provide important vitamins like B12, D, and choline, which supports brain health.
- Lemon Juice: The optional lemon juice not only brightens the flavor but also adds a small boost of Vitamin C. Vitamin C is a powerful antioxidant that supports immune function and skin health.
- Graham Crackers: While they contain sugar, graham crackers are often made with whole wheat flour, which provides some dietary fiber. Fiber is important for digestive health and can help maintain healthy blood sugar levels.
Remember, desserts like these are best enjoyed as part of a balanced diet. The joy and comfort they bring can also contribute positively to overall well-being!
Serving Suggestions
- Classic Toppings: Serve your cheesecake bars with a dollop of fresh whipped cream and a sprinkle of fresh berries like raspberries, blueberries, or sliced strawberries.
- Sauce It Up: Drizzle with a homemade raspberry coulis, warm chocolate sauce, or a tangy caramel sauce for an extra layer of flavor.
- Coffee Companion: These bars are the perfect accompaniment to a hot cup of coffee, espresso, or a soothing herbal tea for an afternoon treat.
- Party Platter: Cut them into smaller, bite-sized squares and arrange them on a dessert platter for easy grabbing at parties or potlucks.
Storage Tips
Store leftover Philadelphia Cheesecake Bars in an airtight container in the refrigerator for up to 5-7 days. For longer storage, you can freeze individual bars. Wrap each bar tightly in plastic wrap, then place them in a freezer-safe bag or container for up to 2-3 months. To enjoy frozen bars, simply thaw them in the refrigerator overnight or at room temperature for an hour or two until soft. Reheating is not necessary; cheesecake is best served chilled or at room temperature.
Conclusion
There you have it – a truly irresistible recipe for Philadelphia Cheesecake Bars! They are the perfect combination of creamy, tangy, and sweet, all nestled on a buttery, crisp crust. This dessert proves that you don’t need fancy techniques to create something truly spectacular and utterly delicious.
We absolutely encourage you to try making these. The process is straightforward, and the results are incredibly rewarding. You’ll love the simple elegance and the comforting taste that these bars bring to any occasion.
So go ahead, bake a batch and share the joy! These cheesecake bars are ideal for family gatherings, a treat for friends, or simply a sweet reward for yourself. Happy baking!


