
Introduction
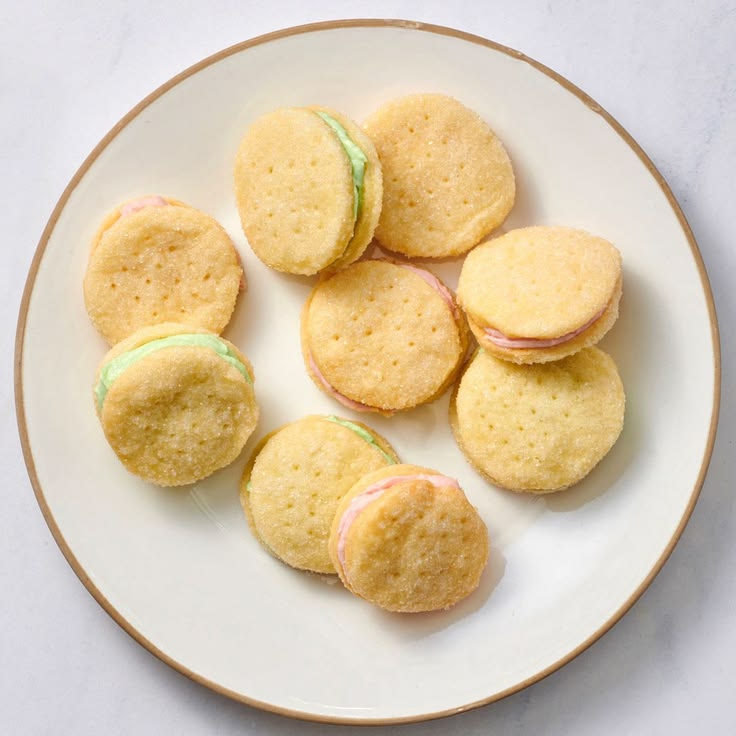
Imagine a light, crispy wafer embracing a cloud of delicate, sweet cream. That’s exactly what Parisian Cream Wafers are! These elegant treats are a delightful symphony of textures and flavors, perfect for a special occasion or a simple afternoon indulgence. They taste like a little piece of heaven, with a subtle sweetness that truly melts in your mouth.
You might think such a refined dessert would be complicated, but these wafers are surprisingly easy to make. The dough comes together quickly, and the cream filling is a breeze to whip up. With just a few simple ingredients and a little love, you’ll create something truly impressive without spending hours in the kitchen.
So, are you ready to bring a touch of Parisian charm to your home? Get ready to bake, create, and savor these exquisite cream wafers. Your taste buds will thank you!
Cooking Time & Prep Time
- Prep Time: 30 minutes
- Cooking Time: 25 minutes
- Total Time: 55 minutes
Small tip: You can make the cream filling a day ahead and chill it. This saves time on the baking day!
Ingredients
This recipe makes approximately 12 Parisian Cream Wafers (24 individual wafer cookies).
For the Wafers:
- 1/2 cup (113g) unsalted butter, softened
- 1/2 cup (100g) granulated sugar
- 1 large egg
- 1 teaspoon vanilla extract
- 1 1/4 cups (150g) all-purpose flour
- 1/4 teaspoon baking powder
- Pinch of salt
- 2 tablespoons milk (any kind)
For the Cream Filling:
- 1 cup (240ml) heavy whipping cream, very cold
- 1/2 cup (120g) mascarpone cheese, very cold
- 1/4 cup (30g) powdered sugar (confectioners’ sugar), sifted
- 1/2 teaspoon vanilla extract
For Garnish (Optional):
- 1 tablespoon powdered sugar, for dusting
- Fresh berries or mint leaves
Step-by-Step Instructions
-
Step 1: Cream the Butter and Sugar
In a large bowl, using an electric mixer, beat the softened butter and granulated sugar together until light and fluffy. This usually takes about 2-3 minutes. Make sure to scrape down the sides of the bowl often.
Small tip: Softened butter should be pliable but not melted. If it’s too warm, your dough might be greasy.
-
Step 2: Add Egg and Vanilla
Beat in the large egg until it is fully incorporated into the mixture. Then, stir in the vanilla extract. The mixture should be smooth and well combined.
-
Step 3: Combine Dry Ingredients
In a separate medium bowl, whisk together the all-purpose flour, baking powder, and salt. This helps to distribute the leavening agents evenly. A quick whisk with a fork is all you need.
-
Step 4: Gradually Add Dry to Wet Ingredients
Add the dry ingredient mixture to the wet ingredients in two additions, mixing on low speed until just combined after each addition. Be careful not to overmix the dough. Overmixing can lead to tough wafers.
-
Step 5: Add Milk and Chill Dough
Stir in the milk until the dough comes together. It should be soft but manageable. Wrap the dough in plastic wrap and chill it in the refrigerator for at least 30 minutes. This makes the dough easier to handle.
Small tip: Chilling the dough also helps prevent the wafers from spreading too much during baking.
-
Step 6: Preheat Oven and Prepare Baking Sheets
Preheat your oven to 350°F (175°C). Line two baking sheets with parchment paper or silicone mats. This will prevent sticking and make cleanup a breeze.
-
Step 7: Roll Out and Cut Wafers
On a lightly floured surface, roll out the chilled dough to about 1/8-inch thickness. Use a 2-inch round cookie cutter or a sharp knife to cut out circles. Carefully transfer the dough circles to the prepared baking sheets.
Small tip: For perfectly round wafers, dip your cookie cutter in flour between cuts.
-
Step 8: Bake the Wafers
Bake the wafers for 10-12 minutes, or until the edges are lightly golden brown. They should be crisp when cool. Rotate the baking sheets halfway through for even baking.
-
Step 9: Cool the Wafers
Let the wafers cool on the baking sheets for a few minutes before transferring them to a wire rack to cool completely. They will crisp up as they cool. Handle them gently as they are delicate.
-
Step 10: Prepare the Cream Filling
In a large, chilled bowl, combine the cold heavy whipping cream, cold mascarpone cheese, sifted powdered sugar, and vanilla extract. Beat with an electric mixer on medium-high speed until firm peaks form. Be careful not to overbeat, or the cream will become grainy.
Small tip: Use a chilled bowl and beaters for the best whipped cream results. Place them in the freezer for 10-15 minutes beforehand.
-
Step 11: Assemble the Wafers
Once the wafers are completely cool, spread about a tablespoon of the cream filling onto the flat side of one wafer. Gently top it with another wafer, pressing lightly to create a sandwich. Repeat with the remaining wafers and cream.
-
Step 12: Garnish and Serve
Arrange the Parisian Cream Wafers on a serving platter. If desired, dust them lightly with powdered sugar and garnish with fresh berries or a sprig of mint. Serve immediately for the best crispness!
Tips & Variations
- Gluten-Free Option: Easily make these gluten-free by substituting the all-purpose flour with a 1:1 gluten-free baking flour blend. Ensure your blend contains xanthan gum for the best texture.
- Vegan/Vegetarian Option: For a vegan version, use a plant-based butter substitute, a “flax egg” (1 tbsp ground flaxseed mixed with 3 tbsp water, let sit for 5 mins) instead of a regular egg, and plant-based milk. For the cream, use chilled full-fat coconut cream (the thick part from a can of refrigerated coconut milk) instead of heavy cream and a vegan cream cheese alternative for mascarpone.
- Add More Fruit or Nuts: For extra texture and flavor, finely chop some dried cranberries or pistachios and fold them into the cream filling. Or, serve the wafers alongside a fresh fruit salad for a burst of vitamins.
- Spicy Version: For a subtle kick, add 1/4 teaspoon of ground ginger or a tiny pinch of cayenne pepper to the wafer dough for a warm, unexpected flavor. You could also swirl a tiny bit of melted dark chocolate with a hint of chili powder into the cream.
- Flavor Variations: Experiment with extracts! Try almond extract in the wafer dough for a nutty flavor, or lemon zest in the cream for a bright, citrusy twist. A touch of cocoa powder in the dough can also make delicious chocolate wafers.
Nutritional Information
Approximate values per serving (based on 12 servings, 1 complete wafer sandwich):
- Calories: 260 kcal
- Protein: 4g
- Carbohydrates: 25g
- Fat: 17g
Please note: Values may vary depending on specific ingredients and brands used.
Health Benefits
While these are a delightful treat, some ingredients offer nutritional value!
Dairy Power: The heavy cream and mascarpone cheese contribute calcium, which is essential for strong bones and teeth. Dairy also provides Vitamin D, especially if fortified, which helps with calcium absorption.
Egg-cellent Nutrients: Eggs are a fantastic source of high-quality protein, crucial for muscle repair and growth. They also contain essential B vitamins like B12, important for energy metabolism, and choline, which supports brain health.
Whole Grain Potential: If you opt for a whole wheat pastry flour in the wafer dough, you’ll add dietary fiber. Fiber aids digestion, helps regulate blood sugar levels, and can contribute to a feeling of fullness.
Vanilla’s Gentle Touch: Vanilla extract, beyond its wonderful aroma, contains antioxidants. Antioxidants help protect your cells from damage caused by free radicals.
Serving Suggestions
- Elegant Afternoon Tea: Serve these wafers as the star of an elegant afternoon tea spread, alongside other small pastries and a pot of your favorite brew.
- Dessert Platter Delight: Arrange them on a dessert platter with fresh berries, chocolate truffles, and mini fruit tarts for a truly impressive display.
- With Coffee or Tea: These wafers are absolutely perfect with a hot cup of coffee, espresso, or a soothing herbal tea. They make a lovely end to any meal.
Storage Tips
Parisian Cream Wafers are best enjoyed fresh, as the wafers can soften over time when filled. If you have leftovers, store them in an airtight container in the refrigerator for up to 2 days. The wafers will lose some of their crispness, but they will still be delicious. We do not recommend freezing assembled wafers, as the cream filling can separate upon thawing, and the wafers will become soggy. If you want to prepare ahead, bake the wafers and store them in an airtight container at room temperature for up to 5 days, then prepare and fill the cream just before serving. You can also make the cream filling a day ahead and store it in the fridge.
Conclusion
These Parisian Cream Wafers are more than just a dessert; they’re an experience. With their delicate crispness and luscious, airy cream, they truly embody simple elegance. They’re quick, they’re easy, and they taste absolutely divine – a perfect recipe for any home baker.
Don’t be shy! Give this recipe a try and watch as these beautiful wafers disappear from the plate. You’ll be amazed at how simple it is to create something so wonderfully sophisticated right in your own kitchen.
Share these delightful treats with your family and friends. They’re perfect for celebrations, quiet evenings, or just because you deserve a little bit of


