
Introduction
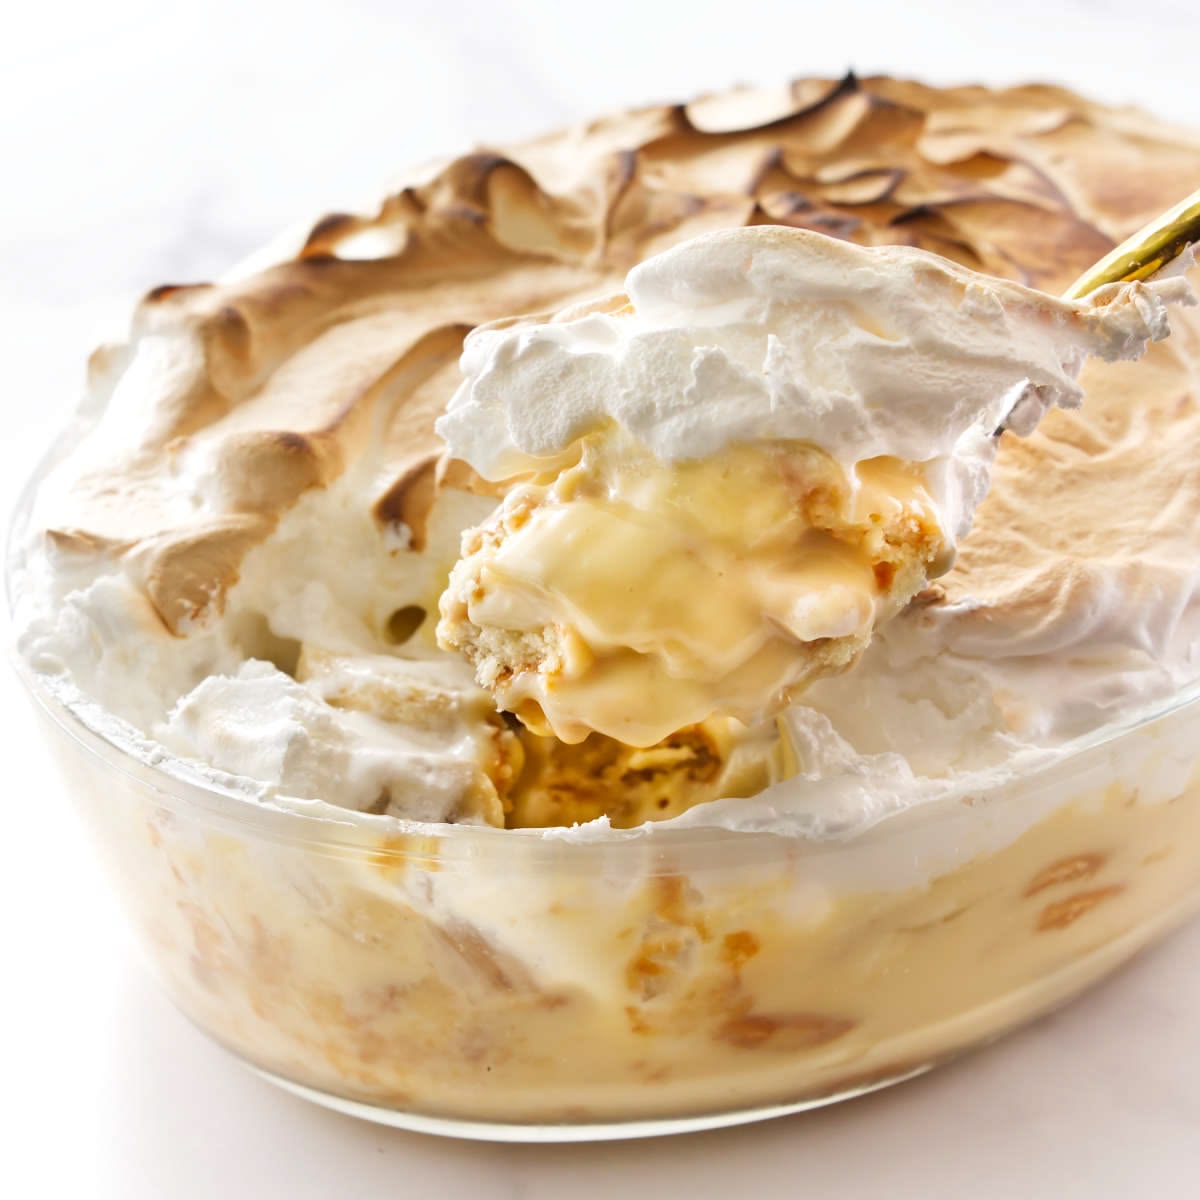
Welcome, dessert lovers! Today, we’re diving into a true Southern classic: Old Fashioned Banana Pudding. This dish is pure comfort in a bowl. It features layers of creamy vanilla pudding, sweet ripe bananas, and crunchy vanilla wafers. Every spoonful is a delightful blend of textures and flavors that will transport you back to simpler times.
You might think making a pudding from scratch is complicated, but it’s surprisingly easy. Our recipe breaks it down into simple steps. You’ll be amazed at how quickly you can create this impressive dessert. It uses common pantry ingredients and doesn’t require any fancy equipment. It’s perfect for both beginners and seasoned bakers.
So, get ready to whip up a batch of this beloved treat. It’s ideal for family gatherings, potlucks, or simply a cozy night in. Trust us, once you try this homemade version, you’ll never go back to the box mix. Let’s get started and make some magic!
Cooking Time & Prep Time
- Prep Time: 25 minutes
- Cooking Time: 15 minutes
- Chilling Time: 4 hours (minimum)
- Total Time: 4 hours 40 minutes (including chilling)
Small tip: The chilling time is crucial for the pudding to set properly and for the flavors to meld beautifully. Don’t rush this step!
Ingredients
This recipe makes 8 generous servings.
For the Homemade Vanilla Pudding:
- 1/2 cup granulated sugar
- 1/4 cup all-purpose flour
- 1/4 teaspoon salt
- 3 large egg yolks
- 2 cups whole milk
- 1 teaspoon vanilla extract
- 2 tablespoons unsalted butter
For Assembly:
- 4-5 ripe but firm bananas
- 1 (11-ounce) box vanilla wafers
For the Meringue Topping (Optional, but highly recommended!):
- 3 large egg whites
- 1/4 cup granulated sugar
- 1/2 teaspoon vanilla extract
- Pinch of cream of tartar (optional, helps stabilize meringue)
Step-by-Step Instructions
-
Step 1: Prepare the Pudding Base
In a medium saucepan, whisk together the 1/2 cup granulated sugar, flour, and salt. Make sure there are no lumps. This dry mixture creates the thick base for our creamy pudding.
Small tip: Whisking dry ingredients well prevents lumps in the final pudding.
-
Step 2: Whisk in Egg Yolks and Milk
In a separate bowl, lightly beat the egg yolks. Gradually whisk the milk into the dry mixture in the saucepan until smooth. Then, slowly whisk in the beaten egg yolks. This creates a rich and creamy liquid base.
Small tip: Whisking the milk and yolks in gradually prevents the yolks from scrambling when heated.
-
Step 3: Cook the Pudding
Place the saucepan over medium heat. Cook, stirring constantly, until the mixture thickens and comes to a gentle boil. This usually takes about 5-7 minutes. Once it boils, continue stirring for one minute, then remove from heat.
Small tip: Constant stirring is key to prevent sticking and burning at the bottom of the pan.
-
Step 4: Add Flavor and Butter
Stir in the vanilla extract and butter until the butter is fully melted and incorporated. The butter adds a lovely richness and smooth texture. The vanilla gives it that classic sweet aroma.
Small tip: Adding vanilla off the heat preserves its delicate flavor.
-
Step 5: Prepare for Assembly
Pour the hot pudding into a heatproof bowl. Press a piece of plastic wrap directly onto the surface of the pudding. This prevents a skin from forming as it cools. Let it cool slightly on the counter, then refrigerate for at least 1 hour.
Small tip: Chilling the pudding slightly before assembly helps it set better and prevents the wafers from getting too soggy too fast.
-
Step 6: Slice Bananas and Begin Layering
Once the pudding is cooled, slice your bananas into 1/4-inch thick rounds. In a 9×13-inch baking dish, spread a thin layer of pudding on the bottom. Arrange a single layer of vanilla wafers over the pudding. Top the wafers with a layer of sliced bananas.
Small tip: Use bananas that are ripe but still firm to prevent them from becoming mushy.
-
Step 7: Continue Layering
Repeat the layering process: pudding, then wafers, then bananas. Finish with a generous top layer of pudding. You should have enough ingredients for 2-3 layers depending on your dish size.
Small tip: Save some pretty wafers for the very top if you’re not making meringue.
-
Step 8: Make the Meringue (Optional)
If making meringue, preheat your oven to 350°F (175°C). In a clean, dry bowl, beat the egg whites and cream of tartar (if using) with an electric mixer until soft peaks form. Gradually add the 1/4 cup sugar, one tablespoon at a time, beating until stiff, glossy peaks form. Fold in the vanilla extract.
Small tip: Ensure your bowl and beaters are completely grease-free for best meringue results.
-
Step 9: Top and Bake (if using meringue)
Spread the meringue over the top of the banana pudding, ensuring it touches the edges of the dish to seal. Bake for 10-15 minutes, or until the meringue is lightly golden brown. This creates a beautiful, toasted topping.
Small tip: Watch the meringue closely as it can brown quickly.
-
Step 10: Chill and Serve
Allow the pudding to cool completely before refrigerating for at least 4 hours, or preferably overnight. This allows the flavors to deepen and the wafers to soften to the perfect consistency. Serve chilled and enjoy!
Small tip: The longer it chills, the better the pudding will taste and set.
Tips & Variations
- Gluten-Free Option: Simply swap out traditional vanilla wafers for gluten-free vanilla or plain cookies. Ensure your flour for the pudding is a gluten-free all-purpose blend.
- Vegetarian Option: This recipe is already vegetarian! For a vegan version, use plant-based milk (like almond or soy), a cornstarch slurry instead of egg yolks for thickening, and vegan-friendly vanilla wafers. You can also make a coconut cream topping instead of meringue.
- More Wholesome Option: To boost nutrition, consider adding a scoop of unflavored or vanilla protein powder to the cooled pudding mixture. For fiber, you could use whole-wheat digestive biscuits instead of vanilla wafers, or add a sprinkle of chia seeds to the pudding as it cools.
- Spiced Version: For a warm, comforting twist, add 1/2 teaspoon of ground cinnamon or a pinch of nutmeg to your pudding mixture along with the flour. A tiny dash of cardamom can also be lovely.
- Other Flavor Tips: Try adding a layer of caramel drizzle between the banana and pudding layers for a Bananas Foster-inspired pudding. You could also use chocolate wafers instead of vanilla for a chocolate banana pudding.
Nutritional Information
Approximate values per serving (based on 8 servings):
- Calories: 350-400 kcal
- Protein: 8-10 g
- Carbohydrates: 50-60 g
- Fat: 12-15 g
Note: These values are approximate and may vary depending on specific brands and exact ingredient amounts used.
Health Benefits
While banana pudding is a dessert, its main ingredients offer some wonderful health benefits!
Bananas: These sweet fruits are packed with potassium, an essential mineral for heart health and blood pressure regulation. They also provide dietary fiber, which aids digestion and helps keep you feeling full. Bananas are a good source of Vitamin B6, important for brain health and metabolism.
Milk: Whole milk contributes calcium and Vitamin D, both vital for strong bones and teeth. It also provides protein, which is essential for muscle repair and growth. Milk contains various B vitamins that support energy production.
Eggs: Egg yolks are rich in vitamins A, D, E, and K, as well as several B vitamins. They also contain choline, which is important for brain and nerve function. The protein in egg whites is a complete protein, meaning it contains all nine essential amino acids.
Enjoying this delicious pudding in moderation can be part of a balanced diet. It brings both joy and some beneficial nutrients!
Serving Suggestions
- Serve chilled, straight from the dish, perhaps with a dollop of whipped cream if you skipped the meringue.
- This is a fantastic dessert for potlucks, family dinners, or holiday gatherings. It’s always a crowd-pleaser!
- For a lighter meal, you could serve a small portion alongside grilled chicken or a crisp salad, making it the sweet finish to your plate.
- Meal Prep Ideas: You can assemble the pudding a day in advance. The flavors deepen overnight, and the wafers soften perfectly. Just cover tightly and refrigerate.
Storage Tips
Leftover Old Fashioned Banana Pudding should be stored in an airtight container in the refrigerator. It will keep well for 3-4 days. The bananas may start to brown slightly after the first day, but the taste will still be delicious. We do not recommend freezing banana pudding, as the texture of the bananas and wafers can become mushy and unpleasant upon thawing. This dessert is best enjoyed fresh and chilled from the fridge.
Conclusion
And there you have it – a truly timeless and irresistible Old Fashioned Banana Pudding! This dessert is more than just a sweet treat; it’s a taste of tradition and pure comfort. The layers of creamy pudding, soft bananas, and tender wafers create a symphony of flavors and textures that everyone adores.
We hope you feel inspired to try making this classic in your own kitchen. It’s a simple recipe with impressive results. There’s nothing quite like the satisfaction of serving a homemade dessert that brings smiles to faces. You’ll be amazed at how easy it is to achieve such a delicious outcome.
So, gather your ingredients, follow our easy steps, and get ready to create a memorable dessert. Share this delightful banana pudding with your family and friends. It’s perfect for any occasion, or just because. Happy baking, and enjoy every spoonful!


