
Introduction
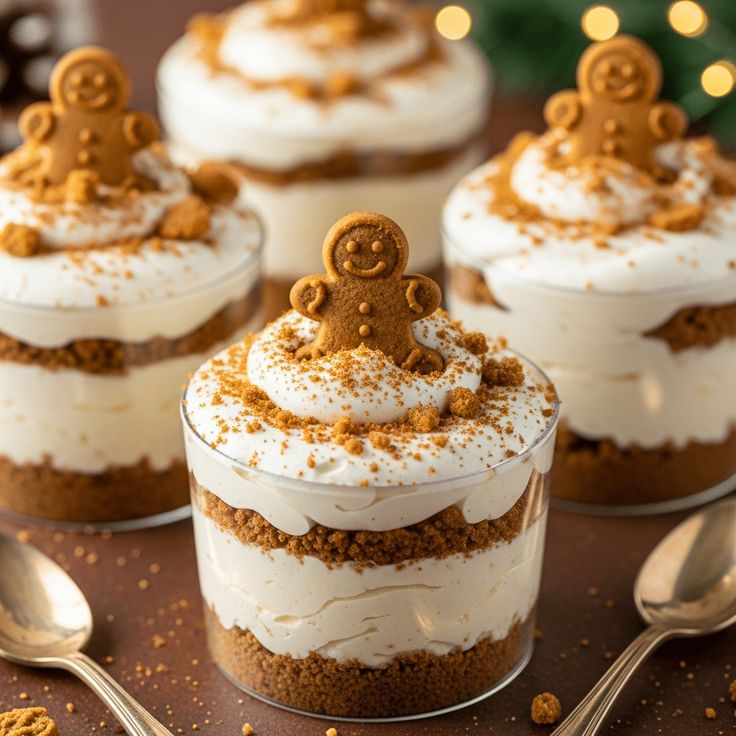
Get ready to fall in love with a dessert that’s bursting with festive cheer and incredible flavor, all without ever turning on your oven! These No Bake Gingerbread Cheesecake Cups are a dream come true for anyone who loves the warm, cozy spices of gingerbread combined with the creamy, tangy goodness of cheesecake. They are individual portions, making them perfect for parties or a special treat just for you.
What makes these cups truly special is their simplicity. You don’t need any fancy baking skills or equipment. With just a few common ingredients and some simple steps, you can whip up these impressive desserts in no time. They are quick to assemble and then just need some chill time in the fridge to set up perfectly.
Imagine a crunchy gingerbread crust, topped with a velvety smooth, spiced cream cheese filling. Each bite is like a hug in a cup, full of holiday magic. So, if you’re looking for an easy, delicious, and show-stopping dessert, you absolutely have to try these No Bake Gingerbread Cheesecake Cups!
Cooking Time & Prep Time
- Prep Time: 30 minutes
- Chill Time: 120 minutes (2 hours)
- Total Time: 150 minutes (2 hours 30 minutes)
Small tip: The chill time is crucial for these cheesecake cups to set properly, so don’t rush this step! They are worth the wait.
Ingredients
This recipe makes 6 servings.
-
For the Gingerbread Crust
- 1 ½ cups (about 150g) gingerbread cookies, finely crushed
- ¼ cup (56g) unsalted butter, melted
-
For the Cheesecake Filling
- 8 ounces (226g) cream cheese, softened
- ½ cup (100g) granulated sugar
- 1 teaspoon ground ginger
- ½ teaspoon ground cinnamon
- ¼ teaspoon ground cloves
- ⅛ teaspoon ground nutmeg
- 1 cup (240ml) heavy cream, cold
- 1 teaspoon vanilla extract
-
For the Garnish (Optional)
- Whipped cream
- Extra gingerbread cookie crumbs
- Candied ginger pieces
Step-by-Step Instructions
-
Step 1: Prepare the Crust
Place the gingerbread cookies in a food processor and pulse until finely crushed into crumbs. Alternatively, you can put them in a zip-top bag and crush them with a rolling pin. Transfer the crumbs to a medium bowl.
Small tip: Make sure the crumbs are very fine so the crust holds together well.
-
Step 2: Mix the Crust Ingredients
Pour the melted butter over the gingerbread crumbs. Stir everything together until the crumbs are evenly moistened. The mixture should resemble wet sand.
Small tip: Ensure all crumbs are coated with butter for a sturdy crust.
-
Step 3: Form the Crust
Divide the crumb mixture evenly among 6 small serving cups or ramekins. Use the back of a spoon or your fingers to press the crumbs firmly into the bottom of each cup. This creates a solid base for your cheesecake.
Small tip: Pressing firmly helps prevent the crust from crumbling when you eat it.
-
Step 4: Prepare the Cream Cheese Mixture
In a large mixing bowl, beat the softened cream cheese with an electric mixer on medium speed until it is light and fluffy. This usually takes about 2-3 minutes. Make sure there are no lumps.
Small tip: Using room temperature cream cheese is key for a smooth, lump-free filling.
-
Step 5: Add Sugar and Spices
Add the granulated sugar, ground ginger, ground cinnamon, ground cloves, and ground nutmeg to the cream cheese. Continue beating on medium speed until the sugar is fully incorporated and the mixture is smooth and creamy. Scrape down the sides of the bowl as needed.
Small tip: Don’t overmix at this stage; just mix until combined.
-
Step 6: Whip the Heavy Cream
In a separate, clean bowl, pour the cold heavy cream. Beat it with an electric mixer on high speed until stiff peaks form. Be careful not to overbeat, or it will turn into butter.
Small tip: A chilled bowl and beaters can help the cream whip faster and more effectively.
-
Step 7: Combine Filling Ingredients
Gently fold the whipped cream into the cream cheese mixture using a spatula. Add the vanilla extract and fold until just combined and no streaks of whipped cream remain. Be gentle to keep the filling light and airy.
Small tip: Folding rather than beating keeps the air in the whipped cream, resulting in a lighter cheesecake.
-
Step 8: Fill the Cups
Spoon or pipe the cheesecake filling evenly over the gingerbread crusts in your serving cups. You can use a piping bag for a neater look. Smooth the tops with the back of a spoon.
Small tip: Leave a little room at the top if you plan to add a generous garnish later.
-
Step 9: Chill the Cheesecake Cups
Cover the cups loosely with plastic wrap. Place them in the refrigerator and chill for at least 2 hours, or until the filling is firm and set. Chilling allows the flavors to meld and the cheesecake to firm up perfectly.
Small tip: For best results, chill overnight if you have the time.
-
Step 10: Garnish and Serve
Once chilled, remove the cheesecake cups from the refrigerator. Garnish with a dollop of whipped cream, a sprinkle of extra gingerbread cookie crumbs, or a few pieces of candied ginger. Serve immediately and enjoy!
Small tip: Garnish just before serving for the freshest look.
Tips & Variations
- Gluten-Free Option: Easily make this recipe gluten-free by using gluten-free gingerbread cookies for the crust. The rest of the ingredients are naturally gluten-free.
- Vegan or Vegetarian Option: To make these cups vegan, substitute dairy cream cheese with a vegan cream cheese alternative, use vegan butter, and replace heavy cream with chilled full-fat coconut cream (scoop out the thick cream from a can that’s been refrigerated overnight). Ensure your gingerbread cookies are also vegan.
- More Nutritious Option: While this is a dessert, you can add a sprinkle of finely chopped pecans or walnuts to the crust mixture for healthy fats and fiber. You could also swirl in a small amount of unsweetened apple sauce or pear puree into the filling for a fruit boost.
- Spicy Version: For those who love an extra kick, increase the amount of ground ginger to 1.5 teaspoons. You can also add a tiny pinch (⅛ teaspoon) of cayenne pepper to the filling to give it a subtle, warming heat that complements the gingerbread spices beautifully.
- Other Flavor Tips: Try adding a tablespoon of finely grated orange zest to the filling for a bright, citrusy note that pairs wonderfully with gingerbread. You could also use a different cookie for the crust, like Biscoff cookies or even chocolate wafers for a unique twist.
Nutritional Information
Approximate values per serving (based on 6 servings):
- Calories: 420
- Protein: 5g
- Carbohydrates: 38g
- Fat: 29g
Please note that nutritional values are approximate and may vary depending on the specific brands and quantities of ingredients used.
Health Benefits
While these cheesecake cups are a delightful treat, some of their key ingredients offer interesting health benefits:
- Ginger: The star spice, ginger, is well-known for its powerful anti-inflammatory and antioxidant properties. It can help soothe digestive issues, reduce nausea, and may even help reduce muscle pain and soreness.
- Cinnamon: Another wonderful spice, cinnamon, is packed with antioxidants. It’s also linked to lowering blood sugar levels and may have beneficial effects on heart health, helping to reduce risk factors like cholesterol.
- Cloves: Cloves are a potent source of antioxidants, particularly eugenol, which has been shown to have anti-inflammatory and antimicrobial properties. They contribute to the complex, warm flavor profile of gingerbread.
- Nutmeg: While used in smaller quantities, nutmeg also contains powerful antioxidants. Traditionally, it has been used for its potential to aid digestion and promote relaxation.
Enjoying these spices in your dessert not only adds incredible flavor but also provides a little boost of goodness!
Serving Suggestions
- Dessert Platter: Serve these individual cups alongside other small desserts like chocolate truffles or fresh fruit for an elegant dessert platter.
- After Dinner Treat: They make a perfect individual dessert after a cozy dinner, especially during the colder months.
- Party Favorite: Ideal for holiday gatherings or potlucks as they are pre-portioned and easy to serve.
- Coffee Break Companion: Enjoy one with your morning coffee or afternoon tea for a delightful pick-me-up.
Storage Tips
These No Bake Gingerbread Cheesecake Cups can be stored in an airtight container in the refrigerator for up to 3-4 days. They are best enjoyed fresh. While you can freeze them for longer storage (up to 1 month), the texture of the cream cheese might change slightly upon thawing, becoming a little less creamy. If freezing, wrap each cup individually in plastic wrap and then place in a freezer-safe container. To reheat (or rather, thaw), simply move them from the freezer to the refrigerator a few hours before you plan to enjoy them, or let them sit at room temperature for about 30 minutes.
Conclusion
There you have it – a truly magical dessert that brings all the warmth and joy of gingerbread and cheesecake together in one incredibly easy-to-make package. These No Bake Gingerbread Cheesecake Cups are not just delicious; they are a testament to how simple ingredients can create something truly special. The blend of rich spices, creamy filling, and crunchy crust is simply irresistible.
So, why wait for a special occasion? Treat yourself and your loved ones to these delightful cups today. They are perfect for holiday entertaining, a cozy night in, or anytime you need a little sweet escape. You’ll be amazed at how quickly they come together and how utterly delicious they are.
Go ahead, gather your ingredients, and whip up a batch. Share them with family and friends, or keep them all to yourself – we won’t tell! Happy no-baking!


