
Introduction
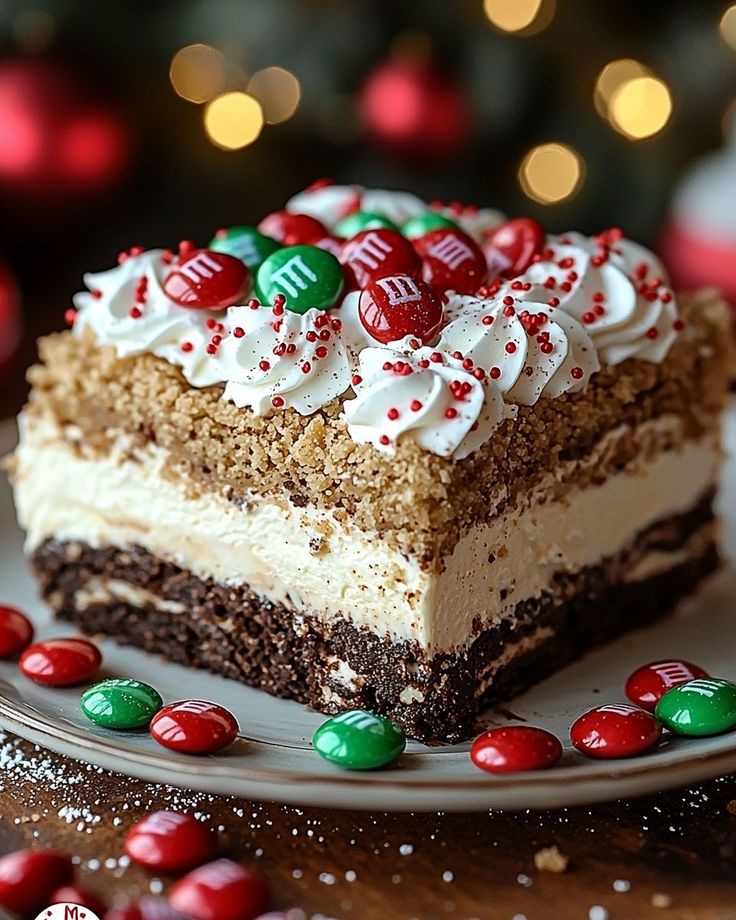
Get ready to discover your new favorite holiday dessert! Our No Bake Christmas Oreo Lasagna is a true showstopper. It’s a dreamy blend of crushed Oreo cookies, creamy cheesecake, rich chocolate pudding, and fluffy whipped topping. Each layer builds on the last, creating a symphony of textures and flavors. It’s festive, indulgent, and absolutely irresistible – perfect for bringing smiles to any holiday gathering.
The best part? You don’t need to turn on your oven! This recipe is incredibly easy and quick to assemble. It’s ideal for busy holiday schedules, allowing you to create something spectacular without the stress. With simple ingredients and straightforward steps, even beginner bakers can achieve dessert perfection. It’s a wonderful way to enjoy a decadent treat without all the fuss.
So, why wait? This delightful holiday dessert is waiting to be made in your kitchen. Gather your loved ones, or simply treat yourself to a slice of pure joy. Let’s dive into making this magical No Bake Christmas Oreo Lasagna. You’ll be so glad you did!
Cooking Time & Prep Time
- Prep Time: 30 minutes
- Cooking Time: 0 minutes (no baking required!)
- Chilling Time: 4 hours (minimum)
- Total Time: 4 hours 30 minutes
Small tip: The chilling time is crucial for the lasagna to set properly. Don’t rush it! For best results, chill overnight.
Ingredients
This recipe makes approximately 12 generous servings.
For the Oreo Crust
- 36 Oreo cookies (about 1 standard family-size package)
- 6 tablespoons unsalted butter, melted
For the Cream Cheese Layer
- 1 (8-ounce) package cream cheese, softened
- 1 cup powdered sugar
- 1 teaspoon vanilla extract
- 1 (8-ounce) container frozen whipped topping (like Cool Whip), thawed, divided
For the Chocolate Pudding Layer
- 2 (3.9-ounce) packages instant chocolate pudding mix
- 3 cups cold milk (whole milk or 2% works best)
For the Whipped Topping & Garnish
- 1 (8-ounce) container frozen whipped topping, thawed (the second container)
- 1/4 cup festive sprinkles (red, green, white)
- Additional crushed Oreos or mini chocolate chips (optional, for garnish)
Step-by-Step Instructions
-
Step 1: Prepare the Oreo Crust
Start by crushing your Oreo cookies. You can do this in a food processor until fine crumbs form, or place them in a large Ziploc bag and crush them with a rolling pin. Mix the crushed Oreos with the melted butter in a medium bowl. Press this mixture evenly into the bottom of a 9×13 inch baking dish. Set aside in the refrigerator while you prepare the other layers.
Small tip: For an extra sturdy crust, bake the crust for 5-7 minutes at 350°F (175°C) before chilling, then cool completely.
-
Step 2: Create the Cream Cheese Layer
In a large bowl, beat the softened cream cheese with an electric mixer until smooth and creamy. Add the powdered sugar and vanilla extract, mixing until fully combined and no lumps remain. Gently fold in half of one thawed whipped topping container (about 1 cup). Spread this creamy mixture evenly over the chilled Oreo crust.
Small tip: Ensure your cream cheese is truly softened to avoid lumps. Take it out of the fridge at least 30 minutes before starting.
-
Step 3: Mix the Chocolate Pudding Layer
In a separate large bowl, whisk together the instant chocolate pudding mixes and cold milk. Continue whisking for about 2-3 minutes, until the mixture starts to thicken. It will become quite firm. Immediately spread this pudding layer over the cream cheese layer in your baking dish.
Small tip: Use cold milk to help the instant pudding set quickly and properly. Do not use regular pudding that requires cooking.
-
Step 4: Add the Final Whipped Topping
Take the second container of thawed whipped topping. Gently spread this entire container over the chocolate pudding layer, creating a fluffy white top. Make sure it covers the pudding completely from edge to edge. This layer adds a beautiful contrast and lightness to the dessert.
Small tip: Use an offset spatula or the back of a spoon to spread the whipped topping smoothly and evenly.
-
Step 5: Chill and Set
Cover the baking dish tightly with plastic wrap. Place the Oreo lasagna in the refrigerator to chill for at least 4 hours, or preferably overnight. This chilling time allows all the layers to firm up and meld together, making it easier to slice and serve.
Small tip: A well-chilled lasagna will have clean, defined layers when cut. Patience is key here!
-
Step 6: Garnish and Serve
Just before serving, remove the plastic wrap. Sprinkle generously with festive sprinkles. You can also add a few extra crushed Oreos or mini chocolate chips for extra texture and visual appeal. Slice into squares and serve cold. Enjoy your delightful holiday creation!
Small tip: For neat slices, use a sharp knife dipped in hot water and wiped clean between each cut.
Tips & Variations
- Gluten-Free Option: Easily make this dessert gluten-free by using gluten-free sandwich cookies (like gluten-free Oreos) for the crust. All other ingredients are typically gluten-free, but always check labels.
- Vegan/Vegetarian Option: For a vegan version, use vegan sandwich cookies, vegan cream cheese, plant-based milk for the pudding, and a dairy-free whipped topping. Ensure your instant pudding mix is vegan-friendly (some contain dairy derivatives).
- Add More Fruit or Protein: For a touch of freshness and nutrients, scatter fresh raspberries or sliced strawberries over the cream cheese layer before adding the pudding. For a slight protein boost, you could add a thin layer of finely chopped pecans or walnuts to the crust.
- Spicy Version: For an adventurous twist, add a pinch (1/4 to 1/2 teaspoon) of cayenne pepper or chili powder to the chocolate pudding mix. This creates a subtle Mexican hot chocolate flavor that is surprisingly delicious with the sweetness.
- Flavor Variations: Experiment with different pudding flavors! Vanilla, white chocolate, or even peppermint pudding can create unique holiday twists. A few drops of peppermint extract in the cream cheese layer would also be wonderfully festive.
Nutritional Information
Approximate values per serving (based on 12 servings):
- Calories: 480 kcal
- Protein: 5g
- Carbohydrates: 60g
- Fat: 25g
Please note: These values are approximate and may vary depending on the specific brands and exact amounts of ingredients used. This is a rich dessert, so enjoy in moderation!
Health Benefits
While this No Bake Christmas Oreo Lasagna is undeniably a decadent treat, there are still some elements that contribute to well-being, especially when enjoyed mindfully.
The dairy products used, like milk and cream cheese (if using traditional versions), provide important nutrients. Milk is a good source of calcium, which is essential for strong bones and teeth. It also contains Vitamin D, which helps the body absorb calcium, and protein, vital for muscle repair and growth.
In moderation, desserts can offer a psychological boost. The act of sharing a delicious, homemade treat with loved ones can enhance social connections and create positive memories. Food brings joy, and enjoying a special dessert like this can be a wonderful part of holiday celebrations, contributing to overall happiness and reducing stress.
If you choose to incorporate a dark chocolate pudding or add dark chocolate shavings as a garnish, you’re introducing a source of antioxidants. Dark chocolate contains flavonoids, which are plant compounds that can help protect your cells from damage. It also contains minerals like iron, magnesium, and zinc.
Adding fresh fruit, such as berries, as a garnish or an additional layer, significantly boosts the nutritional profile. Berries are packed with vitamins (especially Vitamin C), fiber, and antioxidants, offering a refreshing contrast to the richness of the dessert and adding valuable nutrients.
Serving Suggestions
- Serve this delightful lasagna as the grand finale to your holiday meal, following a savory roast or a festive spread.
- Pair a slice with a warm cup of coffee, hot cocoa, or a festive chai latte for a cozy winter treat.
- Offer alongside a platter of fresh fruit, like sliced kiwi, grapes, and berries, to provide a light, refreshing counterpoint to its richness.
- Cut into smaller squares and arrange on a dessert buffet for a party, allowing guests to easily pick up individual portions.
Storage Tips
This No Bake Christmas Oreo Lasagna keeps beautifully in the refrigerator. Cover it tightly with plastic wrap or aluminum foil and it will stay fresh for 3-4 days. For longer storage, you can freeze individual slices or the entire dish. Wrap it securely in plastic wrap, then a layer of foil, and freeze for up to 1-2 months. To enjoy after freezing, simply thaw in the refrigerator overnight. This dessert is best served cold and does not require reheating.
Conclusion
And there you have it – the No Bake Christmas Oreo Lasagna, a truly delightful and effortlessly elegant holiday dessert! It’s the perfect blend of crunchy, creamy, and chocolatey goodness, all coming together in a festive package. This recipe proves that you don’t need a lot of fuss to create something truly spectacular that will impress everyone at your table.
So, take a deep breath, embrace the holiday spirit, and give this recipe a try. You’ll be amazed at how simple it is to put together, and even more delighted by the incredible taste. It’s a wonderful way to add a little extra magic to your celebrations without adding extra stress to your busy schedule.
Whip up this No Bake Christmas Oreo Lasagna and share it with your family and friends. Create new memories around the table, savoring each delicious bite. Happy holidays and happy baking (or rather, no-baking)!


