
Introduction
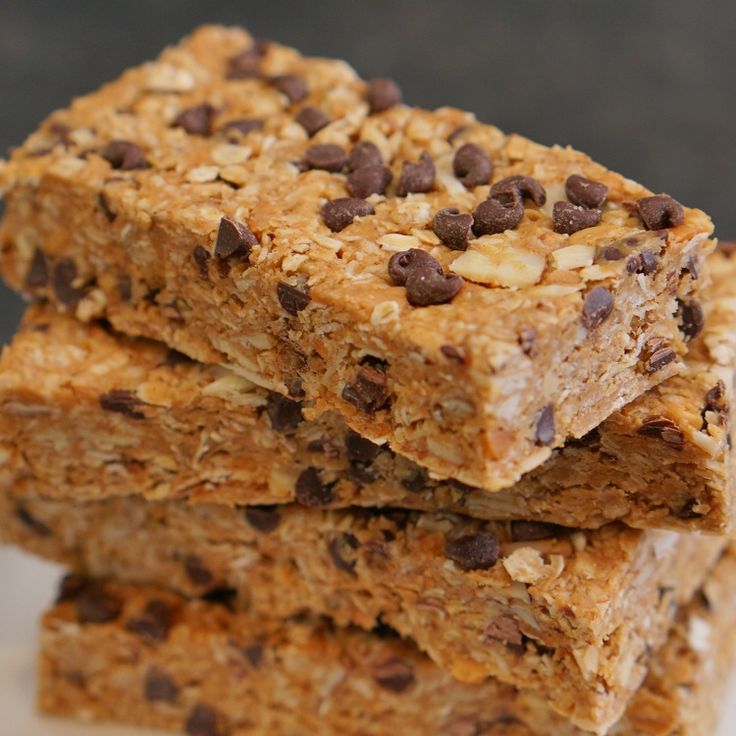
Get ready to discover your new favorite snack! These No Bake Chewy Granola Bars are simply wonderful. They are packed with wholesome ingredients, offering a satisfying chewiness and a delightful blend of flavors. Imagine a perfectly balanced bite that fuels your day and tastes incredible.
The best part? You don’t need to turn on your oven! This recipe is incredibly quick and easy to make. It’s perfect for busy mornings, after-school snacks, or whenever you need a healthy treat without all the fuss. Just mix, press, chill, and enjoy!
So, whether you’re a seasoned baker or just starting in the kitchen, these granola bars are a must-try. They are customizable, delicious, and incredibly convenient. Let’s make some magic together!
Cooking Time & Prep Time
- Prep Time: 15 minutes
- Cooking Time: 0 minutes
- Chilling Time: 2 hours (minimum)
- Total Time (Active): 15 minutes
- Total Time (Including Chill): 2 hours 15 minutes
Small tip: To save time, gather all your ingredients and measure them out before you begin mixing. This is called “mise en place” and it makes the process much smoother!
Ingredients
This recipe makes approximately 12-16 bars, depending on how large you cut them.
For the Granola Bar Base:
- 2 cups old-fashioned rolled oats (ensure they are certified gluten-free if needed)
- 1/2 cup creamy natural peanut butter (or almond butter, cashew butter)
- 1/2 cup honey or maple syrup (for vegan option)
- 1/4 cup melted coconut oil
- 1 teaspoon vanilla extract
- 1/4 teaspoon sea salt
For the Mix-ins:
- 1/2 cup mini chocolate chips (dairy-free if needed)
- 1/4 cup chopped dried cranberries or raisins
- 1/4 cup chopped nuts (almonds, walnuts, pecans) or seeds (pumpkin, sunflower)
Step-by-Step Instructions
-
Step 1: Prepare Your Pan
Line an 8×8 inch baking pan with parchment paper. Make sure the paper hangs over the sides. This will create “handles” to easily lift the bars out later. A light spray of cooking oil can help the parchment paper stick to the pan.
Small tip: Using parchment paper is key for easy removal and clean-up. Don’t skip this step!
-
Step 2: Warm the Wet Ingredients
In a medium microwave-safe bowl, combine the peanut butter, honey (or maple syrup), and melted coconut oil. Microwave on high for 30-60 seconds, or gently heat on the stovetop in a small saucepan over low heat. You want the mixture to be warm and smooth, easy to stir.
Small tip: Warming the ingredients helps them combine better and makes the mixture easier to work with.
-
Step 3: Add Flavorings
Remove the wet mixture from the heat (or microwave). Stir in the vanilla extract and sea salt until well combined. The salt helps to balance the sweetness and enhance all the other flavors.
Small tip: Don’t underestimate the power of a little salt in sweet recipes!
-
Step 4: Combine Dry Ingredients
In a large mixing bowl, combine the rolled oats, mini chocolate chips, dried cranberries (or raisins), and chopped nuts (or seeds). Stir everything together thoroughly. This ensures your mix-ins are evenly distributed.
Small tip: Use old-fashioned rolled oats, not quick oats. Quick oats can make the bars too crumbly.
-
Step 5: Mix Wet and Dry
Pour the warm wet ingredient mixture over the dry ingredients in the large bowl. Using a sturdy spatula or wooden spoon, mix everything together very well. Keep stirring until all the oats and mix-ins are evenly coated with the sticky binder.
Small tip: Make sure there are no dry spots left in the bowl. Every oat flake needs to be coated!
-
Step 6: Press into Pan
Transfer the entire granola bar mixture into your prepared 8×8 inch pan. Press the mixture down very firmly and evenly into the pan. You can use the back of your spatula, your hands (lightly greased if it’s too sticky), or another piece of parchment paper on top to help press it down.
Small tip: Pressing firmly is crucial! This is what helps your no-bake bars hold together perfectly.
-
Step 7: Chill and Set
Place the pan in the refrigerator for at least 2 hours. Chilling allows the bars to firm up completely. It makes them much easier to cut and ensures they hold their shape.
Small tip: For best results, let them chill for the full 2 hours, or even longer if you have time.
-
Step 8: Cut and Serve
Once the bars are firm, use the parchment paper handles to lift the entire slab out of the pan. Place it on a cutting board. Use a sharp knife to cut the slab into 12-16 bars of your desired size. Enjoy your delicious homemade granola bars!
Small tip: Wipe your knife clean between cuts for cleaner, neater bars.
Tips & Variations
- Gluten-Free Option: Simply ensure you use certified gluten-free rolled oats. Most other ingredients are naturally gluten-free, but always check labels.
- Vegan Option: Replace honey with an equal amount of pure maple syrup. Also, make sure your chocolate chips are dairy-free (most dark chocolate chips are).
- Boost Protein & Fiber: Add 1/4 cup of chia seeds, ground flax seeds, or hemp hearts to the dry ingredients. You can also stir in 2-3 tablespoons of your favorite plant-based protein powder (unflavored or vanilla works best) when you add the oats.
- Spiced Version: For a warm, inviting flavor, add 1/2 teaspoon of ground cinnamon and a pinch of nutmeg or ginger to the wet ingredients along with the vanilla extract.
- Other Flavor Tips: Experiment with different extracts like almond extract. Drizzle melted chocolate over the top once the bars are chilled for an extra decadent touch. Try different dried fruits like chopped apricots or cherries.
Nutritional Information
Approximate values per serving (based on 12 servings):
- Calories: 210 kcal
- Protein: 6g
- Carbohydrates: 25g
- Fat: 12g
Please note: These values are approximate and may vary depending on the specific brands and amounts of ingredients used, especially mix-ins like chocolate chips or nuts.
Health Benefits
These No Bake Chewy Granola Bars are not just tasty; they offer some fantastic health benefits too!
Oats: Old-fashioned rolled oats are a powerhouse of nutrition. They are a great source of soluble fiber, specifically beta-glucan, which is known to help lower cholesterol levels and promote heart health. Oats also provide sustained energy, keeping you feeling full and focused throughout your day.
Nut Butter: Whether you choose peanut, almond, or cashew butter, you’re getting a good dose of healthy fats, primarily monounsaturated and polyunsaturated fats. These fats are beneficial for heart health and can help with nutrient absorption. Nut butters also provide plant-based protein, essential for muscle repair and satiety, along with vitamins like Vitamin E and minerals such as magnesium and potassium.
Natural Sweeteners: Honey and maple syrup are natural alternatives to refined sugars. While still sugar, they offer some additional benefits. Honey contains antioxidants and has antimicrobial properties. Maple syrup is also rich in antioxidants and minerals like manganese and zinc, making it a slightly better choice than plain sugar.
Mix-ins: The nuts, seeds, and dried fruits you add contribute a wealth of nutrients. Nuts and seeds are packed with healthy fats, protein, fiber, and essential minerals like Omega-3 fatty acids (especially in flax and chia seeds). Dried fruits provide concentrated vitamins, minerals, and dietary fiber, though they are higher in natural sugars.
Serving Suggestions
- Quick Breakfast: Grab a bar with a cup of coffee or a smoothie for a fast, nutritious start to your day.
- Mid-Day Snack: Perfect for beating the afternoon slump or satisfying hunger between meals.
- Post-Workout Fuel: The combination of carbs, protein, and healthy fats makes them an excellent recovery snack.
- Lunchbox Treat: A wholesome and delicious addition to school or work lunchboxes.
Storage Tips
Store your No Bake Chewy Granola Bars in an airtight container in the refrigerator for up to 1 week. This keeps them firm and fresh. They can also be frozen for longer storage. To freeze, wrap individual bars tightly in plastic wrap, then place them in a freezer-safe bag or container. They will keep well for up to 3 months. There’s no need to reheat them; simply enjoy them chilled straight from the fridge or freezer (let thaw for a few minutes if frozen) or at room temperature.
Conclusion
There you have it – a recipe for incredibly simple, wonderfully delicious, and delightfully chewy No Bake Granola Bars! They are the ultimate homemade snack, combining ease of preparation with wholesome ingredients and fantastic flavor. No more store-bought bars with mystery ingredients when you can make these in minutes.
We truly hope you’ll give this recipe a try. It’s a fantastic way to control what goes into your snacks, ensuring you and your loved ones are eating well. Plus, the customization options mean you can tailor them exactly to your taste preferences.
So, gather your ingredients, follow these easy steps, and whip up a batch today. Share them with family, friends, or simply keep them all to yourself for a week of happy snacking. Happy no-baking!


