
Introduction
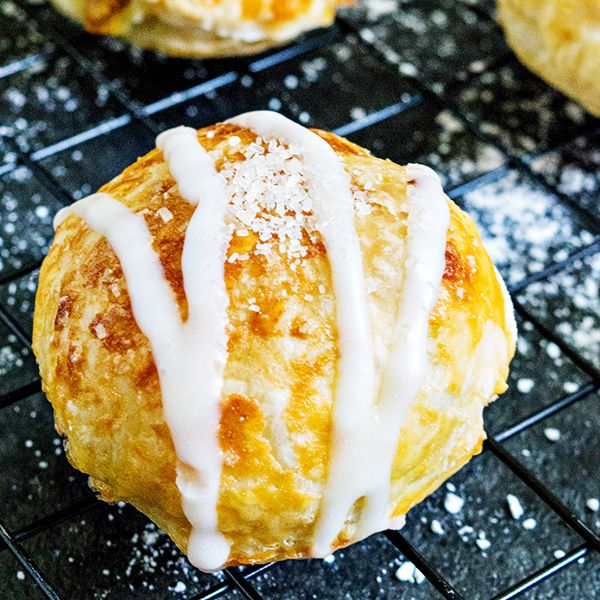
Get ready for the cutest, most delicious fall treat you’ve ever made! These Mini Pumpkin Pie Pops take all the cozy flavors of a classic pumpkin pie and transform them into fun, portable bites. Imagine golden, flaky crust filled with creamy, perfectly spiced pumpkin goodness, all on a stick! They are absolutely irresistible and perfect for any autumn gathering or a sweet treat for yourself.
The best part? These little pops are surprisingly easy to make. We’re using store-bought pie crust to save you time, so you can focus on the simple, flavorful pumpkin filling. With just a few basic ingredients and straightforward steps, you’ll have these adorable treats ready in no time. They look impressive but are truly beginner-friendly.
So, grab your apron and get ready to bake some magic! These Mini Pumpkin Pie Pops are guaranteed to bring smiles and warm, happy feelings. Let’s dive into making these delightful autumn treasures together!
Cooking Time & Prep Time
- Prep Time: 40 minutes
- Cooking Time: 18-20 minutes
- Total Time: 58-60 minutes
Small tip: You can prepare the pumpkin filling up to 2 days in advance and store it in the refrigerator. This will make assembly even quicker on baking day!
Ingredients
This recipe makes approximately 12-16 Mini Pumpkin Pie Pops, depending on the size of your cookie cutter.
For the Pumpkin Filling
- 1 (15-ounce) can pure pumpkin puree (not pumpkin pie filling)
- ½ cup packed light brown sugar
- ½ cup evaporated milk (or heavy cream for a richer filling)
- 1 large egg
- 1 teaspoon ground cinnamon
- ½ teaspoon ground ginger
- ¼ teaspoon ground nutmeg
- ⅛ teaspoon ground cloves
- ½ teaspoon vanilla extract
- ¼ teaspoon salt
For the Pie Pops Assembly
- 2 (14.1-ounce) packages refrigerated pie crusts (4 crusts total)
- 1 large egg (for egg wash)
- 1 tablespoon water (for egg wash)
- 12-16 lollipop sticks or popsicle sticks
- Optional: Powdered sugar for dusting, whipped cream for dipping
Step-by-Step Instructions
-
Step 1: Prepare Your Workspace and Oven
Preheat your oven to 400°F (200°C). Line two large baking sheets with parchment paper or silicone baking mats. This will prevent sticking and make cleanup a breeze.
-
Step 2: Make the Pumpkin Filling
In a medium bowl, whisk together the pumpkin puree, brown sugar, evaporated milk, egg, cinnamon, ginger, nutmeg, cloves, vanilla extract, and salt until smooth and well combined. Make sure there are no lumps of brown sugar.
Small tip: Use a whisk to ensure all the spices are fully incorporated into the mixture for even flavor.
-
Step 3: Prepare the Pie Crusts
Unroll one pie crust onto a lightly floured surface. Using a 2.5 to 3-inch round or festive shape cookie cutter, cut out as many shapes as possible. Repeat with the remaining three pie crusts, gathering and re-rolling scraps as needed. You will need two shapes for each pop.
Small tip: Don’t overwork the dough when re-rolling scraps; it can make the crust tough. Roll gently and quickly.
-
Step 4: Assemble the Bottom Layer
Place half of your cut-out pie crust shapes onto the prepared baking sheets. These will be the bottom layers of your pops. Leave a little space between each one.
-
Step 5: Add Lollipop Sticks and Filling
Carefully place a lollipop stick onto the center of each bottom crust shape, pressing gently to adhere it. Spoon about 1-2 teaspoons of the pumpkin filling onto the center of each bottom crust, over the stick. Make sure to leave a small border around the edge.
Small tip: Don’t overfill the pies, or the filling might seep out during baking. A little less is better than too much.
-
Step 6: Top and Seal the Pops
Place a second pie crust shape on top of the filling, aligning the edges with the bottom crust. Gently press down around the edges to seal. Use a fork to crimp the edges all the way around, ensuring a tight seal to prevent the filling from escaping.
Small tip: For extra security, you can slightly moisten the edges of the bottom crust with a tiny bit of water before placing the top crust on.
-
Step 7: Create the Egg Wash and Bake
In a small bowl, whisk the remaining large egg with 1 tablespoon of water to create an egg wash. Brush the tops of all the pumpkin pie pops with this egg wash. This will give them a beautiful golden-brown shine.
Bake for 18-20 minutes, or until the crust is golden brown and the filling is set. The sticks should be firmly in place.
-
Step 8: Cool and Serve
Carefully transfer the baked pumpkin pie pops to a wire rack to cool completely. The filling will set further as they cool. Once cool, you can dust them with powdered sugar if desired. Serve them as a fun, hand-held dessert!
Small tip: Allow them to cool fully before handling too much, as the filling will be very hot and soft right out of the oven.
Tips & Variations
- Gluten-Free Option: Simply swap out the regular refrigerated pie crusts for your favorite gluten-free pie crusts. The filling itself is naturally gluten-free!
- Vegan/Vegetarian Option: To make these vegan, use a plant-based pie crust (many brands are accidentally vegan), substitute the egg in the filling with a “flax egg” (1 tbsp ground flaxseed + 3 tbsp water, let sit for 5 minutes), and use plant-based milk like full-fat coconut milk or oat milk instead of evaporated milk. Omit the egg wash or use a plant-based milk wash.
- Healthier Pumpkin Boost: For an extra veggie boost, you can add 1-2 tablespoons of finely grated carrot or zucchini (squeezed dry) to the pumpkin filling. It will blend seamlessly and add extra nutrients without changing the flavor much.
- Spicy Kick: For those who love a bit of heat, add a pinch of cayenne pepper (⅛ teaspoon) to the pumpkin filling along with the other spices. It adds a subtle warmth that complements the sweet pumpkin beautifully.
- Other Flavor Fun: Experiment with different fillings! You could make apple pie pops using canned apple pie filling, or cherry pie pops. You can also add a sprinkle of toasted pecans or walnuts to the filling for added texture and nutty flavor.
Nutritional Information
Approximate values per serving (based on 16 servings):
- Calories: 210
- Protein: 4g
- Carbohydrates: 28g
- Fat: 10g
Note: Nutritional values may vary depending on specific brands and exact ingredient amounts used.
Health Benefits
These Mini Pumpkin Pie Pops offer more than just deliciousness; they bring some great health benefits too, thanks to their star ingredients!
- Pumpkin Power: Pumpkin is a nutritional powerhouse! It’s incredibly rich in beta-carotene, which your body converts into Vitamin A. Vitamin A is crucial for healthy vision, immune function, and skin health. Pumpkin also provides a good amount of fiber, which aids digestion and can help you feel full and satisfied.
- Spice it Up: The warming spices in this recipe – cinnamon, ginger, nutmeg, and cloves – aren’t just for flavor. They are packed with antioxidants and boast anti-inflammatory properties. Cinnamon, for example, is known for its potential to help regulate blood sugar levels.
- Egg-cellent Source: Eggs contribute high-quality protein, essential for muscle repair and growth, and they contain vital vitamins and minerals like Vitamin D, B vitamins, and choline, which supports brain health.
- Fiber Boost: While it’s a dessert, the pumpkin adds a noticeable amount of dietary fiber. Fiber is important for digestive health, helping to keep things moving smoothly and contributing to a healthy gut microbiome.
Serving Suggestions
- Dessert Delight: Serve these pops on their own as a charming, hand-held dessert. They are perfect for parties, potlucks, or just a cozy night in.
- Coffee Break Companion: Pair a Mini Pumpkin Pie Pop with your morning coffee or afternoon tea for a delightful and comforting treat.
- Dip It Good: Offer a small bowl of fresh whipped cream or a scoop of vanilla ice cream on the side for dipping. A drizzle of caramel sauce would also be heavenly!
- Meal Prep Idea: You can assemble the pops (up to the egg wash stage) and freeze them on a baking sheet. Once solid, transfer them to a freezer-safe bag. When ready to bake, brush with egg wash and bake from frozen, adding about 5-10 minutes to the baking time.
Storage Tips
Store leftover Mini Pumpkin Pie Pops in an airtight container in the refrigerator for up to 3-4 days. They can also be frozen for up to 1 month; wrap individually in plastic wrap before placing in a freezer-safe bag or container. To reheat, you can warm them gently in a microwave for 15-30 seconds, or in a preheated oven at 300°F (150°C) for 5-10 minutes until warmed through.
Conclusion
There you have it – a recipe for the most adorable and delicious Mini Pumpkin Pie Pops! These little treats are such a fantastic way to enjoy the classic flavors of fall in a fun, bite-sized format. They are simple to make, look absolutely charming, and taste incredibly comforting.
Don’t be shy, give this recipe a try! You’ll be amazed at how easy it is to create such a delightful dessert. Whether you’re a seasoned baker or just starting out, these pops are a guaranteed success that will impress everyone.
Whip up a batch for your next family gathering, a holiday party, or simply to enjoy with loved ones. Sharing these Mini Pumpkin Pie Pops is sure to spread joy and deliciousness. Happy baking!


