
Introduction
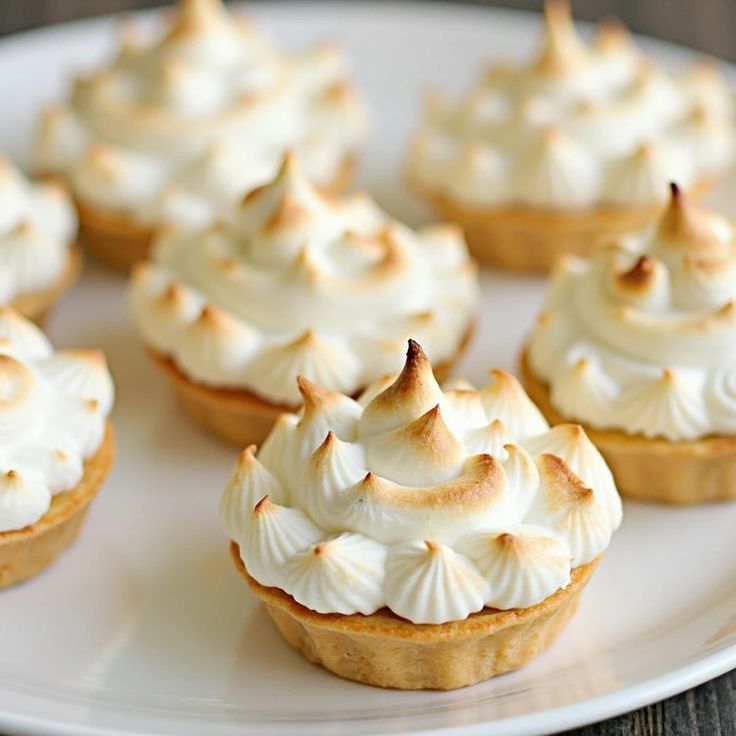
Get ready for a burst of sunshine in every bite with these delightful Mini Lemon Meringue Tarts! Imagine a crisp, buttery crust holding a tangy, smooth lemon curd, all topped with a cloud of sweet, toasted meringue. They are the perfect balance of sweet and tart, light and rich, making them an absolute showstopper for any occasion.
Despite their elegant appearance, these mini tarts are surprisingly simple to make. We’ll break down each component into easy steps, ensuring a successful and delicious outcome even for beginner bakers. You don’t need fancy equipment, just a little patience and a lot of love for lemons!
So, roll up your sleeves and let’s create some magic in the kitchen. These Mini Lemon Meringue Tarts are guaranteed to bring smiles and satisfy any sweet craving. Your friends and family will be so impressed, and you’ll be proud of your homemade masterpiece!
Cooking Time & Prep Time
- Prep Time: 45 minutes
- Cooking Time: 30 minutes (includes baking crusts and meringue)
- Chilling Time: 2 hours (for lemon curd)
- Total Time: Approximately 3 hours 15 minutes
Small tip: You can make the tart crusts and lemon curd a day ahead to break up the preparation and save time on the serving day.
Ingredients
This recipe makes 12 mini tarts.
For the Mini Tart Crusts
- 1 ½ cups (180g) all-purpose flour
- ½ cup (113g) unsalted butter, cold and cut into small cubes
- ¼ cup (50g) granulated sugar
- ¼ teaspoon salt
- 2-3 tablespoons ice water
For the Lemon Curd
- ½ cup (120ml) fresh lemon juice (about 3-4 lemons)
- 1 tablespoon lemon zest
- ¾ cup (150g) granulated sugar
- 3 large egg yolks
- 2 large whole eggs
- 4 tablespoons (56g) unsalted butter, cold and cut into small cubes
- Pinch of salt
For the Meringue Topping
- 3 large egg whites (at room temperature)
- ½ cup (100g) granulated sugar
- ¼ teaspoon cream of tartar (optional, helps stabilize meringue)
- ½ teaspoon vanilla extract
Step-by-Step Instructions
-
Prepare the Tart Crusts
In a large bowl, whisk together the flour, sugar, and salt. Add the cold, cubed butter. Use your fingertips or a pastry blender to cut the butter into the flour mixture until it resembles coarse crumbs with some pea-sized pieces of butter remaining. Slowly add ice water, one tablespoon at a time, mixing until the dough just comes together. Do not overmix.
Small tip: For the flakiest crust, handle the dough as little as possible.
-
Chill and Press the Dough
Form the dough into a disc, wrap it in plastic wrap, and refrigerate for at least 30 minutes. Once chilled, lightly flour your work surface and roll out the dough to about 1/8-inch thickness. Use a 3-inch round cutter (or a glass rim) to cut out 12 circles. Carefully press each circle into the wells of a mini muffin or tart pan, gently pushing the dough up the sides.
-
Blind Bake the Crusts
Prick the bottom of each crust several times with a fork. Line each crust with a small piece of parchment paper and fill with pie weights or dried beans. Bake in a preheated oven at 375°F (190°C) for 10 minutes. Remove the weights and parchment, then bake for another 5-7 minutes, or until lightly golden. Let cool completely in the pan.
Small tip: Blind baking prevents the crust from puffing up and ensures a crisp base.
-
Make the Lemon Curd
In a medium saucepan, whisk together the lemon juice, lemon zest, sugar, egg yolks, whole eggs, and a pinch of salt. Place the saucepan over medium-low heat. Cook, stirring constantly with a whisk, until the curd thickens enough to coat the back of a spoon (about 8-10 minutes). Do not let it boil.
-
Finish and Chill the Curd
Remove the saucepan from the heat. Stir in the cold, cubed butter until it is completely melted and incorporated, making the curd smooth and glossy. Pour the hot curd through a fine-mesh sieve into a clean bowl to remove any cooked egg bits and zest, ensuring a silky-smooth consistency. Cover the surface of the curd directly with plastic wrap to prevent a skin from forming, and refrigerate for at least 2 hours, or until thoroughly chilled and firm.
Small tip: Chilling the curd properly is essential for it to set and hold its shape in the tarts.
-
Assemble the Tarts
Once the tart shells are cool and the lemon curd is chilled and firm, carefully spoon or pipe the lemon curd into each mini tart shell. Fill them almost to the brim.
-
Prepare the Meringue
In a clean, dry bowl (preferably glass or metal), beat the egg whites with an electric mixer on medium speed until foamy. Add the cream of tartar (if using). Gradually add the granulated sugar, 1 tablespoon at a time, while continuing to beat on high speed. Add the vanilla extract. Continue beating until stiff, glossy peaks form. The meringue should be thick and hold its shape.
Small tip: Ensure your bowl and beaters are completely grease-free, as even a tiny bit of fat can prevent egg whites from whipping properly.
-
Top and Finish the Tarts
Spoon or pipe the meringue onto the filled tarts. You can create decorative swirls with a spoon or use a piping bag with a star tip for a more elegant look. Use a kitchen torch to lightly brown the meringue peaks until golden. If you don’t have a torch, you can place the tarts under a broiler for 1-2 minutes, watching them very carefully to prevent burning.
Small tip: If using the broiler, keep the tarts on a lower rack and watch them constantly, as meringue can burn quickly.
Tips & Variations
- Gluten-Free Option: Easily make these tarts gluten-free by using a gluten-free all-purpose flour blend for the tart crusts. Ensure your blend contains xanthan gum or add ¼ teaspoon per cup of flour.
- Vegan/Vegetarian Option: For a vegan version, use a plant-based tart crust (many recipes use oil or vegan butter). For the lemon curd, you can find recipes using cornstarch or agar-agar as a thickener and plant-based milk/cream, along with lemon juice and zest. The meringue can be made with aquafaba (the liquid from canned chickpeas) whipped with sugar and cream of tartar.
- Adding More Fruit or Fiber: While not a vegetable or protein directly, you can boost the nutritional profile by serving these tarts alongside a fresh berry salad or a dollop of Greek yogurt. You could also incorporate a thin layer of raspberry jam at the bottom of the tart shell before adding the lemon curd.
- Spicy Twist: For a subtle kick, add a tiny pinch of cayenne pepper or finely grated fresh ginger to the lemon curd mixture while it’s cooking. It adds an unexpected warmth that complements the tartness beautifully.
- Other Flavor Variations: Experiment with different citrus! Try lime curd for Mini Key Lime Meringue Tarts, or a blood orange curd for a beautiful color and unique flavor. You could also add a layer of a different fruit compote, like blueberry or cherry, at the bottom of the tart before adding the lemon curd.
Nutritional Information
Approximate values per serving (based on 12 servings):
- Calories: 280 kcal
- Protein: 4g
- Carbohydrates: 35g
- Fat: 14g
Note: Nutritional values are estimates and may vary depending on specific ingredients and brands used.
Health Benefits
While these are a sweet treat, some of the main ingredients offer surprising health benefits:
- Lemons: Packed with Vitamin C, lemons are fantastic for boosting your immune system. They also contain antioxidants that help protect your cells from damage and support skin health. The zest provides beneficial essential oils and dietary fiber.
- Eggs: A great source of high-quality protein, eggs provide all nine essential amino acids. The yolks are rich in choline, important for brain health, and contain vitamins D, B12, and antioxidants like lutein and zeaxanthin, which are good for eye health.
- Butter: In moderation, butter provides fat-soluble vitamins like A, E, and K2. It also contains butyrate, a short-chain fatty acid that can support gut health.
- Sugar: While sugar should be consumed in moderation, it provides quick energy. In this recipe, it balances the tartness of the lemon, making the dessert enjoyable.
Serving Suggestions
- Serve these mini tarts as an elegant dessert after any meal – they are perfect for dinner parties or brunch gatherings.
- They make an excellent addition to a dessert buffet or a high tea spread, offering a bright and refreshing option.
- For a delightful contrast, pair them with a small scoop of vanilla bean ice cream or a dollop of fresh whipped cream.
- These tarts are best enjoyed fresh, but you can prepare the crusts and curd ahead of time for easy assembly on the day of your event.
Storage Tips
Mini Lemon Meringue Tarts are best eaten the day they are made, as the meringue can start to weep over time. If you have leftovers, store them in an airtight container in the refrigerator for up to 1-2 days. Freezing meringue-topped tarts is not recommended as the meringue’s texture will suffer upon thawing. If you’ve only prepared the curd and crusts, they can be stored separately; the curd will keep in the fridge for up to 3-4 days, and the baked crusts in an airtight container at room temperature for 2-3 days.
Conclusion
And there you have it – your very own batch of stunning Mini Lemon Meringue Tarts! This recipe proves that you don’t need to be a professional baker to create something truly spectacular. The combination of crisp crust, zesty lemon curd, and sweet, fluffy meringue is simply irresistible.
Don’t hesitate to give this recipe a try. The process is enjoyable, and the reward is a dessert that looks impressive and tastes even better. You’ll love the sense of accomplishment, and your taste buds will thank you for this delightful treat.
So go ahead, bake a batch, and share these little rays of sunshine with your loved ones. They’re perfect for celebrating big moments or simply brightening an ordinary day. Happy baking!


