
Introduction
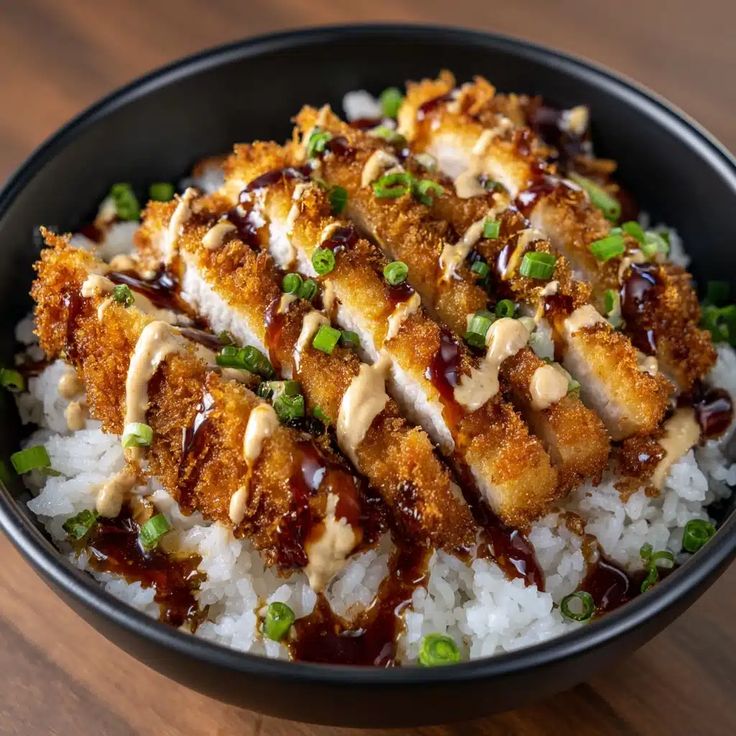
Get ready to dive into a bowl of pure comfort and crispy delight! Japanese Katsu Bowls are a beloved classic, featuring incredibly tender pork cutlets, perfectly fried to a golden crisp. Drizzled with a tangy, savory Tonkatsu sauce and served over fluffy rice with refreshing shredded cabbage, it’s a symphony of textures and flavors that will make your taste buds sing.
You might think making Katsu sounds complicated, but trust me, it’s surprisingly simple and quick to prepare at home. With just a few basic ingredients and straightforward steps, you can recreate this restaurant-quality dish in your own kitchen. It’s a fantastic weeknight meal that feels special without demanding hours of your time.
So, why wait? Gather your ingredients and let’s bring the deliciousness of a Japanese Katsu Bowl to your table today. You’re going to love how easy and satisfying this recipe is, and your family will be asking for it again and again!
Cooking Time & Prep Time
- Prep Time: 25 minutes
- Cooking Time: 25 minutes
- Total Time: 50 minutes
Small tip: To save time, you can prepare the Tonkatsu sauce and shred the cabbage while the pork cutlets are breading.
Ingredients
This recipe makes 4 generous servings.
For the Pork Katsu
- 4 boneless pork loin cutlets (about 1/2 inch thick, 4-5 oz each)
- 1/2 teaspoon salt
- 1/4 teaspoon black pepper
- 1/2 cup all-purpose flour
- 2 large eggs, beaten
- 1 1/2 cups panko breadcrumbs
- 3-4 cups vegetable oil (or other neutral oil) for frying
For the Tonkatsu Sauce
- 1/2 cup ketchup
- 1/4 cup Worcestershire sauce
- 2 tablespoons soy sauce
- 1 tablespoon granulated sugar
- 1 teaspoon mirin (optional, adds a touch of sweetness and depth)
For the Bowls & Garnish
- 4 cups cooked short-grain white rice
- 2 cups finely shredded green cabbage
- Optional: Toasted sesame seeds, chopped green onions (scallions)
Step-by-Step Instructions
-
Step 1: Prepare the Pork Cutlets
Pat the pork cutlets very dry with paper towels. This helps the breading stick better. Season both sides of each cutlet with salt and pepper. Use a meat mallet or the back of a heavy pan to gently pound the cutlets to an even 1/4-inch thickness. This ensures even cooking and tender results.
Small tip: Pounding the meat also helps tenderize it and makes it cook faster.
-
Step 2: Set Up the Breading Station
Prepare three shallow dishes or plates. In the first, place the all-purpose flour. In the second, whisk the eggs. In the third, spread out the panko breadcrumbs. This organized setup makes the breading process smooth and clean.
-
Step 3: Bread the Pork
Take one pork cutlet and dredge it thoroughly in the flour, shaking off any excess. Next, dip it into the beaten egg, ensuring it’s fully coated. Finally, press the cutlet firmly into the panko breadcrumbs, making sure every surface is covered. Repeat this process for all remaining cutlets.
Small tip: For extra crispiness, you can double-coat the cutlets by dipping them in egg and panko a second time after the first coating.
-
Step 4: Make the Tonkatsu Sauce
In a small bowl, combine the ketchup, Worcestershire sauce, soy sauce, granulated sugar, and mirin (if using). Whisk everything together until the sugar is dissolved and the sauce is smooth. Taste and adjust seasonings if needed – add a pinch more sugar for sweetness or a splash more soy sauce for saltiness.
-
Step 5: Heat the Oil for Frying
Pour the vegetable oil into a large, heavy-bottomed skillet or Dutch oven until it reaches about 1 1/2 to 2 inches deep. Heat the oil over medium-high heat to 325-350°F (160-175°C). You can test the oil by dropping a pinch of panko; it should sizzle immediately and float to the surface.
Small tip: A cooking thermometer is ideal for maintaining the correct oil temperature, which is crucial for perfectly crispy katsu without burning.
-
Step 6: Fry the Katsu
Carefully place 1 or 2 breaded pork cutlets into the hot oil, ensuring you don’t overcrowd the pan. Fry for 3-5 minutes per side, or until golden brown and cooked through. The internal temperature of the pork should reach 145°F (63°C).
Small tip: Don’t flip the katsu too often; let it develop a good crust on one side before turning.
-
Step 7: Drain the Katsu
Once cooked, carefully remove the katsu from the oil using tongs and transfer them to a wire rack set over a baking sheet lined with paper towels. This allows excess oil to drain off, keeping the katsu crispy. Repeat with any remaining cutlets, ensuring the oil returns to temperature between batches.
-
Step 8: Assemble the Katsu Bowls
To serve, slice each fried katsu cutlet into 1/2-inch wide strips. Divide the cooked rice among four serving bowls. Top the rice with a generous handful of shredded green cabbage. Arrange the sliced katsu on top of the cabbage.
-
Step 9: Garnish and Serve
Drizzle a generous amount of the prepared Tonkatsu sauce over the katsu. If desired, sprinkle with toasted sesame seeds and chopped green onions for extra flavor and visual appeal. Serve immediately and enjoy your delicious homemade Katsu Bowl!
Tips & Variations
- Gluten-Free Option: Simply swap the all-purpose flour for a gluten-free flour blend and use gluten-free panko breadcrumbs. The Tonkatsu sauce is naturally gluten-free if you use tamari instead of regular soy sauce.
- Vegan/Vegetarian Option: This recipe works wonderfully with thick slices of firm tofu, portobello mushrooms, or even eggplant. Just press the tofu to remove excess water before breading and frying, or slice and bread the vegetables as directed.
- Add More Vegetables or Protein: For an extra boost, serve your katsu bowl with a side of steamed edamame, a quick cucumber salad, or add sliced avocado on top. You can also use chicken breast cutlets for Chicken Katsu.
- Spicy Version: To add a kick, mix a teaspoon of sriracha or a pinch of red pepper flakes into your Tonkatsu sauce. Alternatively, offer a dollop of spicy mayo (mayonnaise mixed with sriracha) on the side.
- Flavor Tip: A dash of grated fresh ginger or garlic powder can be added to the flour mixture for an extra layer of flavor on the katsu itself.
Nutritional Information
Approximate values per serving (based on 4 servings):
- Calories: 650-700
- Protein: 35-40g
- Carbohydrates: 60-65g
- Fat: 30-35g
Please note: Nutritional values are estimates and may vary depending on specific ingredients used, portion sizes, and cooking methods.
Health Benefits
Japanese Katsu Bowls offer a delightful blend of nutrients that contribute to a balanced diet.
The star of the show, pork loin, is an excellent source of lean protein, which is essential for muscle repair, growth, and overall bodily functions. It’s also rich in B vitamins like thiamine, niacin, and B6, crucial for energy metabolism and nervous system health. Furthermore, pork provides important minerals such as iron and zinc, supporting immune function and oxygen transport.
White rice, a staple in this dish, provides a readily available source of carbohydrates, fueling your body with energy. While often refined, it’s a good base for absorbing the flavors and nutrients of the other components in the bowl.
Shredded green cabbage adds a wonderful crunch and a significant boost of vitamins and fiber. Cabbage is packed with Vitamin C, an antioxidant that supports immune health, and Vitamin K, important for blood clotting and bone health. Its high fiber content aids digestion and promotes a feeling of fullness.
Even the Tonkatsu sauce, in moderation, contributes a mix of flavors from ingredients like Worcestershire sauce, which can contain beneficial compounds from its various spices. Overall, this dish offers a good balance of macronutrients for a satisfying and energizing meal.
Serving Suggestions
- Serve with a simple side salad dressed with a light ginger dressing for added freshness.
- This dish is a complete meal on its own, making it a perfect main course for lunch or dinner.
- For meal prep, cook the rice and katsu separately. Store the cooked katsu and sauce in airtight containers. Reheat katsu in an air fryer or oven to regain crispiness before assembling the bowl.
- A bowl of miso soup makes an excellent traditional accompaniment.
- Garnish with a sprinkle of shichimi togarashi (Japanese seven-spice blend) for an extra layer of flavor and a little heat.
Storage Tips
Leftover Katsu and rice can be stored in separate airtight containers in the refrigerator for up to 3 days. The Tonkatsu sauce can be stored separately in an airtight container for up to a week. While you can freeze cooked katsu, the texture of the breading may become soggy upon reheating. If freezing, cool completely, wrap tightly, and freeze for up to 1 month. Reheat frozen katsu in an oven or air fryer directly from frozen for best results, or thaw in the fridge overnight before reheating.
Conclusion
And there you have it – your very own Japanese Katsu Bowl, a masterpiece of crispy texture and savory flavor, ready to be devoured! This dish truly embodies comfort food at its finest, offering a delightful combination of tender pork, crunchy panko, and the irresistible tang of homemade Tonkatsu sauce, all nestled on a bed of fluffy rice.
We hope you’ve found this recipe easy to follow and inspiring. It’s a fantastic way to bring the vibrant tastes of Japanese cuisine into your home without any fuss. The satisfaction of making something so delicious from scratch is truly rewarding.
So go ahead, give this Japanese Katsu Bowl a try today! Share it with your family and friends, and watch their faces light up with every bite. Happy cooking, and enjoy every moment of this incredible meal!


