
Introduction
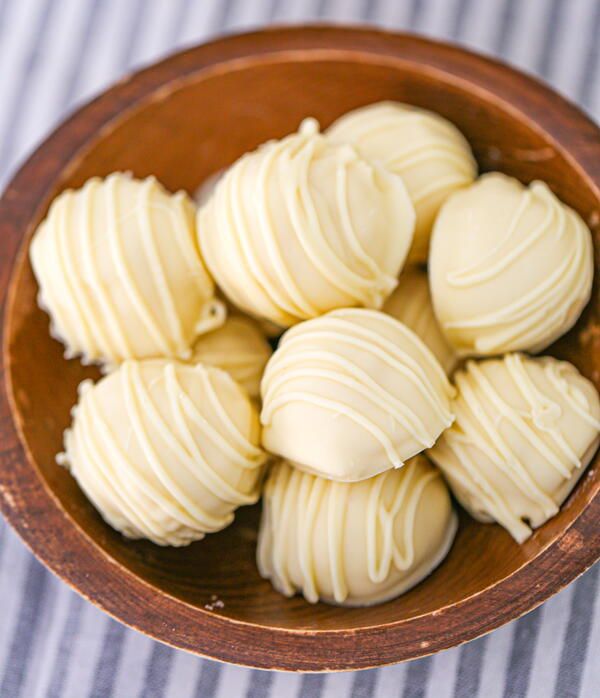
Get ready to create something truly magical in your kitchen today! We’re diving into the delightful world of homemade white chocolate. This creamy, dreamy confection is a sweet treat that melts beautifully in your mouth. It’s not “chocolate” in the traditional sense, as it doesn’t contain cocoa solids, but its rich, vanilla-infused flavor makes it a beloved indulgence.
You might think making chocolate at home sounds complicated, but I promise you, it’s surprisingly easy and quick! With just a few simple ingredients and a little bit of patience, you can whip up a batch of delicious white chocolate that far surpasses anything you’d buy from a store. It’s a fun project that yields incredibly satisfying results.
So, clear your counter, gather your ingredients, and prepare to impress yourself and your loved ones. This recipe is designed for everyone, from novice bakers to seasoned candy makers. Let’s make some luscious white chocolate together!
Cooking Time & Prep Time
- Prep Time: 15 minutes
- Cooking Time: 10-15 minutes (active melting and mixing)
- Total Time: 25-30 minutes (plus chilling time for setting)
Small tip: To make your process smooth and stress-free, measure out all your ingredients before you begin. This is called “mise en place” and it’s a game-changer!
Ingredients
This recipe makes approximately 10-12 small bars or individual pieces, depending on your mold size.
- 1 cup (225g) high-quality cocoa butter, chopped into small pieces
- 1 cup (120g) powdered sugar (confectioners’ sugar), sifted
- ½ cup (50g) whole milk powder
- 1 teaspoon pure vanilla extract
- Pinch of fine sea salt (about ¼ teaspoon)
Step-by-Step Instructions
-
Step 1: Prepare Your Workspace and Equipment
First, set up a double boiler. You can do this by placing a heatproof bowl over a saucepan filled with about an inch or two of simmering water. Make sure the bottom of the bowl does not touch the water. Have your silicone molds ready and clean on a baking sheet or flat surface.
Small tip: A clean, dry bowl and spatula are essential when working with chocolate to prevent seizing.
-
Step 2: Gently Melt the Cocoa Butter
Add the chopped cocoa butter to the heatproof bowl over your simmering water. Stir occasionally with a clean, dry spatula until the cocoa butter is completely melted and smooth. Be patient and keep the heat gentle; you don’t want to scorch it.
Small tip: Low and slow is the key to melting cocoa butter perfectly. Avoid high heat to maintain its quality.
-
Step 3: Whisk in the Dry Ingredients
Once the cocoa butter is fully melted, remove the bowl from the heat (but keep the saucepan of water nearby). Gradually add the sifted powdered sugar, milk powder, and fine sea salt to the melted cocoa butter. Whisk continuously until all the dry ingredients are fully incorporated and there are no lumps.
Small tip: Sifting your powdered sugar and milk powder beforehand prevents lumps and ensures a super smooth final product.
-
Step 4: Incorporate Vanilla Extract
Now, stir in the pure vanilla extract. Mix it thoroughly into the white chocolate mixture. The vanilla adds a beautiful depth of flavor that is characteristic of classic white chocolate.
Small tip: Use a good quality vanilla extract for the best flavor; it makes a real difference!
-
Step 5: Blend for Ultimate Smoothness
This step is crucial for achieving that silky-smooth, melt-in-your-mouth texture. Carefully transfer the mixture to a food processor or use an immersion blender. Blend for 2-5 minutes, or until the mixture is incredibly smooth and creamy. It should feel warm but not hot.
Small tip: Blending helps to break down any remaining sugar crystals and ensures a luxurious, professional finish.
-
Step 6: Temper the Chocolate (Optional but Recommended)
For a white chocolate with a beautiful snap and shiny finish, you’ll want to temper it. If using an immersion blender, you can continue blending until the temperature drops to around 88-90°F (31-32°C). If using a food processor, you might need to pour it back into a clean bowl and stir over an ice bath briefly until it reaches the tempering temperature. This step prevents blooming and gives your chocolate a professional look.
Small tip: If you don’t have a thermometer, you can skip tempering, but your chocolate might be softer and less shiny. It will still taste amazing!
-
Step 7: Pour into Molds
Carefully pour the tempered white chocolate mixture into your prepared silicone molds. Fill them evenly. Gently tap the molds on your counter a few times to release any air bubbles, ensuring a smooth surface.
Small tip: Work relatively quickly if you’ve tempered your chocolate, as it will start to set.
-
Step 8: Chill and Enjoy
Place the molds in the refrigerator for at least 30-60 minutes, or until the white chocolate is completely firm and easily releases from the molds. Once firm, gently pop out your homemade white chocolate pieces. They are now ready to be enjoyed!
Small tip: Make sure the chocolate is fully set before attempting to unmold it; otherwise, it might break.
Tips & Variations
- Gluten-Free Option: This white chocolate recipe is naturally gluten-free! Just ensure that all your individual ingredients (cocoa butter, powdered sugar, milk powder, vanilla) are certified gluten-free if you have a severe allergy or intolerance.
- Vegan/Vegetarian Option: To make this recipe completely plant-based, simply substitute the whole milk powder with a dairy-free alternative. Oat milk powder, soy milk powder, or coconut cream powder work beautifully to achieve a similar creamy texture.
- Boost Nutrition: While white chocolate is a treat, you can enhance its nutritional profile or pair it with healthier options. Try adding chopped nuts like almonds or pistachios, or dried fruits like cranberries or blueberries directly into the melted chocolate before pouring into molds. You can also use your homemade white chocolate to coat fresh fruit like strawberries or banana slices for a more balanced snack.
- Spicy Kick: For a surprising and delightful twist, add a tiny pinch (⅛ teaspoon) of cayenne pepper or chili powder to the mixture along with the vanilla. The subtle heat complements the sweetness beautifully, creating a sophisticated flavor profile.
- Flavor Infusions: Experiment with other flavorings! Consider adding a touch of food-grade essential oils (like peppermint or orange), a teaspoon of finely grated citrus zest, a tablespoon of instant coffee powder, or even a teaspoon of matcha powder for unique variations.
Nutritional Information
Approximate values per serving (based on 10 servings):
- Calories: 285
- Protein: 2.5g
- Carbohydrates: 22g
- Fat: 22g
Please note that nutritional values are approximate and can vary depending on the specific brands and quantities of ingredients used.
Health Benefits
While white chocolate is often seen purely as an indulgence, its main ingredient, cocoa butter, offers some interesting health benefits.
Cocoa butter is a healthy fat derived from the cocoa bean. It is rich in antioxidants, which are compounds that help protect your body’s cells from damage caused by free radicals. These antioxidants can contribute to overall cellular health.
It contains a significant amount of oleic acid, a monounsaturated fat that is also found in olive oil. Oleic acid is known for its potential to support heart health when consumed as part of a balanced diet.
Beyond its internal benefits, cocoa butter is renowned for its skin-nourishing properties. It’s often used in skincare products due to its moisturizing and emollient qualities. Enjoying it in moderation can be a delightful way to experience its natural goodness.
The pure vanilla extract also contributes a small amount of antioxidants and has been traditionally used for its calming and mood-enhancing properties. When enjoyed mindfully, a piece of homemade white chocolate can offer a moment of delicious comfort and a boost to your well-being.
Serving Suggestions
- Sweet Treat: Enjoy your homemade white chocolate as a delightful treat on its own, perhaps with a cup of coffee


