
Introduction
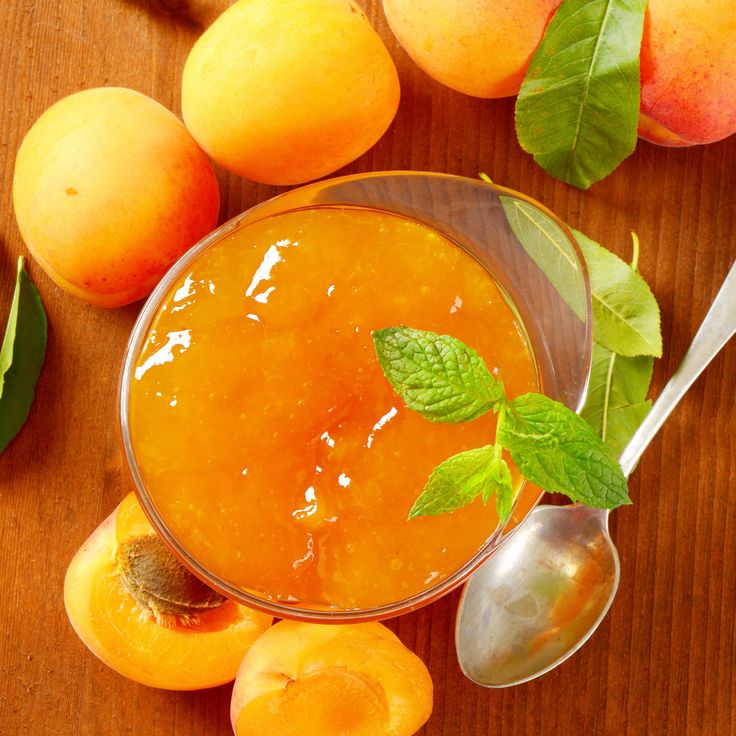
Get ready to discover the pure joy of homemade apricot jam! This vibrant, sunny spread captures the sweet and slightly tart essence of fresh apricots in every spoonful. It’s a truly special treat that brightens up any breakfast or snack, tasting far superior to anything you can buy in a store.
You might think making jam is a big, complicated task, but I promise you, it’s surprisingly easy and incredibly rewarding. With just a few simple ingredients and a little bit of patience, you can transform fresh fruit into golden jars of deliciousness. The process is straightforward, and the results are absolutely worth it.
So, why not give it a try? Imagine slathering this glistening, fruit-filled jam on warm toast, stirring it into yogurt, or even using it in desserts. It’s a delightful way to preserve the taste of summer. Let’s get cooking and fill your kitchen with the irresistible aroma of homemade apricot jam!
Cooking Time & Prep Time
- Prep Time: 25 minutes
- Cooking Time: 35-45 minutes
- Total Time: 60-70 minutes
Small tip: Sterilizing your jars while the jam is cooking will save you time and ensure everything is ready when your jam is perfectly set!
Ingredients
This recipe makes approximately 4-5 half-pint (8 oz) jars of delicious apricot jam.
- 3 pounds ripe apricots, pitted and chopped (no need to peel!)
- 4 cups granulated sugar (about 2 pounds)
- 1/4 cup fresh lemon juice (from 1-2 lemons)
- 1 teaspoon unsalted butter (optional, helps reduce foam)
Step-by-Step Instructions
-
Step 1: Prepare the Apricots
Start by thoroughly washing your apricots. Halve them, remove the pits, and then chop the fruit into small, roughly 1/2-inch pieces. Don’t worry about peeling them; the skins will soften beautifully during cooking and add a lovely texture.
Small tip: Choose apricots that are ripe but still firm. Overly soft apricots can make the jam mushy, while underripe ones lack flavor.
-
Step 2: Combine Ingredients in a Pot
Place the chopped apricots into a large, heavy-bottomed pot or Dutch oven. Add the granulated sugar and fresh lemon juice. Stir everything together gently until the sugar begins to dissolve and coat the apricots.
Small tip: Using a wide pot helps the jam cook down and thicken faster, as it provides more surface area for evaporation.
-
Step 3: Let it Macerate (Optional but Recommended)
Cover the pot and let the apricot mixture sit at room temperature for at least 30 minutes, or even overnight in the refrigerator. This step, called macerating, helps draw out the natural juices from the apricots, creating a more flavorful jam and aiding in the cooking process.
Small tip: Macerating also helps the sugar dissolve more evenly, preventing scorching later on.
-
Step 4: Begin Cooking the Jam
Place the pot over medium-high heat. Bring the mixture to a rolling boil, stirring frequently to prevent sticking. Once boiling, add the optional teaspoon of butter; this helps to reduce the foam that often forms on top of the jam.
Small tip: A rolling boil means the bubbles don’t disappear when you stir the jam. This is crucial for proper setting.
-
Step 5: Cook to Setting Point
Reduce the heat slightly to maintain a vigorous, rolling boil. Continue to cook, stirring often, for 25-35 minutes, or until the jam reaches its setting point. You can test this using a cold plate test: spoon a small amount of jam onto a plate chilled in the freezer for 5 minutes, then push it with your finger. If it wrinkles, it’s ready.
Small tip: Alternatively, use a candy thermometer. The jam is set when it reaches 220°F (104°C).
-
Step 6: Prepare Jars for Canning
While the jam is cooking, sterilize your canning jars and lids. You can do this by washing them thoroughly in hot, soapy water, rinsing, and then submerging them in boiling water for 10 minutes. Keep them hot until ready to fill.
Small tip: Always use jars specifically designed for canning to ensure a safe seal.
-
Step 7: Fill the Jars
Carefully remove the hot jam from the heat. Ladle the hot jam into the sterilized jars, leaving about 1/4 inch of headspace from the rim. Wipe the rims clean with a damp cloth to ensure a good seal. Place the lids and screw bands on, tightening them just until fingertip-tight.
Small tip: A canning funnel can make filling jars much easier and cleaner.
-
Step 8: Process Jars (Optional for Shelf-Stable)
For shelf-stable jam, process the filled jars in a boiling water bath canner for 10 minutes. Ensure the jars are completely covered by at least 1 inch of water. Carefully remove the jars and let them cool undisturbed on a wire rack for 12-24 hours. You should hear a “pop” as the lids seal.
Small tip: If you don’t plan to water bath can, store the jam in the refrigerator immediately after it cools.
Tips & Variations
- Gluten-Free Option: This recipe is naturally gluten-free! Enjoy it without any modifications.
- Vegan/Vegetarian Option: This recipe is naturally vegan and vegetarian. Just skip the optional butter if you want to keep it strictly vegan, though the small amount of butter typically doesn’t impact its vegan status for most.
- Add More Protein/Fiber: Stir in 2-3 tablespoons of chia seeds during the last 5 minutes of cooking. They will thicken the jam further and add a boost of protein and fiber.
- Spicy Version: For a delightful kick, add 1/2 teaspoon of finely minced fresh ginger or a pinch of red pepper flakes along with the apricots and sugar.
- Flavor Boosts: Experiment with adding a vanilla bean pod during cooking (remove before jarring), a splash of almond extract at the end, or a few sprigs of fresh thyme or rosemary for a sophisticated herbal note.
Nutritional Information
Approximate values per serving (based on 20 servings, about 2 tablespoons per serving):
- Calories: 110 kcal
- Protein: 0.5 g
- Carbohydrates: 28 g
- Fat: 0.1 g
Note: Nutritional values are approximate and may vary depending on the specific ingredients used and portion sizes.
Health Benefits
Apricot jam isn’t just delicious; it offers some wonderful health benefits too, thanks to its star ingredient!
Apricots are little powerhouses of nutrition. They are an excellent source of Vitamin A, which is crucial for healthy vision, skin, and immune function. Enjoying this jam can contribute to your daily intake of this important vitamin.
You’ll also find a good amount of Vitamin C in apricots. Vitamin C acts as a powerful antioxidant, helping to protect your cells from damage. It also supports your immune system and is vital for collagen production, keeping your skin firm.
Apricots provide dietary fiber, which is fantastic for digestive health. Fiber helps keep things moving smoothly and can contribute to a feeling of fullness. While some fiber is lost during cooking, you still get a beneficial amount.
Beyond vitamins, apricots contain potassium, an essential mineral that helps maintain healthy blood pressure and fluid balance. They also boast antioxidants like beta-carotene, which gives them their beautiful orange color and helps fight free radicals in the body.
Serving Suggestions
- Classic Toast Topper: Spread generously on warm toast, English muffins, or fresh croissants for a classic breakfast delight.
- Yogurt & Oatmeal Swirl: Stir a spoonful or two into plain Greek yogurt or hot oatmeal for a burst of fruity flavor and natural sweetness.
- Cheese Board Companion: Pair with soft cheeses like brie or goat cheese, and crusty bread or crackers, for an elegant appetizer.
- Baking Boost: Use it as a filling for thumbprint cookies, tarts, or even as a glaze for roasted chicken or pork.
- Ice Cream Topping: Drizzle warm apricot jam over vanilla bean ice cream for a simple yet sophisticated dessert.
Storage Tips
If properly water bath canned, sealed jars of apricot jam can be stored in a cool, dark place for up to 1 year. Once opened, or if you skipped the canning process, store the jam in the refrigerator. It will keep well for up to 3-4 weeks in the fridge. Freezing jam is generally not recommended as it can alter the texture, making it more watery upon thawing. Reheating isn’t typically necessary, as jam is usually served at room temperature or chilled.
Conclusion
There’s truly nothing quite like the taste of homemade apricot jam. It’s a simple pleasure that brings a touch of sunshine to your day, bursting with fresh fruit flavor and a delightful texture. This recipe proves that making your own preserves is not only achievable but also incredibly rewarding.
So, gather those beautiful apricots and dive into this wonderful culinary adventure. You’ll be amazed at how easy it is to create something so delicious and wholesome right in your own kitchen. The aroma alone is enough to lift your spirits!
Share your golden jars of apricot jam with family and friends – they’ll be so impressed by your homemade creation. It makes a thoughtful gift and a cherished addition to any pantry. Happy jamming!


