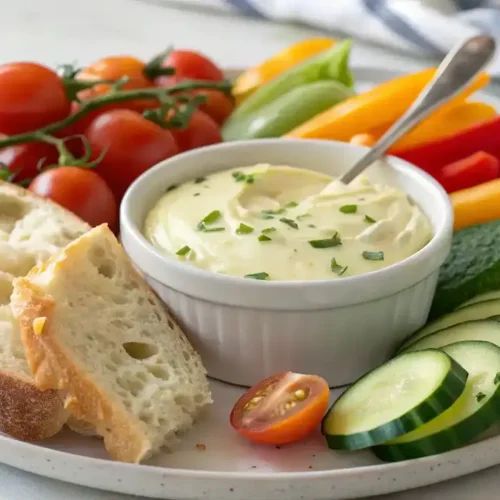

Introduction
Get ready to elevate your meals with the most incredible homemade Garlic Aioli! This creamy, dreamy sauce is a true culinary game-changer. Imagine a rich, luxurious mayonnaise, but infused with a vibrant, pungent garlic kick that awakens your taste buds. It’s truly special because it transforms simple ingredients into something extraordinary, adding depth and a gourmet touch to almost any dish.
You might think making something so fancy is complicated, but I promise you, it’s surprisingly easy and quick! With just a few basic ingredients and a simple technique, you can whip up this restaurant-quality condiment in minutes. No need for special equipment, though an immersion blender makes it even faster. It’s a fantastic way to impress your friends and family without spending hours in the kitchen.
So, are you ready to ditch the store-bought stuff and discover the magic of homemade aioli? Trust me, once you try this fresh, intensely flavorful version, you’ll never go back. Let’s dive in and create some deliciousness together!
Cooking Time & Prep Time
- Prep Time: 10 minutes
- Cooking Time: 0 minutes
- Total Time: 10 minutes
Small tip: Gathering all your ingredients and tools before you start, also known as “mise en place,” will make the process even smoother and quicker!
Ingredients
This recipe makes approximately 1 cup of Garlic Aioli, serving 4-6 people generously.
- 1 large egg yolk, at room temperature
- 2-3 cloves garlic, finely minced or grated
- 1 tablespoon fresh lemon juice
- 1/2 teaspoon Dijon mustard (optional, but helps with emulsification and flavor)
- 1 cup neutral-flavored oil (such as grapeseed, canola, or a light olive oil)
- 1/4 teaspoon fine sea salt, plus more to taste
- Pinch of black pepper, to taste
Step-by-Step Instructions
-
Step 1: Prepare Your Ingredients
Start by making sure your egg yolk is at room temperature. This helps it emulsify better with the oil. Finely mince or grate your garlic cloves. Squeeze your lemon juice and measure out your oil. Having everything ready to go is key for smooth aioli making.
Small tip: If your egg yolk is cold, place the whole egg in a bowl of warm water for 5-10 minutes before separating.
-
Step 2: Combine the Base Ingredients
In a tall, narrow container (like the one that comes with an immersion blender, or a wide-mouthed jar), combine the room-temperature egg yolk, minced garlic, fresh lemon juice, Dijon mustard (if using), and 1/4 teaspoon of salt. Give it a quick stir with a spoon or the immersion blender head just to combine these ingredients.
-
Step 3: Begin the Emulsification
Pour all of the neutral oil directly on top of the egg yolk mixture in the container. Insert your immersion blender all the way to the bottom of the container, covering the egg yolk. Turn the blender on high speed and hold it steady at the bottom for about 15-20 seconds. You will see the mixture at the bottom start to turn thick and pale.
Small tip: Do not move the blender around too much at this stage. Patience here is crucial for a stable emulsion.
-
Step 4: Slowly Bring Up the Blender
Once the bottom mixture is thick, slowly and gradually lift the immersion blender upwards through the oil, allowing the oil to be drawn into the emulsified base. Continue blending until all the oil is incorporated and the aioli is thick, creamy, and uniform in color. This whole process should only take about 30-60 seconds.
-
Step 5: Adjust Seasoning and Serve
Once your aioli is beautifully thick, give it a taste. Add more salt if needed, and a pinch of black pepper. If you like it tangier, a little more lemon juice can be added. Stir well to combine any final seasonings. Your homemade Garlic Aioli is now ready to be enjoyed!
Small tip: For an extra smooth aioli, you can pass the minced garlic through a garlic press or even a very fine grater.
Tips & Variations
- Gluten-Free Option: Good news! This Garlic Aioli recipe is naturally gluten-free, so no changes are needed. Enjoy it worry-free!
- Vegan Option: To make a delicious vegan aioli, replace the egg yolk with 1/2 cup of aquafaba (the liquid from a can of chickpeas). Blend it with the lemon juice, garlic, mustard, and salt, then slowly drizzle in the oil while blending until thick.
- Herbal Aioli: For a fresh twist, finely chop 1-2 tablespoons of fresh herbs like chives, parsley, dill, or tarragon and stir them into the finished aioli. This adds a lovely burst of color and herbaceous flavor.
- Spicy Version: Add a pinch of cayenne pepper, a dash of your favorite hot sauce, or 1/4 teaspoon of red pepper flakes to the base ingredients before blending for a fiery kick.
- Roasted Garlic Aioli: For a milder, sweeter garlic flavor, roast 2-3 cloves of garlic until soft and caramelized. Mash them into a paste and use this instead of raw minced garlic in the recipe. It adds incredible depth!
Nutritional Information
Approximate values per serving (based on 4 servings):
- Calories: 350 kcal
- Protein: 0.5 g
- Carbohydrates: 1 g
- Fat: 39 g
Please note: These values are approximate and can vary depending on the specific ingredients and brands used.
Health Benefits
While aioli is a rich condiment, its main ingredients offer some wonderful health benefits!
Garlic, the star of this aioli, is renowned for its impressive properties. It contains compounds like allicin, which are believed to have powerful antioxidant and anti-inflammatory effects. Regular consumption of garlic can support your immune system and may even contribute to heart health.
If you choose to use a light olive oil or a blend, you’re incorporating healthy fats into your diet. Olive oil, in particular, is rich in monounsaturated fatty acids, which are known to be beneficial for cardiovascular health. These fats are essential for absorbing fat-soluble vitamins and can help keep you feeling satisfied.
Lemon juice provides a dose of Vitamin C, a crucial antioxidant that supports immune function and skin health. It also aids in the absorption of iron from other foods. Even in small amounts, it adds a refreshing zest and nutritional boost.
Finally, the egg yolk contributes essential nutrients like Vitamin D, Vitamin B12, and choline. Choline is vital for brain health and metabolism. So, while aioli should be enjoyed in moderation, you’re still getting some goodness from its wholesome components!
Serving Suggestions
- Fries & Dips: The classic pairing! Serve your homemade aioli with crispy French fries, sweet potato fries, or even roasted potato wedges. It’s also fantastic as a dip for raw vegetables like carrots, celery, and bell peppers.
- Sandwiches & Burgers: Spread a generous layer of Garlic Aioli on your favorite sandwiches, wraps, or burgers. It adds an incredible burst of flavor and moisture that elevates any handheld meal.
- Roasted & Grilled Foods: Dollop it alongside grilled fish, chicken, steak, or roasted vegetables like asparagus, broccoli, or Brussels sprouts. It’s a perfect finishing touch that brightens and enriches the flavors.
- Eggs & Breakfast: A surprising but delicious pairing! Try a spoonful of aioli with scrambled eggs, a fried egg, or even on avocado toast for a gourmet breakfast or brunch.
Storage Tips
Store your homemade Garlic Aioli in an airtight container in the refrigerator. It will stay fresh and delicious for 5-7 days. Due to the fresh egg yolk, it’s best to consume it within this timeframe. Aioli does not freeze well; the emulsion will likely break upon thawing, resulting in a separated, oily texture. There’s no need to reheat aioli, as it is a cold condiment meant to be served chilled or at room temperature.
Conclusion
There you have it – your very own batch of glorious homemade Garlic Aioli! We’ve demystified what might seem like a complex sauce, proving that incredible flavor doesn’t have to come with a lot of fuss. This aioli is truly a versatile superstar in the kitchen, capable of transforming everyday dishes into something truly special with its rich, garlicky, and tangy profile.
I genuinely encourage you to give this recipe a try. Don’t be intimidated by the idea of making your own mayonnaise-based sauce; with an immersion blender, it’s practically foolproof! The reward of tasting this fresh, vibrant condiment, knowing you made it yourself, is incredibly satisfying.
So, go ahead, whip up a batch, and share the deliciousness with your family and friends. They’ll be amazed by your culinary skills, and you’ll have a fantastic new staple in your fridge. Happy cooking, and enjoy every flavorful bite!


