
Introduction
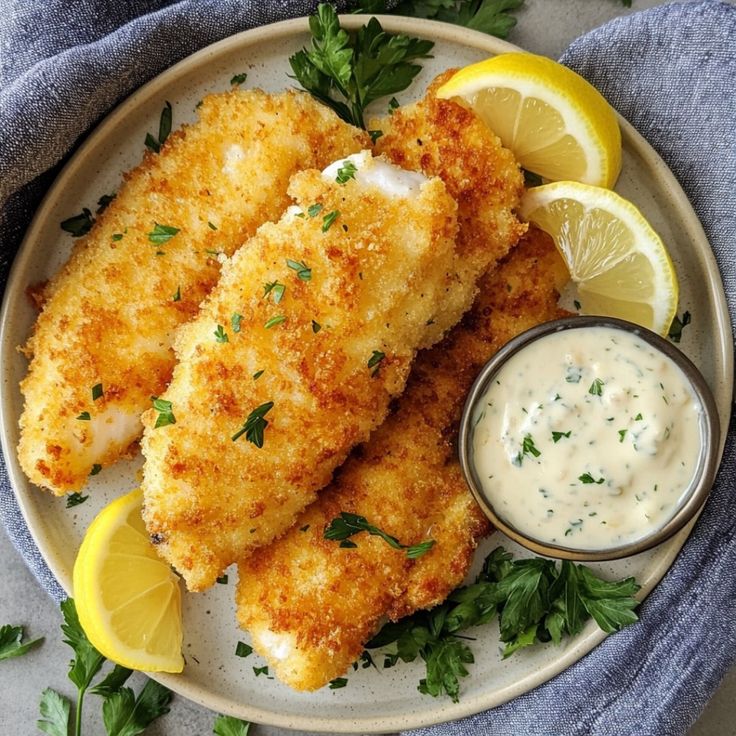
Are you ready for a game-changer? Today, we’re diving into the world of perfectly fried fish. This isn’t just any fried fish. This is the recipe for “Fried Fish That Doesn’t Taste Fishy Finally Right.” It’s incredibly crispy, wonderfully seasoned, and surprisingly light. You’ll get tender, flaky fish inside with a golden-brown, flavorful crust that will make your taste buds sing.
The best part? This dish is so much easier and quicker to make than you might think. We’ve got simple steps and clever tricks to ensure your fish is fresh-tasting and absolutely delicious every single time. Forget complicated techniques or long ingredient lists. This recipe focuses on maximizing flavor and texture with minimal fuss, making it perfect for a weeknight meal or a special weekend treat.
So, if you’ve been hesitant to fry fish at home because of that “fishy” taste, prepare to have your mind changed. Get ready to impress yourself and your family with this incredible recipe. Trust us, once you try this method, you’ll never go back!
Cooking Time & Prep Time
- Prep Time: 35 minutes (includes fish soak time)
- Cooking Time: 18 minutes
- Total Time: 53 minutes
Small tip: You can prepare your dry dredge ingredients while the fish is soaking to save time.
Ingredients
This recipe makes 4 generous servings.
For the Fish & Marinade
- 1.5 lbs (about 680g) white fish fillets (such as cod, tilapia, or pollock), about 1-inch thick
- 1 cup whole milk (or buttermilk)
- 2 tablespoons fresh lemon juice, divided
- 1 teaspoon salt, divided
- 1/2 teaspoon black pepper, divided
- 1 teaspoon garlic powder
- 1 teaspoon smoked paprika
For the Crispy Coating
- 1 cup all-purpose flour
- 1/2 cup cornstarch
- 1 teaspoon baking powder
- 1/2 teaspoon salt
- 1/4 teaspoon black pepper
- 1 teaspoon onion powder
- 1/2 teaspoon cayenne pepper (optional, for a little kick)
For Frying
- 4-5 cups vegetable oil, canola oil, or peanut oil (enough to fill a heavy-bottomed pot or Dutch oven about 2-3 inches deep)
Optional for Serving
- Lemon wedges
- Fresh parsley, chopped
- Tartar sauce
Step-by-Step Instructions
-
Step 1: Prepare the Fish for Soaking
Pat your fish fillets very dry with paper towels. Cut any larger fillets into 4-6 ounce portions if needed. This ensures even cooking. Place the fish pieces in a shallow dish.
Small tip: Drying the fish thoroughly helps the marinade and coating adhere better.
-
Step 2: The Fish-Fighting Soak
In a bowl, whisk together the milk and 1 tablespoon of lemon juice. Pour this mixture over the fish fillets in the shallow dish. Make sure all fish is submerged. Cover the dish and refrigerate for at least 15 minutes, or up to 30 minutes. This step is key to removing any “fishy” odors and tenderizing the fish.
Small tip: Buttermilk works even better than regular milk for this step, if you have it on hand!
-
Step 3: Season the Fish
While the fish is soaking, prepare your seasoning. In a small bowl, combine 1/2 teaspoon salt, 1/4 teaspoon black pepper, 1 teaspoon garlic powder, and 1 teaspoon smoked paprika. Set aside. Once the fish has soaked, remove it from the milk mixture and pat it thoroughly dry again with fresh paper towels. Discard the milk. Sprinkle the fish evenly with the prepared seasoning and the remaining 1 tablespoon of lemon juice.
Small tip: Don’t skip patting the fish dry after the soak; excess moisture will make your coating soggy.
-
Step 4: Prepare the Crispy Coating
In a large, shallow dish or pie plate, whisk together the all-purpose flour, cornstarch, baking powder, remaining 1/2 teaspoon salt, remaining 1/4 teaspoon black pepper, onion powder, and cayenne pepper (if using). Mix until everything is well combined. This is your dry dredge.
Small tip: Cornstarch is the secret ingredient for an extra-crispy crust!
-
Step 5: Coat the Fish
Working one piece at a time, dredge each seasoned fish fillet generously in the flour mixture. Press firmly to ensure the coating sticks well to all sides. Shake off any excess flour. Place the coated fish on a clean plate or wire rack. Repeat with all remaining fish pieces.
Small tip: For an extra-thick coating, you can dip the fish in the milk mixture again (if you reserved some or used a small amount of fresh milk) then back into the flour mixture for a second coat.
-
Step 6: Heat the Oil
Pour the frying oil into a large, heavy-bottomed pot or Dutch oven, ensuring it’s about 2-3 inches deep. Heat the oil over medium-high heat until it reaches 350-375°F (175-190°C). You can use a thermometer, or test a small pinch of flour – if it sizzles vigorously and turns golden in a few seconds, it’s ready.
Small tip: Use a thermometer for best results. Too low, and the fish will be greasy; too high, and it will burn before cooking through.
-
Step 7: Fry the Fish
Carefully lower 2-3 pieces of coated fish into the hot oil, making sure not to overcrowd the pot. Fry for 3-5 minutes per side, or until the fish is golden brown and cooked through. The internal temperature should reach 145°F (63°C). Flip gently halfway through cooking.
Small tip: Do not overcrowd the pan. Frying in batches helps maintain the oil temperature, resulting in crispier fish.
-
Step 8: Drain and Serve
Once cooked, carefully remove the fish from the oil using a slotted spoon or tongs. Place it on a wire rack set over a baking sheet lined with paper towels to drain any excess oil. Season immediately with a pinch of extra salt if desired. Repeat with the remaining fish. Serve hot with lemon wedges and your favorite sides!
Small tip: Draining on a wire rack helps keep the crust crispy, unlike draining directly on paper towels.
Tips & Variations
- Gluten-Free Option: Easily make this recipe gluten-free by swapping the all-purpose flour for a 1:1 gluten-free flour blend. Ensure your other ingredients like spices are also certified gluten-free.
- Vegan/Vegetarian Option: This recipe can be adapted! Use thick slices of firm tofu or halloumi cheese instead of fish. Marinate in plant-based milk and lemon, then coat and fry as directed. You can also use large portobello mushroom caps.
- Add More Vegetables or Protein: Serve alongside a vibrant coleslaw, roasted asparagus, or a fresh green salad for a complete meal. You can also add some shrimp or calamari to the fryer for a mixed seafood platter.
- Spicy Version: For an extra kick, increase the cayenne pepper in the coating to 1 teaspoon, or add a pinch of chili flakes. A dash of your favorite hot sauce in the milk soak can also add a subtle heat.
- Flavor Tip: Herbaceous Twist: Add dried dill, parsley, or oregano to your dry coating mixture for an aromatic boost. A tablespoon of Old Bay seasoning also makes a fantastic addition.
Nutritional Information
Approximate values per serving (based on 4 servings):
- Calories: 480-550 kcal
- Protein: 35-40g
- Carbohydrates: 30-35g
- Fat: 25-30g
Note: Values may vary significantly depending on the type of fish, amount of oil absorbed during frying, and specific ingredients used.
Health Benefits
This fried fish recipe isn’t just delicious; it also brings some great health benefits, thanks to its star ingredient!
Lean Protein Powerhouse: White fish like cod or tilapia is an excellent source of lean protein. Protein is essential for building and repairing tissues, making enzymes and hormones, and supporting overall body function. It also helps you feel full and satisfied, which can aid in weight management.
Omega-3 Fatty Acids (in moderation): While not as high in Omega-3s as fatty fish like salmon, white fish still provides some beneficial fatty acids. Omega-3s are crucial for heart health, reducing inflammation, and supporting brain function. Even small amounts contribute to your daily intake.
Rich in Essential Nutrients: Fish is packed with important vitamins and minerals. It’s a good source of B vitamins, especially B12 and B6, which are vital for energy metabolism and nervous system health. You’ll also get minerals like phosphorus, selenium, and potassium, which play roles in bone health, antioxidant defense, and blood pressure regulation.
Antioxidant Boost: Ingredients like lemon juice, garlic powder, and smoked paprika add flavor and natural antioxidants. These compounds help protect your cells from damage caused by free radicals, contributing to overall health and well-being. The baking powder helps lighten the coating, making the dish feel less heavy.
Serving Suggestions
- Classic Comfort: Serve with a side of homemade coleslaw and crispy French fries for a traditional fish and chips experience.
- Light & Fresh: Pair with a vibrant green salad tossed in a lemon vinaigrette and some steamed green beans.
- Taco Tuesday Twist: Flake the fried fish and use it as the star filling for fish tacos, topped with shredded cabbage, a creamy sauce, and fresh salsa.
- Meal Prep Idea: Fry a larger batch of fish, let it cool completely, and store it in an airtight container. Reheat in an air fryer or oven for a quick meal.
Storage Tips
Leftover fried fish can be stored in an airtight container in the refrigerator for up to 2-3 days. For best results, it’s not recommended to freeze fried fish as the crispy coating can become soggy upon reheating. To reheat, place the fish on a baking sheet and warm in an oven preheated to 375°F (190°C) for 10-15 minutes, or until heated through and crispy again. An air fryer also works wonderfully for reheating, bringing back that perfect crunch in just a few minutes.
Conclusion
There you have it – the ultimate recipe for “Fried Fish That Doesn’t Taste Fishy Finally Right!” This dish truly delivers on its promise of a perfectly crispy, flavorful, and incredibly tender fish experience. The simple trick of soaking the fish in milk and lemon juice makes all the difference, ensuring a clean, fresh taste every time.
Don’t be intimidated by frying fish at home. With our clear, step-by-step instructions and helpful tips, you’ll be a fried fish master in no time. It’s a quick and satisfying meal that feels special, even on a busy weeknight.
So, gather your ingredients, follow our guide, and get ready to enjoy the best fried fish you’ve ever made. Share this delightful dish with your family and friends, and watch their faces light up with every delicious bite. Happy cooking!


