
Introduction
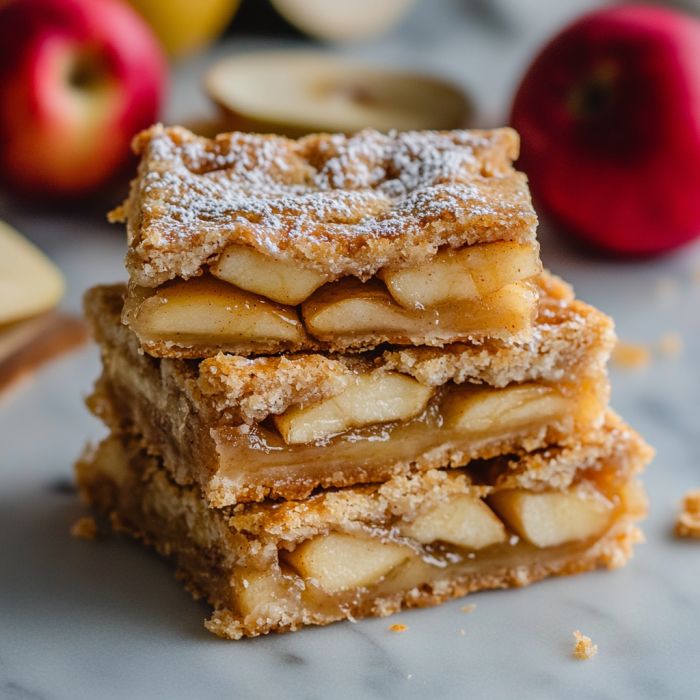
Imagine the comforting taste of homemade apple pie, but in a convenient, easy-to-eat bar form. That’s exactly what our Flaky Apple Pie Bars deliver! They feature a buttery, flaky crust that cradles a sweet, spiced apple filling. Each bite is a little piece of heaven, perfect for any time of day.
You might think baking a pie is complicated, but these bars are surprisingly simple. The crust comes together quickly in a food processor, and the apple filling requires minimal prep. No fussy crimping or intricate lattice work needed! Just press, fill, bake, and enjoy.
So, get ready to fill your kitchen with the irresistible aroma of cinnamon and baked apples. These bars are a guaranteed crowd-pleaser and a joy to make. We can’t wait for you to try this delightful recipe!
Cooking Time & Prep Time
- Prep Time: 30 minutes
- Cooking Time: 45-50 minutes
- Total Time: 75-80 minutes (plus cooling time)
Small tip: You can peel and slice your apples while the crust chills. This helps save time and keeps your workflow smooth.
Ingredients
This recipe makes 16 delicious bars.
For the Flaky Crust
- 2 ½ cups all-purpose flour
- 1 teaspoon granulated sugar
- ½ teaspoon salt
- 1 cup (2 sticks) unsalted butter, very cold and cut into ½-inch cubes
- ½ cup ice water (or more, as needed)
For the Apple Filling
- 6 medium apples (about 2 ½ pounds), such as Granny Smith, Honeycrisp, or Fuji, peeled, cored, and thinly sliced
- ½ cup granulated sugar (adjust based on apple sweetness)
- ¼ cup packed light brown sugar
- 2 tablespoons all-purpose flour
- 1 teaspoon ground cinnamon
- ¼ teaspoon ground nutmeg
- ⅛ teaspoon ground cloves (optional)
- 1 tablespoon fresh lemon juice
For the Glaze
- 1 cup powdered sugar
- 2-3 tablespoons milk (any kind)
- ½ teaspoon vanilla extract
Step-by-Step Instructions
-
Step 1: Prepare the Crust Dough
In a large food processor, combine the flour, granulated sugar, and salt. Pulse a few times to mix. Add the cold, cubed butter and pulse until the mixture resembles coarse crumbs with some pea-sized pieces of butter remaining.
Small tip: Keeping the butter very cold is key to a flaky crust. Don’t overmix!
-
Step 2: Add Ice Water to Dough
With the food processor running, slowly add the ice water through the feed tube, a tablespoon at a time. Stop adding water as soon as the dough begins to come together. It should be shaggy but hold together when squeezed.
Small tip: Avoid adding too much water. The dough should not be sticky.
-
Step 3: Chill the Dough
Divide the dough in half. Shape each half into a flat disk, wrap tightly in plastic wrap, and refrigerate for at least 30 minutes. Chilling helps the butter solidify and makes the dough easier to roll.
Small tip: You can chill the dough for up to 2 days, or freeze for longer storage.
-
Step 4: Prepare the Apple Filling
In a large bowl, combine the peeled, cored, and thinly sliced apples. Add the granulated sugar, brown sugar, flour, cinnamon, nutmeg, cloves (if using), and lemon juice. Toss gently until the apples are evenly coated.
Small tip: Use a mix of sweet and tart apples for the best flavor balance.
-
Step 5: Preheat Oven and Prepare Pan
Preheat your oven to 375°F (190°C). Lightly grease a 9×13-inch baking pan, then line it with parchment paper, leaving an overhang on the sides. This makes it easy to lift the bars out later.
Small tip: The parchment paper overhang is a lifesaver for clean removal and cutting.
-
Step 6: Roll Out the Bottom Crust
On a lightly floured surface, roll out one disk of chilled dough into a 9×13-inch rectangle. Carefully transfer the dough to the prepared baking pan, pressing it gently into the bottom and up the sides. Trim any excess dough.
Small tip: If the dough cracks, just press it together with your fingers. It will be fine!
-
Step 7: Add the Apple Filling
Pour the apple filling evenly over the bottom crust in the pan. Spread the apples out so they form a relatively flat layer. Ensure there are no large gaps.
Small tip: Try to keep the apple layer as even as possible for uniform baking.
-
Step 8: Add the Top Crust
Roll out the second disk of dough into another 9×13-inch rectangle. Carefully place it over the apple filling. Pinch the edges of the top and bottom crusts together to seal them. Cut a few slits on top of the crust to allow steam to escape.
Small tip: For a rustic look, you can cut the top crust into strips and create a lattice.
-
Step 9: Bake the Bars
Bake for 45-50 minutes, or until the crust is golden brown and the apples are tender. You might see some bubbling filling. Let the bars cool completely in the pan on a wire rack before glazing.
Small tip: Cooling completely is crucial before cutting, otherwise the bars might crumble.
-
Step 10: Prepare and Apply the Glaze
Once the bars are completely cool, whisk together the powdered sugar, milk, and vanilla extract in a small bowl until smooth. Drizzle the glaze evenly over the cooled bars. Let the glaze set for about 15-20 minutes before cutting into squares.
Small tip: Adjust milk quantity to achieve your desired glaze consistency – thicker or thinner.
Tips & Variations
- Gluten-Free Option: Substitute the all-purpose flour in the crust and filling with a 1:1 gluten-free baking flour blend. Ensure your blend contains xanthan gum for best results.
- Vegan Option: Use a plant-based butter substitute (like Earth Balance sticks) for the crust. For the glaze, use plant-based milk (almond, soy, or oat). Ensure your sugar is vegan-friendly (some are processed with bone char).
- Nutritional Boost: For added fiber and nutrients, replace up to ½ cup of all-purpose flour in the crust with whole wheat flour or finely ground rolled oats. You can also sprinkle chopped walnuts or pecans over the apple filling before adding the top crust.
- Spicy Twist: Add a tiny pinch (⅛ teaspoon) of cayenne pepper or a small amount of freshly grated ginger to the apple filling. This subtle heat will beautifully complement the sweet apples and warm spices.
- Caramel Apple Bars: Drizzle about ½ cup of store-bought or homemade caramel sauce over the apple filling before adding the top crust. This creates a decadent caramel apple flavor.
Nutritional Information
Approximate values per serving (based on 16 servings):
- Calories: 320
- Protein: 3g
- Carbohydrates: 48g
- Fat: 14g
Note: Nutritional values may vary depending on specific ingredients used and portion sizes.
Health Benefits
These Flaky Apple Pie Bars, while a delightful treat, also offer some health benefits from their main ingredients.
Apples are a fantastic source of dietary fiber, particularly soluble fiber, which aids in digestion and can help regulate blood sugar levels. They are also rich in Vitamin C, an antioxidant important for immune function, and various other antioxidants that protect your cells from damage.
The cinnamon used in the filling isn’t just for flavor. It’s known for its powerful antioxidant properties and has been studied for its potential to help lower blood sugar levels and improve insulin sensitivity. A little goes a long way in adding both flavor and wellness.
While butter and sugar should be enjoyed in moderation, the natural goodness of apples makes this dessert a more wholesome choice than some others. The whole grains in the flour (especially if you opt for whole wheat) contribute additional fiber and B vitamins.
Enjoying homemade treats like these bars can also contribute to mental well-being. The act of baking and sharing food can reduce stress and foster connections with loved ones.
Serving Suggestions
- Serve warm with a scoop of vanilla bean ice cream or a dollop of whipped cream for a classic dessert experience.
- Enjoy them chilled as a delightful afternoon snack with a cup of coffee or tea.
- Cut into smaller squares and arrange on a platter for an easy-to-serve party dessert.
- For a breakfast treat, warm a bar slightly and serve with a side of plain Greek yogurt for added protein.
Storage Tips
Store leftover Flaky Apple Pie Bars in an airtight container at room temperature for up to 2 days, or in the refrigerator for up to 5 days. You can also freeze the cooled, unglazed bars for up to 3 months. Wrap them tightly in plastic wrap, then foil, before freezing. To reheat, thaw in the refrigerator overnight (if frozen) and then warm gently in a microwave or a 300°F (150°C) oven until heated through. If glazed, reheating in the oven might melt the glaze slightly.
Conclusion
There you have it – a truly irresistible recipe for Flaky Apple Pie Bars that brings all the joy of apple pie without the fuss. The combination of the tender, spiced apples and the perfectly flaky crust is simply magical. It’s a comforting dessert that feels special, yet is so approachable to make.
We truly hope you’ll give these bars a try in your own kitchen. They are perfect for family gatherings, potlucks, or just a cozy evening at home. The aroma alone is enough to brighten any day!
So go ahead, bake a batch, and share the deliciousness with your loved ones. These Flaky Apple Pie Bars are bound to become a new favorite in your recipe collection. Happy baking!


