
Introduction
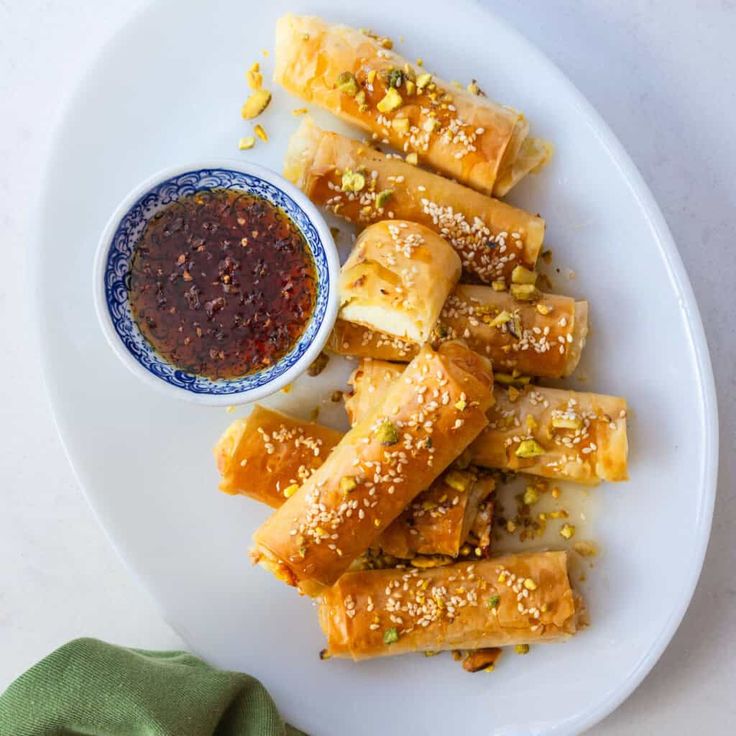
Get ready to discover your new favorite appetizer or light meal! These Feta Phyllo Pockets are an absolute dream. Imagine delicate, crispy layers of golden phyllo dough, encasing a warm, creamy, and tangy cheese filling. It’s a delightful dance of textures and flavors that will impress everyone.
What makes this recipe truly special is how incredibly easy and quick it is to prepare. You don’t need any fancy chef skills. With just a few simple ingredients and straightforward steps, you can create these gourmet-looking pockets in no time. They are perfect for last-minute guests or a comforting weeknight treat.
So, whether you’re a seasoned home cook or just starting your culinary journey, this recipe is for you. It’s a guaranteed crowd-pleaser that brings a touch of Mediterranean sunshine to your table. Let’s dive in and make some delicious Feta Phyllo Pockets!
Cooking Time & Prep Time
- Prep Time: 25 minutes
- Cooking Time: 20-25 minutes
- Total Time: 45-50 minutes
Small tip: Always read through the entire recipe before you start. This helps you organize your ingredients and understand the flow, making the process even smoother.
Ingredients
This recipe makes approximately 12 delicious Feta Phyllo Pockets.
- 12 sheets (approx. half a 1 lb package) frozen phyllo dough, thawed
- 8 ounces (about 1 ½ cups) crumbled feta cheese
- 4 ounces (½ cup) cream cheese, softened
- 1 large egg
- 2 tablespoons fresh dill, finely chopped
- 2 tablespoons fresh parsley, finely chopped
- ¼ teaspoon black pepper
- Pinch of salt (optional, feta is salty)
- ½ cup unsalted butter, melted
- 2 tablespoons olive oil
Step-by-Step Instructions
-
Step 1: Prepare Your Workspace and Oven
Preheat your oven to 375°F (190°C). Line a large baking sheet with parchment paper. This prevents sticking and makes cleanup a breeze. Have all your ingredients measured and ready to go.
Small tip: Make sure your oven is fully preheated before baking to ensure even cooking and golden-brown pockets.
-
Step 2: Thaw the Phyllo Dough
If your phyllo dough is still frozen, place the package in the refrigerator overnight to thaw. If you’re short on time, you can thaw it at room temperature for about 2-3 hours. Carefully unroll the phyllo dough and keep it covered with a damp kitchen towel. This prevents it from drying out and becoming brittle.
Small tip: Phyllo dries out very quickly! Always keep the sheets you’re not actively working with covered with a slightly damp cloth or plastic wrap.
-
Step 3: Create the Creamy Cheese Filling
In a medium bowl, combine the crumbled feta cheese, softened cream cheese, and the large egg. Add the finely chopped fresh dill and parsley. Season with black pepper. You likely won’t need much salt, as feta is quite salty on its own. Mix everything together until it’s well combined and creamy.
Small tip: Ensure your cream cheese is softened to room temperature. This makes it much easier to mix into a smooth, lump-free filling.
-
Step 4: Prepare the Butter and Oil Mixture
In a small bowl, melt the unsalted butter. Stir in the olive oil. This mixture will be used to brush between the phyllo layers, giving them that beautiful golden crispiness. Have a pastry brush handy for this step.
Small tip: The combination of butter and olive oil adds both flavor and helps the phyllo become extra crispy without burning too quickly.
-
Step 5: Assemble the Phyllo Layers
Carefully lay one sheet of phyllo dough on your clean work surface. Brush it lightly but entirely with the butter and olive oil mixture. Place a second sheet of phyllo directly on top of the first one. Brush this second sheet with the butter mixture as well. Repeat this process for a third sheet, brushing it with butter. You now have a stack of three buttered phyllo sheets.
Small tip: Don’t over-saturate the phyllo with butter; a light, even brush is all you need for crispiness. Too much can make it greasy.
-
Step 6: Fill and Fold the Pockets
Spoon about 2 tablespoons of the creamy cheese filling onto one end of the stacked phyllo sheets. Leave a small border around the edges. Fold the long sides of the phyllo inward over the filling, about 1 inch on each side. Then, starting from the end with the filling, roll the phyllo tightly into a neat pocket, like a spring roll.
Small tip: Don’t overfill the pockets, or the cheese might leak out during baking. A modest amount ensures a perfect seal.
-
Step 7: Repeat and Arrange
Repeat steps 5 and 6 with the remaining phyllo sheets and cheese filling. You will make approximately 12 pockets. As you finish each pocket, gently place it seam-side down on your prepared baking sheet. Leave a little space between each pocket for even baking.
Small tip: Work efficiently but gently with the phyllo. If it tears, just patch it up with another small piece and a little butter. It will still bake beautifully!
-
Step 8: Final Brush and Bake
Once all the pockets are assembled and on the baking sheet, brush the tops of each pocket with any remaining butter and olive oil mixture. This ensures a beautiful golden-brown finish. Place the baking sheet in the preheated oven and bake for 20-25 minutes, or until the phyllo is golden brown and delightfully crispy.
Small tip: Keep an eye on the pockets towards the end of baking, as ovens can vary. You want them golden, not burnt!
-
Step 9: Cool and Serve
Carefully remove the baking sheet from the oven. Let the Feta Phyllo Pockets cool on the baking sheet for a few minutes before serving. This allows the cheese filling to set slightly and prevents burns. Serve them warm and enjoy!
Small tip: These pockets are best enjoyed warm, when the phyllo is at its crispiest and the cheese filling is wonderfully gooey.
Tips & Variations
- Gluten-Free Option: While traditional phyllo dough contains gluten, some specialty stores now carry gluten-free phyllo. Alternatively, you could try a similar filling baked in individual ramekins or as a rustic “crustless” pie.
- Vegan/Vegetarian Option: This recipe is already vegetarian! To make it vegan, simply use plant-based phyllo dough (many brands are naturally vegan), a good quality vegan feta, and vegan cream cheese. Substitute the egg with a flax egg (1 tbsp ground flaxseed + 3 tbsp water, let sit for 5 mins) or simply omit it, as the cream cheese will help bind the filling.
- Add More Vegetables or Protein: For extra nutrition and flavor, sauté some finely chopped spinach, leeks, or sun-dried tomatoes and mix them into the cheese filling. Cooked, shredded chicken or crumbled cooked sausage would also make a delicious protein boost.
- Spicy Version: If you love a little kick, add a pinch or two of red pepper flakes to the cheese filling. A dash of hot sauce can also be mixed in for an extra layer of heat.
- Flavor Boosters: A teaspoon of lemon zest in the cheese filling brightens the flavors beautifully. You can also experiment with other fresh herbs like mint or oregano. For an extra touch, sprinkle some sesame seeds or nigella seeds on top of the pockets before baking.
Nutritional Information
Approximate values per serving (based on 12 servings):
- Calories: 220
- Protein: 7g
- Carbohydrates: 15g
- Fat: 15g
Please note that these values are approximate and may vary depending on the specific brands and exact quantities of ingredients used.
Health Benefits
These Feta Phyllo Pockets offer more than just deliciousness. They also pack some healthy benefits!
Feta Cheese: Feta is a good source of protein, which is essential for building and repairing tissues. It’s also rich in calcium, crucial for strong bones and teeth, and contains probiotics that can support gut health.
Phyllo Dough: Compared to other pastries like puff pastry, phyllo dough is relatively low in fat. Its thin layers mean you get a satisfying crunch with fewer calories than heavier doughs.
Fresh Herbs (Dill & Parsley): Dill and parsley are more than just garnishes. They are packed with vitamins and antioxidants. Parsley is an excellent source of Vitamin K, Vitamin C, and Vitamin A, while dill offers Vitamin A and manganese, all contributing to overall well-being.
Eggs: Eggs are a complete protein source, providing all nine essential amino acids. They are also rich in vitamins D and B12, as well as choline, which is important for brain health.
Serving Suggestions
- As an Appetizer: Serve these warm Feta Phyllo Pockets with a side of cool tzatziki sauce or a simple Greek yogurt dip for a refreshing contrast.
- Light Lunch or Brunch: Pair them with a fresh, crisp green salad dressed with a light vinaigrette. They make a satisfying and elegant lunch option.
- Side Dish: These pockets can also complement a grilled chicken or fish main course beautifully, adding a unique texture and flavor.
- Meal Prep Idea: You can assemble the pockets ahead of time and freeze them unbaked. Arrange them on a baking sheet and freeze until solid, then transfer to a freezer-safe bag. Bake from frozen, adding about 5-10 minutes to the cooking time.
Storage Tips
Leftover Feta Phyllo Pockets can be stored in an airtight container in the refrigerator for up to 3-4 days. For reheating, the best method is to place them on a baking sheet in a preheated oven at 350°F (175°C) for 10-15 minutes, or until heated through and crispy again. Microwaving is not recommended as it will make the phyllo soggy.
Conclusion
There you have it – a truly delicious and surprisingly simple recipe for Feta Phyllo Pockets! These golden, crispy parcels of creamy, tangy cheese are guaranteed to be a hit. The combination of textures and the fresh herb flavors make them utterly irresistible.
Don’t be intimidated by phyllo dough; with our easy-to-follow steps and helpful tips, you’ll be a pro in no time. This recipe is perfect for those moments when you want something special without spending hours in the kitchen.
So go ahead, gather your ingredients, and whip up a batch of these amazing pockets. Share them with your family and friends, or simply enjoy them all to yourself. Happy cooking!


