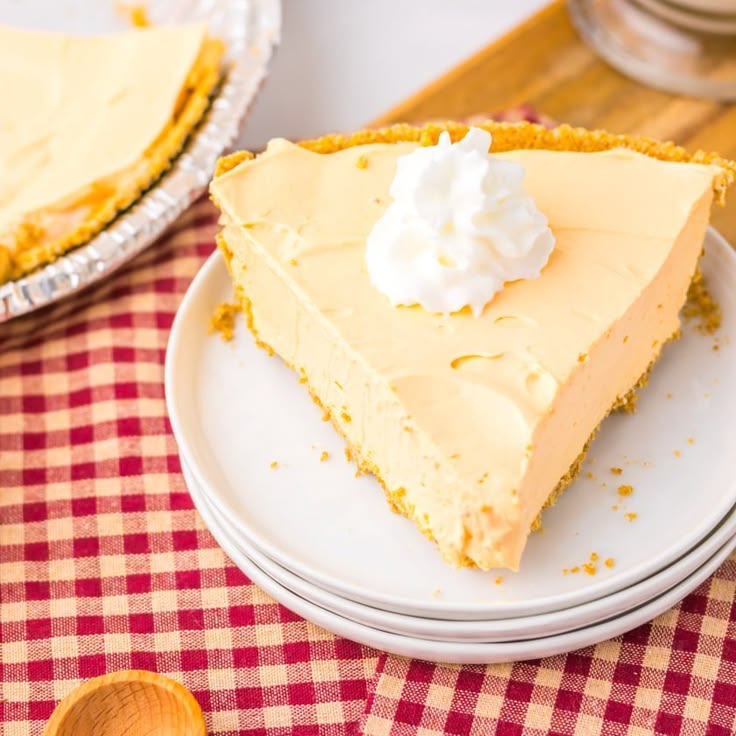

Easy Kool Aid Pie Recipe No Bake Dessert
Introduction
Get ready for a burst of sunshine and nostalgia with our unbelievably easy Kool-Aid Pie! This no-bake dessert is a true classic, bringing vibrant color and tangy-sweet flavor to your table. It’s wonderfully creamy, delightfully refreshing, and guaranteed to put a smile on everyone’s face, making it the perfect treat for any occasion.
What makes this pie so special? It’s the ultimate hassle-free dessert. You don’t need to turn on your oven, and the ingredient list is short and sweet. With just a few simple steps, you’ll create a show-stopping pie that tastes like pure joy. It’s perfect for busy days, summer gatherings, or whenever you crave something deliciously simple.
So, whether you’re a seasoned baker or a kitchen novice, this Kool-Aid Pie recipe is calling your name. It’s fun to make, even more fun to eat, and incredibly customizable. Let’s dive in and create some sweet memories together!
Cooking Time & Prep Time
- Prep Time: 15 minutes
- Cooking Time: 0 minutes
- Chilling Time: 4 hours (minimum)
- Total Time: 4 hours 15 minutes
Small tip: The chilling time is crucial for this no-bake pie to set perfectly. Don’t rush it! A well-chilled pie will slice beautifully and have the best creamy texture.
Ingredients
This recipe makes 8 servings.
- For the Pie:
- 1 (9-inch) graham cracker pie crust (store-bought or homemade)
- 1 (14-ounce) can sweetened condensed milk
- 1 (8-ounce) container frozen whipped topping, thawed (like Cool Whip)
- 2 (0.13-ounce) packets unsweetened Kool-Aid drink mix (your favorite flavor, e.g., cherry, strawberry, lemon)
- Optional Garnish:
- Fresh berries (strawberries, raspberries)
- Extra whipped cream
- Lemon or lime zest
Step-by-Step Instructions
-
Step 1: Gather Your Ingredients
Before you begin, make sure all your ingredients are ready. Thaw your whipped topping in the refrigerator for a few hours or on the counter for about 30 minutes until it’s soft but still cold. This ensures it blends smoothly into the mixture.
Small tip: Having everything at room temperature (except the whipped topping) can sometimes help with mixing, but for this recipe, the cold whipped topping is key for structure.
-
Step 2: Prepare the Pie Crust
If you’re using a store-bought graham cracker crust, simply unwrap it and set it aside. If you’re making your own, ensure it’s fully cooled and set before adding the filling. A sturdy crust is important to hold the creamy pie filling.
Small tip: For an extra flavorful crust, you can mix a teaspoon of sugar and a pinch of cinnamon into your graham cracker crumbs before pressing them into the pie plate.
-
Step 3: Combine Condensed Milk and Kool-Aid
In a large mixing bowl, pour in the entire can of sweetened condensed milk. Open both packets of your chosen unsweetened Kool-Aid drink mix and sprinkle the powder over the condensed milk. Use a whisk or a rubber spatula to mix these two ingredients together thoroughly.
Keep mixing until the Kool-Aid powder is completely dissolved and the mixture has a uniform, vibrant color. It will look quite thick and bright at this stage.
-
Step 4: Fold in the Whipped Topping
Gently add the thawed whipped topping to the Kool-Aid and condensed milk mixture. Using a rubber spatula, carefully fold the whipped topping into the colorful base. The goal is to incorporate it without deflating the airiness of the whipped topping.
Continue folding until no streaks of white whipped topping remain and the mixture is light, fluffy, and evenly colored. This step creates the characteristic creamy texture of the pie.
Small tip: Fold gently! Overmixing can make the pie less airy and creamy. Use a “cut and fold” motion from the bottom up.
-
Step 5: Pour into the Crust
Carefully spoon or pour the entire pie filling mixture into your prepared graham cracker crust. Use your spatula to gently spread the filling evenly across the bottom and up to the edges of the crust. Make sure the top is smooth and appealing.
-
Step 6: Chill Until Set
Cover the pie loosely with plastic wrap or aluminum foil. Place the pie in the refrigerator and chill for at least 4 hours. For best results and a firmer set, chilling overnight is even better.
This crucial chilling time allows the ingredients to meld together and the pie to firm up, making it easy to slice and serve.
-
Step 7: Garnish and Serve
Once your Kool-Aid pie is fully chilled and set, remove it from the refrigerator. If desired, garnish with fresh berries, a dollop of extra whipped cream, or a sprinkle of citrus zest to complement the flavor. Slice into generous wedges and serve immediately to enjoy this delightful, no-bake treat!
Tips & Variations
- Gluten-Free Option: Easily make this pie gluten-free by using a certified gluten-free graham cracker crust. Many brands now offer this convenient option.
- Vegan/Vegetarian Option: To make this pie vegan, use a vegan graham cracker crust, a plant-based sweetened condensed milk (often made from coconut or oat milk), and a dairy-free whipped topping. Ensure your Kool-Aid packets do not contain animal-derived ingredients (most are vegan, but always check).
- Adding More Fruit or Fiber: While this is a dessert, you can certainly boost its nutritional profile slightly. Serve each slice with a generous side of fresh berries (strawberries, blueberries, raspberries) for added vitamins, antioxidants, and dietary fiber. A sprinkle of chopped nuts like almonds or walnuts on top can also add a touch of protein and healthy fats.
- Spicy Version (Not Recommended): A “spicy” Kool-Aid pie isn’t really a thing, as the flavors would clash dramatically! However, if you want to add a little “zing,” consider using a lemon or lime Kool-Aid and adding a teaspoon of fresh citrus zest to the filling for an extra bright, tangy kick.
- Flavor Fun: The beauty of Kool-Aid pie is its versatility! Try different Kool-Aid flavors like grape, blue raspberry, or orange. You can even combine two flavors for a unique swirl. Add a teaspoon of vanilla extract or a complementary fruit extract (like strawberry extract with strawberry Kool-Aid) for an extra layer of flavor.
- Mini Pies: For individual servings, use mini graham cracker crusts or press graham cracker crumbs into muffin tins lined with paper liners. Reduce chilling time slightly if using smaller portions.
Nutritional Information
Approximate values per serving (based on 8 servings):
- Calories: 350-400 kcal
- Protein: 3-5 g
- Carbohydrates: 50-60 g
- Fat: 15-20 g
Note: These values are approximate and can vary significantly based on the specific brands and amounts of ingredients used, especially the type of crust and whipped topping.
Health Benefits
While Kool-Aid Pie is undeniably a treat, we can still find some small benefits in its components, especially when enjoyed in moderation:
- Dairy Goodness (from Sweetened Condensed Milk): Sweetened condensed milk is a dairy product, which means it contributes calcium and Vitamin D (if fortified) to your diet. Calcium is essential for strong bones and teeth, while Vitamin D helps with calcium absorption.
- Whole Grains (from Graham Cracker Crust): Many graham cracker crusts contain whole wheat flour. While not a significant source, this offers a small amount of dietary fiber, which is beneficial for digestive health.
- Mood Booster: Sometimes, the best health benefit comes from pure enjoyment! Indulging in a delicious, vibrant dessert like Kool-Aid Pie can boost your mood, reduce stress, and create feelings of happiness and nostalgia. Emotional well-being is a vital part of overall health.
- Hydration (Minimal): While not a primary source, the moisture content in the pie contributes minimally to your overall fluid intake.
- Vitamins from Garnish: If you choose to garnish your pie with fresh fruit like berries, you’re adding a healthy dose of vitamins (like Vitamin C), antioxidants, and fiber, enhancing the nutritional value of your serving.
Serving Suggestions
- Serve chilled as a delightful dessert after any meal, especially light summer lunches or dinners.
- Perfect for potlucks, BBQs, birthday parties, or any gathering where you need a quick, crowd-pleasing treat.
- Pair with a scoop of vanilla ice cream for an extra indulgent experience.
- Offer a bowl of mixed fresh berries on the side for a beautiful color contrast and a light, fruity counterpoint.
- Drizzle with a contrasting fruit sauce, like a raspberry coulis for lemon pie, or a chocolate sauce for a cherry pie.
Storage Tips
This Easy Kool-Aid Pie keeps wonderfully in the refrigerator. Cover it loosely with plastic wrap or aluminum foil and it will stay fresh for 3-4 days. For longer storage, you can freeze the pie! Wrap it tightly in plastic wrap, then an additional layer of aluminum foil, and it will keep well in the freezer for up to 1 month. To enjoy, simply thaw in the refrigerator overnight. This pie is meant to be served chilled; no reheating is necessary or recommended.
Conclusion
And there you have it – your very own Easy Kool-Aid Pie! This dessert is truly a winner, offering incredible flavor, vibrant color, and undeniable fun with minimal effort. It’s the perfect blend of tangy and sweet, creamy and refreshing, making it an instant favorite for kids and adults alike.
Whether you’re looking for a quick weeknight treat or a show-stopping dish for your next get-together, this no-bake pie delivers every time. Its simplicity means you can spend less time in the kitchen and more time enjoying the moments that matter.
So go ahead, pick your favorite Kool-Aid flavor and whip up a batch of this delightful pie. Share it with your family, bring it to a friend’s house, or simply enjoy a slice (or two!) all to yourself. Happy baking (or rather, no-baking)!


