
Introduction
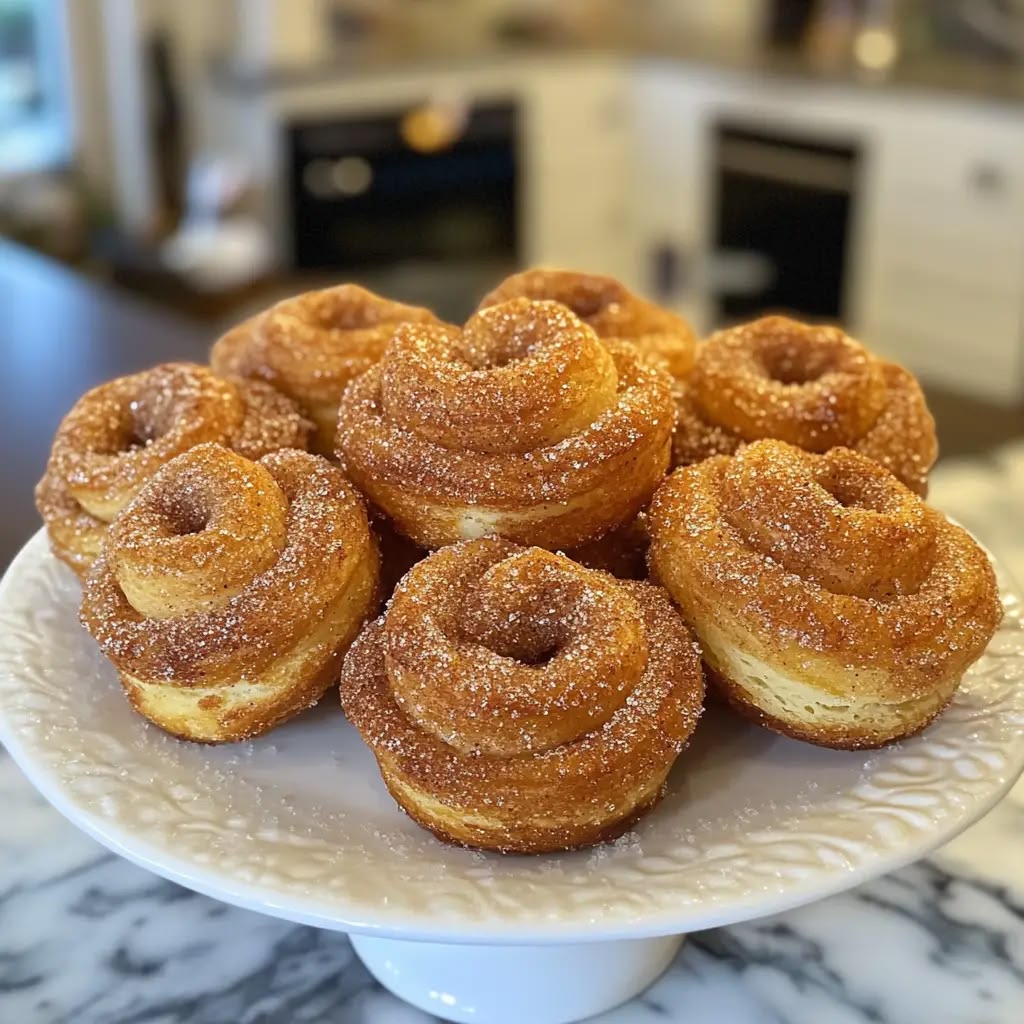
Get ready to discover your new favorite treat: Cruffins with Cinnamon! Imagine the flaky, buttery layers of a croissant baked in the shape of a muffin. Then, picture it generously swirled with warm, aromatic cinnamon sugar. It’s a delightful pastry that offers the best of both worlds, creating a truly irresistible experience with every bite.
You might think making something so elegant is complicated, but I promise it’s simpler than you imagine. This recipe breaks down the process into easy-to-follow steps. We’re going to use a clever technique that makes creating those beautiful layers achievable for any home baker. No fancy equipment needed, just a little patience and a lot of love.
So, clear your kitchen counter and get ready to bake some magic. These cinnamon cruffins are perfect for a special breakfast, a cozy brunch, or a wonderful dessert. They’re guaranteed to impress your family and friends, or simply make your own day a little sweeter. Let’s get baking!
Cooking Time & Prep Time
- Prep Time: 90 minutes (includes chilling time)
- Cooking Time: 25 minutes
- Total Time: 115 minutes
Small tip: The prep time includes several chilling stages. Don’t rush these steps; they are crucial for achieving the perfect flaky texture. You can even prepare the dough the day before and finish baking the next morning!
Ingredients
This recipe makes 12 delicious cruffins.
For the Dough:
- 2 ½ cups (300g) all-purpose flour, plus more for dusting
- ¼ cup (50g) granulated sugar
- 1 teaspoon instant dry yeast
- ½ teaspoon salt
- ½ cup (120ml) warm milk (about 105-115°F / 40-46°C)
- ¼ cup (60ml) warm water
- 1 large egg, room temperature
- 2 tablespoons unsalted butter, melted and cooled
For the Butter Layers:
- ½ cup (113g) unsalted butter, softened
For the Cinnamon Sugar Filling:
- ½ cup (100g) granulated sugar
- 2 tablespoons ground cinnamon
For the Glaze (Optional):
- 1 cup (120g) powdered sugar
- 2-3 tablespoons milk or water
- ¼ teaspoon vanilla extract
Step-by-Step Instructions
-
Step 1: Prepare the Dough
In a large bowl, whisk together the flour, granulated sugar, yeast, and salt. In a separate bowl, combine the warm milk, warm water, egg, and melted butter. Pour the wet ingredients into the dry ingredients and mix with a spoon until a shaggy dough forms.
Small tip: Ensure your milk and water are warm, not hot, to activate the yeast without killing it.
-
Step 2: Knead the Dough
Turn the dough out onto a lightly floured surface. Knead for 5-7 minutes until it’s smooth and elastic. It should spring back when you gently poke it. Place the dough in a lightly oiled bowl, cover with plastic wrap, and let it rise in a warm place for 1 hour, or until doubled in size.
-
Step 3: Chill the Dough
Once risen, gently punch down the dough to release the air. Place it back in the bowl, cover tightly with plastic wrap, and refrigerate for at least 30 minutes. This chilling makes the dough easier to handle for lamination.
-
Step 4: Prepare the Butter for Lamination
While the dough chills, place the softened butter (½ cup) between two sheets of parchment paper. Roll it out into an 8×8 inch square. Place this butter square in the refrigerator to chill until firm but still pliable.
Small tip: The butter and dough should be similar in consistency for best layering. If the butter is too cold, it will break; if too warm, it will melt into the dough.
-
Step 5: First Fold (Single Turn)
On a lightly floured surface, roll the chilled dough into a 16×16 inch square. Place the chilled butter square in the center of the dough. Fold one side of the dough over the butter, then the other side, overlapping slightly, to completely enclose the butter. Pinch the seams to seal.
-
Step 6: First Roll and Fold
Gently roll the dough into a long rectangle, about 18×8 inches. Fold the dough into thirds, like a letter: fold one end to the center, then fold the other end over it. This is your first “turn.” Wrap the dough tightly in plastic wrap and refrigerate for 30 minutes.
-
Step 7: Second Roll and Fold
Repeat Step 6: take the dough out, place it on a lightly floured surface with the folded edge facing you. Roll it into an 18×8 inch rectangle again, fold into thirds, wrap, and refrigerate for another 30 minutes.
Small tip: Always dust your surface lightly. Too much flour can make the dough tough.
-
Step 8: Prepare the Cinnamon Sugar
While the dough chills for its final turn, combine the ½ cup granulated sugar and 2 tablespoons ground cinnamon in a small bowl. Stir well to mix evenly. Set aside.
-
Step 9: Shape the Cruffins
After the final chilling, roll the dough into a large rectangle, approximately 20×12 inches and about ⅛ inch thick. Sprinkle the cinnamon sugar mixture evenly over the entire surface of the dough, leaving a small border on one long edge.
-
Step 10: Roll and Cut
Starting from one long edge, tightly roll the dough into a log. Using a sharp knife, cut the log into 12 equal slices, each about 1 to 1.5 inches thick. You should see beautiful cinnamon swirls.
-
Step 11: Final Shaping and Proofing
Lightly grease a 12-cup muffin tin. Take each cruffin slice and gently place it into a muffin cup. Cover the muffin tin loosely with plastic wrap and let the cruffins rise in a warm place for about 30-45 minutes, or until visibly puffy.
Small tip: Don’t let them over-proof, or they might lose their flaky layers during baking.
-
Step 12: Bake the Cruffins
Preheat your oven to 375°F (190°C). Bake the cruffins for 20-25 minutes, or until they are golden brown and cooked through. The layers should be visible and crisp.
-
Step 13: Glaze and Serve
While the cruffins cool slightly, prepare the optional glaze: whisk powdered sugar, milk/water, and vanilla extract until smooth. Drizzle the glaze over the warm cruffins. Serve immediately and enjoy the delicious aroma!
Small tip: For an extra cinnamon kick, sprinkle a little extra cinnamon sugar on top of the glaze before it sets.
Tips & Variations
- Gluten-Free Option: Replace all-purpose flour with a 1:1 gluten-free baking flour blend that contains xanthan gum. You might need to adjust the liquid slightly as gluten-free flours absorb differently.
- Vegan Option: Use plant-based milk (like almond or soy), replace butter with a good quality vegan butter alternative (for both the dough and layers), and use a flax egg (1 tbsp ground flaxseed + 3 tbsp water per egg) instead of a regular egg.
- Fruit & Nut Addition: Before rolling the dough in Step 9, sprinkle a handful of finely chopped dried cranberries or raisins, and toasted pecans or walnuts along with the cinnamon sugar.
- Spicy Kick: For a subtle warmth, add ¼ teaspoon of ground ginger or a pinch of cayenne pepper to the cinnamon sugar mixture. It adds an unexpected depth of flavor!
- Chocolate Swirl: Instead of cinnamon sugar, spread ⅓ cup of softened Nutella or a chocolate-hazelnut spread over the dough before rolling in Step 9.
Nutritional Information
Approximate values per serving (based on 12 servings):
- Calories: 320 kcal
- Protein: 5g
- Carbohydrates: 40g
- Fat: 16g
Note: Nutritional values may vary depending on specific ingredients used and portion sizes.
Health Benefits
While cruffins are a treat, some of their star ingredients offer wonderful health benefits!
Cinnamon, the hero of this recipe, is packed with antioxidants. These compounds help protect your body from damage caused by free radicals. It’s also known for its anti-inflammatory properties, which can help reduce swelling and discomfort.
Beyond antioxidants, cinnamon may help regulate blood sugar levels. Studies suggest it can improve insulin sensitivity, making it beneficial for managing glucose. A little sprinkle goes a long way!
Dairy products like milk and butter (in moderation) provide essential nutrients. Milk is a great source of calcium for strong bones and teeth, and it also offers protein for muscle repair and growth. Eggs, if included, contribute high-quality protein and various vitamins like B12 and D.
Even the carbohydrates from the flour provide energy. While this recipe uses all-purpose flour, opting for a portion of whole wheat flour in variations can add beneficial fiber, aiding digestion and promoting a feeling of fullness.
Serving Suggestions
- These cruffins are absolutely perfect on their own with a cup of coffee or tea for a delightful breakfast or brunch.
- Serve them as a fancy dessert alongside a scoop of vanilla bean ice cream or a dollop of fresh whipped cream.
- For a lighter touch, pair them with a bowl of fresh mixed berries. The tartness of the fruit will balance the sweetness of the cruffin.
- They make a fantastic addition to any holiday breakfast spread or a special weekend treat table.
Storage Tips
Cruffins are best enjoyed fresh on the day they are baked. If you have leftovers, store them in an airtight container at room temperature for up to 2 days. For longer storage, you can freeze baked cruffins for up to 1 month. Wrap each cruffin individually in plastic wrap, then place them in a freezer-safe bag. To reheat, thaw at room temperature and then warm in a preheated oven at 300°F (150°C) for 5-7 minutes, or until warmed through and flaky again.
Conclusion
There you have it – the recipe for Delicious Cruffins with Cinnamon, your new favorite treat! These beautiful pastries are a true labor of love, but every flaky, buttery, cinnamon-swirled bite is absolutely worth the effort. The combination of croissant layers and muffin shape creates a unique texture that will have everyone asking for more.
Don’t be intimidated by the steps; think of it as a fun baking adventure. The process of laminating the dough is incredibly rewarding, and seeing those perfect swirls emerge from the oven is pure joy. You’ll be amazed at what you can create in your own kitchen!
So, gather your ingredients, put on your apron, and get ready to bake something truly special. These cinnamon cruffins are perfect for sharing with family and friends, making any occasion a little more delicious and memorable. Happy baking!


