
Introduction
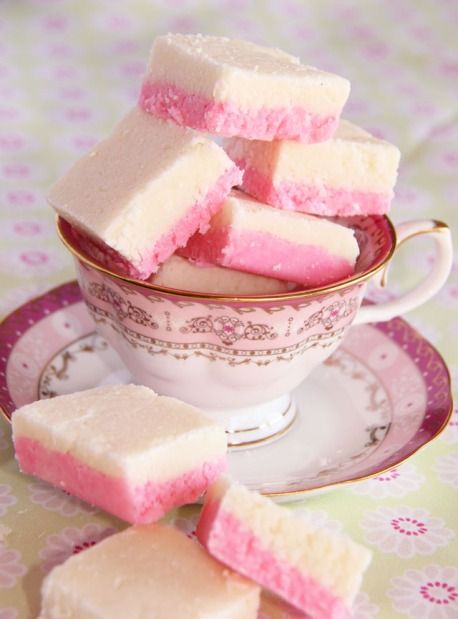
Get ready to add a sprinkle of magic to your holiday season with our delightful Coconut Ice Christmas Trees! This charming treat is a vibrant, no-bake confection that captures the festive spirit perfectly. Imagine a sweet, chewy, and intensely coconutty bite, shaped like a miniature Christmas tree and adorned with colorful sprinkles. It’s a truly special addition to any holiday platter or a lovely homemade gift.
The best part? This recipe is incredibly easy and quick to make. You don’t need any special baking skills or fancy equipment. With just a few simple ingredients and a little mixing, you can create these beautiful festive treats in no time. It’s a wonderful activity to do with children, too, making it a perfect holiday project for the whole family.
So, whether you’re looking for a fun new recipe to try, a charming gift idea, or just a sweet escape into holiday cheer, these Coconut Ice Christmas Trees are for you. Let’s dive into the kitchen and make some edible festive joy!
Cooking Time & Prep Time
- Prep Time: 25 minutes
- Chilling Time: 2 hours (minimum)
- Total Time: 2 hours 25 minutes
Small tip: You can prepare the coconut ice mixture the day before and let it chill overnight for even easier cutting and shaping the next day.
Ingredients
This recipe makes approximately 12-15 Coconut Ice Christmas Trees.
For the Coconut Ice:
- 200g (7 oz) desiccated coconut
- 400g (14 oz) icing sugar (powdered sugar)
- 50g (1.8 oz) unsalted butter, softened
- 1 x 397g can (14 oz) sweetened condensed milk
- 1 teaspoon vanilla extract
- Green food coloring gel (a few drops)
For Decoration:
- Assorted Christmas sprinkles or edible glitter
Step-by-Step Instructions
-
Step 1: Prepare Your Pan
Lightly grease a square baking tin (about 20cm x 20cm or 8×8 inches) with a little butter or oil. Line it with baking parchment, leaving an overhang on the sides. This makes it super easy to lift the coconut ice out later.
Small tip: The parchment paper overhang acts as handles, making removal effortless once chilled.
-
Step 2: Combine Dry Ingredients
In a large mixing bowl, combine the desiccated coconut and the icing sugar. Use a whisk or a spoon to make sure they are thoroughly mixed together. This prevents lumps and ensures an even texture.
Small tip: Sifting the icing sugar before adding it can help prevent any stubborn lumps from forming in your mixture.
-
Step 3: Melt the Butter
In a small saucepan over low heat, gently melt the softened butter. Be careful not to let it brown, we just want it to be liquid. Alternatively, you can melt it in a microwave-safe bowl in 15-second bursts until fully melted.
Small tip: Melting the butter slowly ensures it doesn’t separate or burn, which can affect the final texture.
-
Step 4: Add Wet Ingredients to Dry
Pour the melted butter, sweetened condensed milk, and vanilla extract into the bowl with the coconut and icing sugar mixture. Mix everything together really well. You’ll want to use a sturdy spoon or a spatula for this.
Small tip: Keep mixing until all the dry ingredients are fully incorporated and you have a thick, sticky dough-like consistency.
-
Step 5: Color the Mixture
Now it’s time to add the festive green! Add a few drops of green food coloring gel to the mixture. Continue to mix until the color is evenly distributed throughout. Add more drops if you prefer a darker green.
Small tip: Use gel food coloring for vibrant colors without adding too much liquid, which can change the texture.
-
Step 6: Press into the Tin
Transfer the green coconut ice mixture into your prepared baking tin. Press it down very firmly and evenly using the back of a spoon or your hands. Make sure the surface is as flat and smooth as possible.
Small tip: Pressing firmly is key to achieving a dense, uniform coconut ice that holds its shape well when cut.
-
Step 7: Chill Until Firm
Cover the baking tin with plastic wrap or foil. Place it in the refrigerator for at least 2 hours, or until the coconut ice is completely firm. This step is crucial for easy cutting and shaping.
Small tip: Don’t rush the chilling process; a well-chilled block will be much easier to handle and cut cleanly.
-
Step 8: Cut and Decorate
Once firm, remove the coconut ice from the tin using the parchment paper overhang. Place it on a cutting board. Cut the block into squares, then cut each square diagonally to form triangles (Christmas trees). Decorate each tree with your chosen sprinkles while the surface is still slightly tacky.
Small tip: For perfect triangles, use a sharp, warm knife. You can dip the knife in hot water and wipe it clean between cuts.
Tips & Variations
- Gluten-Free Option: This recipe is naturally gluten-free! Just ensure that any sprinkles or edible decorations you use are also certified gluten-free, as some can contain wheat starch.
- Vegan or Vegetarian Option: To make this recipe vegan, simply substitute the butter with a plant-based butter alternative and use a vegan sweetened condensed milk. Both are readily available in most supermarkets.
- Add More Texture and Flavor: For an extra layer of flavor and a slight protein boost, try folding in 1/4 cup of finely chopped pistachios or almonds into the mixture before pressing it into the tin.
- Spicy Warmth: For a unique twist, add a tiny pinch (1/4 teaspoon) of ground ginger or cinnamon to the dry ingredients. This will give your Christmas trees a subtle, warming spiced flavor perfect for the holidays.
- Different Shapes and Colors: Instead of Christmas trees, you can cut the coconut ice into festive squares, stars, or use small cookie cutters for other fun shapes. You can also divide the mixture and color different portions with red, white, or blue food coloring for a multi-colored treat!
Nutritional Information
Approximate values per serving (based on 12 servings):
- Calories: 250 kcal
- Protein: 2.5g
- Carbohydrates: 40g
- Fat: 15g
Please note: These values are approximate and may vary depending on the specific brands and quantities of ingredients used.
Health Benefits
While Coconut Ice Christmas Trees are a delightful treat, some of their main ingredients offer interesting health properties:
Desiccated coconut, the star of this recipe, is a good source of dietary fiber. Fiber is essential for digestive health, helping to keep things moving smoothly and promoting a feeling of fullness. It also contributes to a healthy gut microbiome.
Coconut also contains healthy fats, including medium-chain triglycerides (MCTs). MCTs are known for being easily digestible and can provide a quick source of energy. Some studies suggest they may support brain function and weight management.
Furthermore, coconut provides several essential minerals. It is a good source of manganese, which is crucial for bone health and metabolism. You’ll also find copper, important for red blood cell formation, and selenium, an antioxidant that helps protect your cells from damage.
Although this is a sweet confection, incorporating ingredients like coconut means you’re getting more than just empty calories. Enjoy in moderation as part of a balanced diet!
Serving Suggestions
- Festive Platter: Arrange these vibrant Christmas trees on a large platter alongside other holiday cookies and desserts for a show-stopping festive spread.
- With Hot Beverages: They pair wonderfully with a cup of hot cocoa, a freshly brewed coffee, or a comforting mug of spiced tea.
- Edible Gifts: Package a few Coconut Ice Christmas Trees in clear cellophane bags with a festive ribbon. They make delightful homemade gifts for neighbors, teachers, or friends.
- Kids’ Party Treat: These colorful and fun treats are a huge hit with children. They are perfect for holiday-themed parties or school events.
Storage Tips
Store your Coconut Ice Christmas Trees in an airtight container in the refrigerator for up to 1 week. The cold temperature helps them maintain their firm texture and freshness. Freezing is generally not recommended as the texture can become grainy upon thawing. There is no need to reheat them; they are best enjoyed straight from the fridge or at room temperature.
Conclusion
And there you have it! Your very own batch of dazzling Coconut Ice Christmas Trees. This recipe truly is a celebration of simplicity and festive joy. It’s incredibly easy to make, requires no baking, and delivers a burst of sweet, coconutty flavor with every bite. The vibrant green color and cheerful sprinkles make them an instant hit, perfect for brightening up any holiday gathering.
Don’t hesitate to give this recipe a try. You’ll be amazed at how quickly you can create such an impressive and delicious treat. It’s a fantastic project for a cozy afternoon, especially if you have little helpers in the kitchen eager to add sprinkles!
Share these beautiful, homemade confections with your family and friends. They make wonderful gifts and are sure to bring smiles and festive cheer to everyone who tastes them. Happy holidays and happy cooking!


