
Introduction
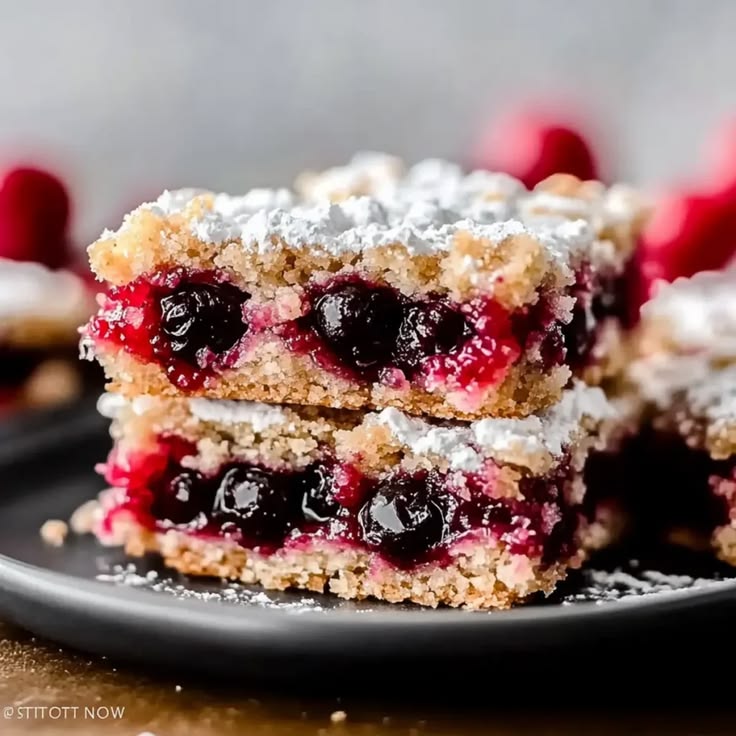
Get ready to add a burst of festive cheer to your holiday table with these incredible Christmas Cherry Bars! Imagine a buttery, crumbly shortbread crust, generously topped with a sweet-tart cherry filling, and finished with a delicate, sweet glaze. These bars are a true celebration of classic holiday flavors, vibrant in color and utterly irresistible in taste. They are the perfect treat to bring joy and a touch of elegance to any gathering.
What makes these bars truly special is how delightfully easy and quick they are to prepare. You don’t need to be a seasoned baker to whip up a batch of these beauties. With simple, readily available ingredients and straightforward steps, you’ll have a festive dessert ready in no time. It’s the kind of recipe that lets you spend more time enjoying the season and less time stressing in the kitchen.
So, whether you’re looking for a show-stopping dessert for your Christmas party, a thoughtful homemade gift, or just a sweet treat to enjoy with your family, these Christmas Cherry Bars are calling your name. Roll up your sleeves, gather your ingredients, and let’s create some holiday magic together. You’ll be so glad you did!
Cooking Time & Prep Time
- Prep Time: 25 minutes
- Cooking Time: 40 minutes
- Total Time: 65 minutes
Small tip: For the best results, ensure your butter for the crust is very cold. This helps achieve that wonderfully crumbly and tender texture.
Ingredients
This recipe makes approximately 16 delicious bars.
-
For the Buttery Crust:
- 2 cups (240g) all-purpose flour
- 1 cup (2 sticks / 226g) unsalted butter, very cold and cut into cubes
- ½ cup (100g) granulated sugar
- ½ teaspoon salt
- ¼ cup (30g) rolled oats (optional, for extra texture)
-
For the Festive Cherry Filling:
- 1 (21-ounce / 595g) can cherry pie filling
- ½ teaspoon almond extract
-
For the Sweet Glaze (Optional):
- 1 cup (120g) powdered sugar (confectioners’ sugar)
- 2-3 tablespoons milk (dairy or non-dairy)
- ¼ teaspoon vanilla extract
Step-by-Step Instructions
-
Preheat Oven & Prep Pan
Preheat your oven to 375°F (190°C). Line a 9×13 inch baking pan with parchment paper, leaving an overhang on the sides. This makes it super easy to lift the cooled bars out of the pan later. Spray the parchment paper lightly with non-stick cooking spray.
-
Make the Crust Mixture
In a large bowl, combine the all-purpose flour, granulated sugar, salt, and optional rolled oats. Add the cold, cubed butter. Use a pastry blender, two knives, or your fingertips to cut the butter into the dry ingredients until the mixture resembles coarse crumbs with some pea-sized pieces of butter remaining.
Small tip: Work quickly when cutting in the butter to prevent it from getting too warm. Cold butter is key for a tender crust.
-
Press the Crust
Press about two-thirds of the crumb mixture evenly into the bottom of the prepared 9×13 inch baking pan. Use the back of a spoon or your clean hands to firmly and evenly press it down. This forms the base of your cherry bars.
-
Prepare the Cherry Filling
In a separate medium bowl, combine the can of cherry pie filling with the almond extract. Stir gently until well mixed. The almond extract really enhances the cherry flavor and adds a lovely festive aroma.
-
Assemble the Bars
Carefully spoon the prepared cherry pie filling evenly over the pressed crust in the baking pan. Spread it gently to cover the entire surface of the crust. Then, sprinkle the remaining one-third of the crumb mixture evenly over the cherry filling. This creates a delightful crumb topping.
-
Bake to Golden Perfection
Place the baking pan in the preheated oven. Bake for 35-40 minutes, or until the crumb topping is lightly golden brown and the cherry filling is bubbly around the edges. The aroma filling your kitchen will be absolutely amazing!
-
Cool and Glaze (Optional)
Once baked, remove the pan from the oven and let the bars cool completely in the pan on a wire rack. This is crucial for clean slicing. Once cooled, if you’re adding the glaze, whisk together the powdered sugar, milk, and vanilla extract in a small bowl until smooth. Drizzle the glaze evenly over the cooled bars. Let the glaze set for a few minutes before slicing into bars.
Small tip: For perfect slices, chill the bars in the refrigerator for about 30 minutes after they’ve cooled completely and before glazing. Use a sharp, warm knife.
Tips & Variations
- Gluten-Free Option: Easily make these bars gluten-free by substituting the all-purpose flour with your favorite 1:1 gluten-free baking flour blend. Ensure your rolled oats (if using) are certified gluten-free as well.
- Vegan/Vegetarian Option: To make these bars vegan, simply swap the dairy butter for a high-quality plant-based butter alternative. Most cherry pie fillings are naturally vegan, but always check the label to be sure. Use a plant-based milk for the glaze.
- More Protein or Fiber: Boost the nutritional value by adding ½ cup of finely chopped almonds or walnuts to the crust mixture. You can also substitute up to half of the all-purpose flour with whole wheat pastry flour for added fiber.
- Spicy Version: For a subtle warmth and complexity, add a tiny pinch (⅛ teaspoon) of cayenne pepper to the cherry filling. Alternatively, a ½ teaspoon of ground cinnamon or nutmeg in the crust mixture adds a cozy, holiday spice without heat.
- Other Flavor Tips: Experiment with different fruit fillings like apple, blueberry, or raspberry pie filling. For a brighter flavor, add 1 teaspoon of lemon zest to the crust mixture or a squeeze of fresh lemon juice to the glaze.
Nutritional Information
Approximate values per serving (based on 16 servings):
- Calories: 290
- Protein: 2g
- Carbohydrates: 45g
- Fat: 12g
Please note that these values are approximate and may vary depending on the specific brands and ingredients used.
Health Benefits
While these are a festive treat, some of the key ingredients offer wonderful health benefits:
- Cherries: The star of our show, cherries are packed with antioxidants, particularly anthocyanins, which give them their vibrant red color. These compounds are known for their anti-inflammatory properties and may help reduce muscle soreness and improve sleep due to natural melatonin content.
- Oats: If you include the optional rolled oats in your crust, you’re adding a good source of soluble fiber, specifically beta-glucan. This type of fiber is beneficial for heart health, helping to lower cholesterol levels and promote a feeling of fullness.
- Almonds (if added): Should you choose to incorporate almonds for extra crunch and protein, you’ll be adding healthy monounsaturated fats, Vitamin E (a powerful antioxidant), magnesium, and plant-based protein. These nutrients contribute to heart health, skin health, and bone strength.
- Homemade Goodness: Making treats from scratch allows you to control the quality of ingredients, reducing processed additives and artificial flavors often found in store-bought options. This means you can enjoy your dessert knowing exactly what’s in it.
Serving Suggestions
- Serve these festive bars at room temperature or slightly warmed. They are delightful on their own, but truly shine with a dollop of freshly whipped cream or a scoop of vanilla bean ice cream.
- These bars make a perfect addition to any holiday dessert platter, potluck, or cookie exchange. Their vibrant color makes them a beautiful centerpiece.
- Enjoy a bar with your morning coffee or afternoon tea for a delightful snack. They also pack well for a special treat in a lunchbox.
Storage Tips
Store leftover Christmas Cherry Bars in an airtight container at room temperature for up to 2 days, or in the refrigerator for up to 3-4 days. For longer storage, you can freeze the un-glazed bars for up to 3 months. Wrap them tightly in plastic wrap and then aluminum foil. Thaw overnight in the refrigerator before glazing and serving. You can gently warm a bar in the microwave for 10-15 seconds if you prefer it slightly warm, but they are best enjoyed at room temperature.
Conclusion
And there you have it – a truly magnificent recipe for Christmas Cherry Bars that are as easy to make as they are delicious to eat. With their bright cherry filling, crumbly buttery crust, and a touch of sweet glaze, these bars embody the spirit and flavors of the holiday season. They are simple, stunning, and sure to be a crowd-pleaser.
Don’t let the hustle and bustle of the holidays deter you from enjoying some homemade goodness. This recipe is designed to be stress-free, allowing you to create something truly special without spending hours in the kitchen. The joy of baking these bars is almost as wonderful as the joy of eating them!
So go ahead, give these Christmas Cherry Bars a try. Share them with your loved ones, bring them to a festive gathering, or simply savor them yourself with a warm cup of cocoa. They’re more than just a dessert; they’re a little piece of holiday happiness that you’ve created with your own hands. Happy baking!


