
Introduction
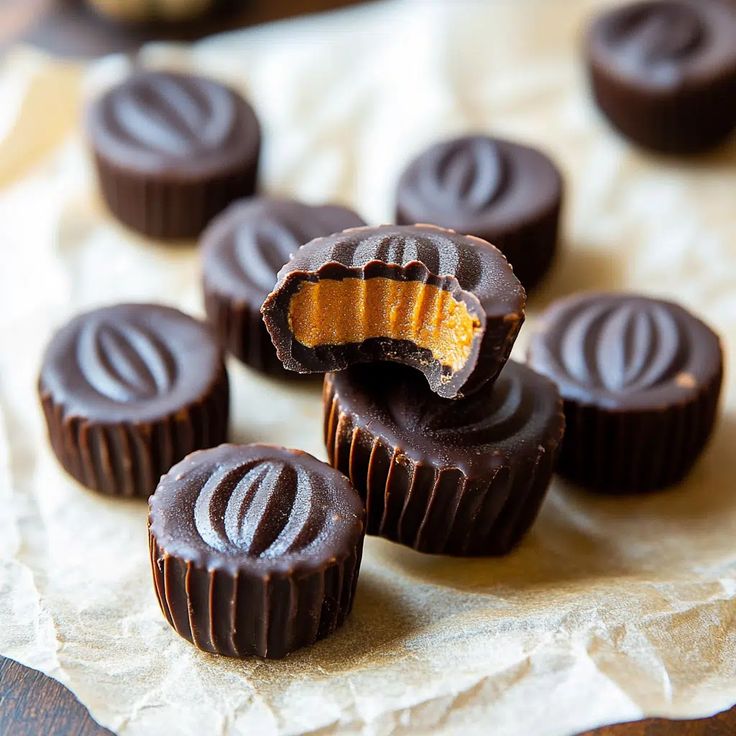
Get ready to fall in love with our incredible Chocolate Pumpkin Butter Cups! Imagine the classic peanut butter cup, but with a cozy, spiced pumpkin twist. These delightful treats feature a smooth, creamy pumpkin butter filling encased in a shell of rich, decadent chocolate. They are truly a taste of autumn bliss in every bite.
What makes these cups so special is not just their amazing flavor, but also how wonderfully easy they are to create. You don’t need to be a baking expert to whip up a batch of these beauties. With no oven required and just a few simple steps, you’ll have a gourmet-tasting dessert ready in no time. It’s the perfect project for a cozy afternoon.
So, gather your ingredients and prepare for a truly satisfying kitchen adventure. These Chocolate Pumpkin Butter Cups are sure to become a new favorite in your home. They are ideal for holiday gatherings, a thoughtful homemade gift, or simply a delicious treat for yourself. Let’s make some magic!
Cooking Time & Prep Time
Making these delicious cups is surprisingly quick and straightforward. Most of the time is spent chilling!
- Prep Time: 25 minutes
- Chilling Time: 60 minutes
- Total Time: 85 minutes
Small tip: To save time, measure out all your ingredients before you start. This makes the whole process much smoother and more enjoyable.
Ingredients
This recipe makes approximately 12 delightful Chocolate Pumpkin Butter Cups.
For the Chocolate Shell
- 1 ½ cups (about 9 ounces) good quality dark chocolate chips (60-70% cacao recommended)
- 1 tablespoon coconut oil (refined, for neutral flavor)
For the Pumpkin Butter Filling
- ½ cup pure pumpkin puree (not pumpkin pie filling)
- ½ cup powdered sugar (also known as confectioners’ sugar)
- ¼ cup unsalted butter, softened to room temperature
- 1 teaspoon pumpkin pie spice
- ½ teaspoon vanilla extract
- Pinch of salt
Step-by-Step Instructions
-
Step 1: Prepare Your Molds
Line a 12-cup muffin tin with paper or silicone cupcake liners. This will make it easy to remove your finished cups. Having everything ready before you start melting chocolate is key.
Small tip: If using paper liners, a light spray of non-stick cooking spray inside each liner can help prevent the chocolate from sticking later.
-
Step 2: Melt the Chocolate
In a microwave-safe bowl, combine the dark chocolate chips and coconut oil. Microwave in 30-second intervals, stirring well after each, until the chocolate is completely melted and smooth. Be careful not to overheat the chocolate, as it can seize.
Small tip: Alternatively, you can melt the chocolate using a double boiler method for a more controlled melt.
-
Step 3: Create the Bottom Chocolate Layer
Spoon about 1 tablespoon of melted chocolate into the bottom of each prepared liner. Use the back of the spoon to spread the chocolate evenly across the bottom. Place the muffin tin in the refrigerator for 10-15 minutes, or until the chocolate is firm.
Small tip: Don’t make the chocolate layer too thin, or it might break when you try to unmold the cups.
-
Step 4: Prepare the Pumpkin Butter Filling
While the chocolate chills, in a medium bowl, combine the softened unsalted butter, pumpkin puree, powdered sugar, pumpkin pie spice, vanilla extract, and a pinch of salt. Mix with a spoon or an electric mixer on low speed until everything is well combined and smooth. The mixture should be thick and spreadable.
Small tip: Make sure your butter is truly softened, not melted, for the best consistency in the filling.
-
Step 5: Add the Pumpkin Filling
Once the bottom chocolate layers are firm, remove the muffin tin from the fridge. Spoon about 1 to 1 ½ tablespoons of the pumpkin butter filling onto the center of each hardened chocolate base. Gently flatten the top of the filling with the back of a spoon, leaving a small gap around the edges for the top chocolate layer.
Small tip: Try to keep the filling from touching the sides of the liner too much, so the top chocolate layer can seal properly.
-
Step 6: Top with More Chocolate
Re-melt any remaining chocolate if it has started to harden. Spoon the remaining melted chocolate over the pumpkin filling, ensuring it completely covers the filling and meets the bottom chocolate layer to seal it. Gently tap the muffin tin on the counter a few times to help the chocolate settle and create a smooth top.
Small tip: Work relatively quickly so the warm chocolate doesn’t melt the pumpkin filling too much.
-
Step 7: Chill Until Firm
Return the muffin tin to the refrigerator for at least 45-60 minutes, or until the chocolate cups are completely firm and set. This chilling time is crucial for easy removal and a perfect texture.
Small tip: You can also place them in the freezer for about 20-30 minutes if you’re in a hurry, but keep a close eye on them.
-
Step 8: Enjoy Your Cups!
Once firm, carefully peel the paper or silicone liners away from the Chocolate Pumpkin Butter Cups. Serve immediately and enjoy your homemade fall treats! These are a delight for any occasion.
Small tip: For the best flavor and texture, let the cups sit at room temperature for 5-10 minutes before serving.
Tips & Variations
- Gluten-Free Option: This recipe is naturally gluten-free! Just be sure to check the labels on your chocolate chips to ensure they are certified gluten-free, as some brands may have cross-contamination warnings.
- Vegan Option: To make these cups vegan, use dairy-free chocolate chips and substitute the unsalted butter in the filling with vegan butter or refined coconut oil. Ensure your pumpkin puree and powdered sugar are also vegan-friendly.
- Add More Nutrients: For an extra boost, you can blend a tablespoon of collagen powder or a scoop of unflavored protein powder into the pumpkin filling. You could also mix in a teaspoon of finely grated carrot for extra vegetables.
- Spicy Kick: For those who love a bit of heat, add a tiny pinch (⅛ teaspoon) of cayenne pepper or chili powder to the melted chocolate. It creates a subtle warmth that beautifully complements the sweetness and spice of the pumpkin.
- White Chocolate Dream: For a different flavor profile, try making these with white chocolate instead of dark chocolate. The sweetness of the white chocolate pairs wonderfully with the spiced pumpkin. You can also drizzle white chocolate over the dark chocolate cups for a decorative touch.
Nutritional Information
Approximate values per serving (based on 12 servings):
- Calories: 220 kcal
- Protein: 2 g
- Carbohydrates: 25 g
- Fat: 14 g
Please note that nutritional values are estimates and may vary depending on the specific brands and exact amounts of ingredients used.
Health Benefits
These Chocolate Pumpkin Butter Cups are a treat, but their main ingredients also offer some wonderful health benefits!
Pumpkin: This star ingredient is packed with nutrients. It’s an excellent source of Vitamin A, thanks to its high beta-carotene content, which is vital for vision and immune function. Pumpkin also provides a good amount of fiber, promoting digestive health, and potassium, which supports heart health.
Dark Chocolate: Choosing a good quality dark chocolate (60% cacao or higher) offers a wealth of antioxidants. These powerful compounds help protect your body from damage by free radicals. Dark chocolate also contains flavanols, which may improve blood flow and lower blood pressure. It’s a source of minerals like iron and magnesium too.
Coconut Oil: Used in the chocolate shell, coconut oil contains medium-chain triglycerides (MCTs). Some research suggests MCTs can be easily digested and used for energy, potentially supporting metabolism. Refined coconut oil has a neutral flavor, making it a great choice for sweet treats.
Pumpkin Pie Spice: This blend often includes cinnamon, ginger, nutmeg, and cloves. Cinnamon is known for its anti-inflammatory properties and its potential to help regulate blood sugar. Ginger can aid digestion, while nutmeg and cloves also offer antioxidant benefits. These spices add not just flavor but also a little extra goodness.
Serving Suggestions
- Perfect Dessert: Serve these Chocolate Pumpkin Butter Cups as a delightful dessert after any meal, especially during the fall season.
- Coffee or Tea Companion: They pair wonderfully with a warm cup of coffee, a spiced chai latte, or a comforting herbal tea for an afternoon treat.
- Party Favor: Package them individually in small bags with ribbons for a charming homemade gift or party favor for guests.
- Holiday Platter: Arrange them on a festive dessert platter alongside other holiday goodies like cookies and truffles.
Storage Tips
Store your Chocolate Pumpkin Butter Cups in an airtight container in the refrigerator for up to 1 week. If you’d like to keep them longer, they freeze beautifully! Place them in a single layer in an airtight container or freezer bag, separated by parchment paper, and freeze for up to 2 months. There’s no need to reheat; simply let them sit at room temperature for 10-15 minutes before enjoying for the best texture, or eat them straight from the fridge for a firmer bite.
Conclusion
There you have it – a


