
Introduction
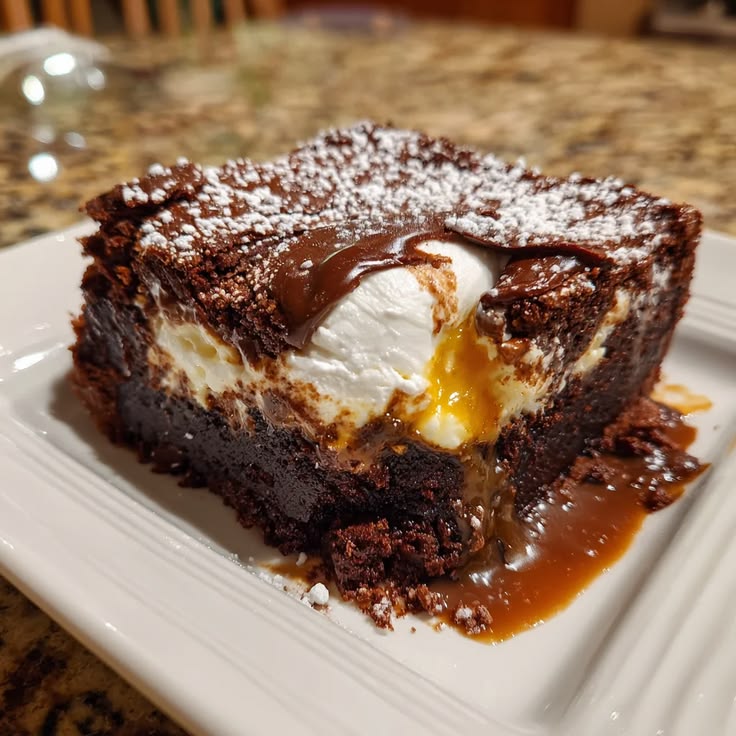
Get ready to dive into pure chocolate bliss! Today, we’re making a “Chocolate Ooey Gooey Cake” – a dessert so decadent, so rich, and so incredibly moist, it will melt in your mouth. Imagine a fudgy chocolate cake base with a luscious, gooey chocolate topping that sinks into every crevice, creating pockets of intense, molten chocolate goodness. It’s the ultimate treat for any chocolate lover!
You might think such an amazing cake would be complicated to make, but that’s where the magic truly begins. This recipe uses simple, everyday ingredients and straightforward steps, making it surprisingly easy and quick to whip up. There’s no fancy equipment needed, just a few bowls and a baking pan, and you’ll be well on your way to chocolate heaven.
So, whether you’re celebrating a special occasion, craving a comforting dessert, or just want to treat yourself, this Chocolate Ooey Gooey Cake is your answer. Don’t be shy – gather your ingredients and let’s create some unforgettable chocolate memories together!
Cooking Time & Prep Time
- Prep Time: 20 minutes
- Cooking Time: 35-40 minutes
- Total Time: 55-60 minutes
Small tip: Always preheat your oven while you start gathering and mixing your ingredients. This ensures it’s at the perfect temperature when your batter is ready to go in!
Ingredients
This recipe makes 12 generous servings.
For the Cake
- 1 ½ cups all-purpose flour
- 1 ½ cups granulated sugar
- ½ cup unsweetened cocoa powder
- 1 teaspoon baking soda
- ½ teaspoon salt
- ½ cup vegetable oil (or canola oil)
- 1 cup cold water
- 1 teaspoon vanilla extract
- 1 tablespoon white vinegar
For the Gooey Topping
- 1 cup (2 sticks) unsalted butter, melted
- 1 (14-ounce) can sweetened condensed milk
- 1 ½ cups semi-sweet chocolate chips (or chopped chocolate)
- 1 teaspoon vanilla extract
Step-by-Step Instructions
-
Step 1: Prepare Your Baking Pan and Preheat Oven
Preheat your oven to 350°F (175°C). Lightly grease and flour a 9×13 inch baking pan. Make sure every corner is covered to prevent sticking.
Small tip: You can also line the pan with parchment paper, leaving an overhang on the sides, to make lifting the cake out super easy!
-
Step 2: Combine Dry Cake Ingredients
In a large mixing bowl, whisk together the all-purpose flour, granulated sugar, unsweetened cocoa powder, baking soda, and salt. Make sure there are no lumps and everything is well combined.
Small tip: Sifting the cocoa powder can help prevent lumps, ensuring a smoother batter.
-
Step 3: Add Wet Cake Ingredients
To the dry ingredients, add the vegetable oil, cold water, vanilla extract, and white vinegar. Stir everything together with a spoon or spatula until just combined. Do not overmix; a few small lumps are fine.
Small tip: The vinegar reacts with the baking soda to create a light and fluffy cake, so don’t skip it!
-
Step 4: Pour Batter into Pan
Pour the cake batter evenly into your prepared 9×13 inch baking pan. Spread it gently with a spatula to ensure an even layer. This will help the cake bake uniformly.
-
Step 5: Prepare the Gooey Topping
In a separate medium bowl, combine the melted butter, sweetened condensed milk, semi-sweet chocolate chips, and vanilla extract. Stir these ingredients together until the chocolate chips are mostly melted and the mixture is smooth and glossy. If the butter cools too much, you can gently warm the mixture in the microwave for 30 seconds to help the chocolate melt fully.
Small tip: Make sure your butter is truly melted, not just softened, for the best gooey texture.
-
Step 6: Layer the Gooey Topping
Carefully pour the chocolate gooey topping evenly over the cake batter in the pan. Don’t stir it in; just let it float on top. It will magically sink and create that wonderful gooey layer during baking.
Small tip: Use the back of a spoon to gently spread the topping to cover most of the cake batter surface.
-
Step 7: Bake the Cake
Place the baking pan in your preheated oven. Bake for 35-40 minutes, or until the edges of the cake are set and the center of the gooey topping is bubbly. A toothpick inserted into the cake part (not the gooey topping) should come out with moist crumbs, not wet batter.
Small tip: Ovens can vary, so start checking at 35 minutes. You want the cake base cooked but the topping still wonderfully soft.
-
Step 8: Cool and Serve
Once baked, remove the cake from the oven and let it cool completely on a wire rack before slicing and serving. This allows the gooey topping to set slightly and become even more luscious. Enjoy every single bite!
Small tip: While it’s best to let it cool, a slightly warm slice with a scoop of vanilla ice cream is pure heaven!
Tips & Variations
- Gluten-Free Option: Easily make this cake gluten-free by swapping the all-purpose flour for a 1:1 gluten-free all-purpose flour blend. Ensure your blend contains xanthan gum for the best texture.
- Vegan Option: For a delicious vegan version, use a flax egg (1 tbsp ground flaxseed + 3 tbsp water per egg, let sit for 5 mins) if you adjust the recipe, or substitute the milk and butter. Use plant-based milk, vegan butter, and dairy-free chocolate chips. For the condensed milk, use a can of sweetened condensed coconut milk, which works wonderfully.
- Protein/Fiber Boost: While this is a dessert, you can add a handful of chopped walnuts or pecans to the cake batter for extra healthy fats, fiber, and a slight protein boost. These also add a lovely textural contrast.
- Spicy Version: For a subtle kick, add ¼ to ½ teaspoon of cayenne pepper or chili powder to the dry cake ingredients. The heat will enhance the chocolate flavor without being overpowering.
- Flavor Variations: Elevate the chocolate flavor by adding 1 tablespoon of instant espresso powder to the dry cake ingredients. You can also swap semi-sweet chocolate chips for dark chocolate chips for a richer, less sweet experience, or add a teaspoon of orange zest to the cake batter for a bright citrus note.
Nutritional Information
Approximate values per serving (based on 12 servings):
- Calories: 450-500
- Protein: 5-7g
- Carbohydrates: 60-65g
- Fat: 25-30g
Note: Nutritional values may vary depending on specific brands and exact amounts of ingredients used. These are approximate estimates.
Health Benefits
While this is an indulgent treat, some of its key ingredients offer a few surprising benefits:
- Cocoa Powder: Unsweetened cocoa powder, especially dark varieties, is packed with antioxidants called flavonoids. These powerful compounds can help fight free radicals in the body and may contribute to heart health. It’s also known to boost mood and brain function!
- Eggs: Eggs are an excellent source of high-quality protein, providing all essential amino acids. They also contain important vitamins like B12, D, and A, as well as minerals such as selenium and choline, which is vital for brain health.
- Milk: Dairy milk is a good source of calcium, which is essential for strong bones and teeth. It also provides vitamin D (if fortified), potassium, and protein, all contributing to overall body function and health.
- Vanilla Extract: Beyond its delightful aroma and flavor, vanilla extract contains antioxidants. It’s also known to have calming properties, which can contribute to a sense of well-being.
Serving Suggestions
- Classic Delight: Serve a warm slice with a scoop of premium vanilla bean ice cream or a dollop of freshly whipped cream. The contrast of cold and warm, and the creamy texture, is simply divine!
- Berry Fresh: Pair your chocolate cake with a side of fresh berries – strawberries, raspberries, or blueberries. Their tartness cuts through the richness of the cake beautifully.
- Coffee Break: Enjoy a slice with a hot cup of coffee, espresso, or a glass of cold milk. The flavors complement each other perfectly.
- Meal Prep Idea: While not a typical “meal prep” dish, you can bake this cake ahead of time for parties or gatherings. Cut into individual squares and store them, making it easy to grab and serve whenever you need a quick dessert.
Storage Tips
Store any leftover Chocolate Ooey Gooey Cake tightly covered with plastic wrap or in an airtight container at room temperature for up to 2-3 days, or in the refrigerator for up to 5 days. If refrigerated, the gooey topping will firm up slightly. You can freeze individual slices, wrapped tightly in plastic wrap and then foil, for up to 2-3 months. To reheat, microwave a slice for 20-30 seconds until warm and gooey again, or warm in a low oven (250°F/120°C) for about 10-15 minutes.
Conclusion
And there you have it – your very own Chocolate Ooey Gooey Cake! This recipe isn’t just about baking a cake; it’s about creating an experience. The rich, deep chocolate flavor, combined with that irresistible gooey center, makes every forkful a moment of pure indulgence. It’s a comforting classic that truly delivers on its promise of deliciousness.
So, don’t hesitate! Give this recipe a try. You’ll be amazed at how simple it is to achieve such a spectacular dessert. The aroma filling your kitchen alone is worth the effort, and the first bite will confirm that you’ve found a new favorite.
Bake it for yourself, for your family, or for friends. This Chocolate Ooey Gooey Cake is perfect for sharing and bringing smiles to everyone’s faces. Enjoy the magic of homemade chocolate goodness!


