
Introduction
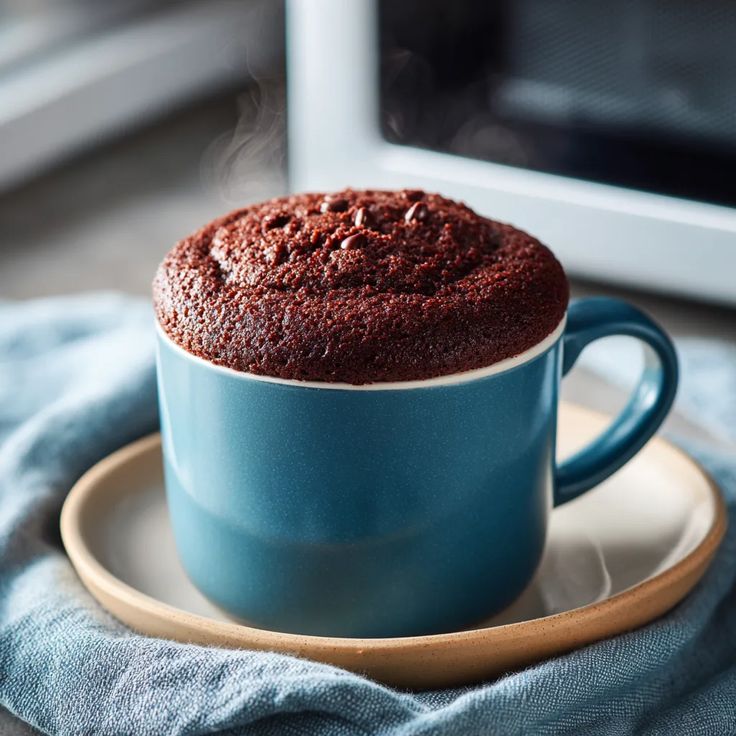
Imagine a warm, gooey, chocolatey dessert ready in mere minutes. That’s exactly what our Chocolate Mug Cake is! It’s a little slice of heaven, perfect for satisfying those sudden sweet cravings. Each spoonful is rich, decadent, and utterly delicious, tasting like it took hours to make, but only takes a moment.
The best part about this recipe is how incredibly easy and quick it is. You don’t need fancy equipment or a long list of ingredients. Everything comes together right in your favorite mug, and your microwave does all the hard work. It’s the ultimate hassle-free dessert for busy evenings or when you just want a quick treat.
So, get ready to whip up some magic! This Chocolate Mug Cake is about to become your new go-to recipe for instant comfort and joy. Gather your ingredients, and let’s make some delicious memories together. You won’t believe how simple it is!
Cooking Time & Prep Time
- Prep Time: 5 minutes
- Cooking Time: 1-2 minutes
- Total Time: 6-7 minutes
Small tip: Always measure your ingredients before you start mixing. This makes the whole process even quicker and smoother!
Ingredients
This recipe makes 1 delicious serving.
- All-Purpose Flour: 4 tablespoons
- Granulated Sugar: 4 tablespoons
- Unsweetened Cocoa Powder: 2 tablespoons
- Baking Powder: 1/4 teaspoon
- Salt: A tiny pinch (about 1/8 teaspoon)
- Milk (any kind): 3 tablespoons
- Vegetable Oil (or melted butter): 3 tablespoons
- Vanilla Extract: 1/2 teaspoon
- Chocolate Chips (optional, but highly recommended!): 1-2 tablespoons
Step-by-Step Instructions
Step 1: Choose Your Mug
First, pick out your favorite microwave-safe mug. Make sure it’s large enough to hold all the ingredients comfortably, with some room for the cake to rise. A standard 12-14 ounce mug works perfectly for this recipe.
Small tip: A wider mug will cook more evenly than a very tall, narrow one.
Step 2: Combine Dry Ingredients
In your chosen mug, add the all-purpose flour, granulated sugar, unsweetened cocoa powder, baking powder, and salt. Use a small fork or a mini whisk to mix these dry ingredients together very well. You want to make sure there are no lumps of cocoa powder.
Small tip: Thoroughly mixing the dry ingredients ensures the baking powder is evenly distributed, helping your cake rise beautifully.
Step 3: Add Wet Ingredients
Now it’s time to introduce the wet ingredients. Pour in the milk, vegetable oil (or melted butter), and vanilla extract into the mug with the dry mix. These liquids will bring everything together to form your cake batter.
Small tip: Use room temperature milk if you can, as it helps the ingredients combine more smoothly.
Step 4: Mix the Batter
Using the same fork or whisk, gently mix all the ingredients until they are just combined. Be careful not to overmix! A few small lumps are totally fine and will disappear during cooking. Overmixing can lead to a tough cake.
Small tip: Scrape down the sides of the mug with your fork to make sure all the dry bits are incorporated into the batter.
Step 5: Stir in Chocolate Chips
If you’re using chocolate chips, now is the time to add them! Stir them into the batter. They will melt into gooey pockets of chocolate goodness as the cake cooks. You can also sprinkle a few on top for a nice finish.
Small tip: Dark chocolate chips add a lovely bittersweet contrast, while milk chocolate chips make it extra sweet and creamy.
Step 6: Microwave Your Cake
Place your mug in the microwave. Cook on high for 60-90 seconds. Microwave power can vary greatly, so start with 60 seconds and then add 10-15 second increments if needed. Watch it carefully!
Small tip: The cake is done when it looks set on the edges, but the very center might still look a little gooey. This makes for a wonderfully moist cake.
Step 7: Check for Doneness
Carefully remove the hot mug from the microwave. The cake should be puffed up and spring back slightly when gently touched. If it looks very wet or liquidy in the center, microwave for another 10-15 seconds.
Small tip: Avoid overcooking, as this can make the mug cake dry and rubbery. It’s better to undercook slightly for a fudgier texture.
Step 8: Serve Immediately
Let the mug cake cool for just a minute or two in the mug before digging in. It will be very hot! Enjoy it straight from the mug with a spoon. This is when it’s at its absolute best – warm, soft, and incredibly delicious.
Small tip: A scoop of vanilla ice cream or a dollop of whipped cream on top takes this simple dessert to the next level!
Tips & Variations
- Gluten-Free Option: Easily make this cake gluten-free by substituting the all-purpose flour with a 1:1 gluten-free baking flour blend. Ensure your blend contains xanthan gum for the best texture.
- Vegan Option: This recipe is already very close to being vegan! Simply use a plant-based milk (like almond, soy, or oat milk) and ensure your chocolate chips are dairy-free. Vegetable oil is naturally vegan, so no changes needed there.
- Protein Boost: For an added protein punch, you can stir in 1 tablespoon of unflavored or chocolate-flavored protein powder with the dry ingredients. You might need to add an extra tablespoon of milk to maintain the right batter consistency.
- Spicy Kick: If you love a little heat, add a tiny pinch (about 1/8 teaspoon) of cayenne pepper or chili powder to the dry ingredients. The subtle warmth complements the chocolate beautifully without making it overtly spicy.
- Nutella Swirl: After mixing the batter, dollop a spoonful of Nutella or your favorite nut butter on top and swirl it gently with a toothpick before microwaving. It creates a delicious, gooey center.
- Coffee Lover’s Dream: Replace 1 tablespoon of the milk with 1 tablespoon of strong brewed coffee or espresso for a rich mocha flavor. Alternatively, add 1/4 teaspoon of instant coffee granules to the dry ingredients.
Nutritional Information
Approximate values per serving (based on 1 serving):
- Calories: Approximately 420-480 kcal
- Protein: Approximately 6-8g
- Carbohydrates: Approximately 55-65g
- Fat: Approximately 20-25g
Please note: These values are approximate and may vary depending on the specific brands and quantities of ingredients used, especially if adding optional items like chocolate chips or toppings.
Health Benefits
While a chocolate mug cake is certainly a treat, some of its core ingredients offer a few notable benefits!
Cocoa Powder: Unsweetened cocoa powder is a star in this recipe. It’s rich in antioxidants, particularly flavonoids, which are known to help reduce inflammation and may improve heart health. It can also act as a mood booster, thanks to compounds that interact with neurotransmitters in the brain.
Milk: Whether you choose dairy or a plant-based alternative, milk provides important nutrients. Dairy milk is a great source of calcium for strong bones and teeth, and it’s often fortified with Vitamin D, which is crucial for calcium absorption and immune function. Plant-based milks are also frequently fortified with these vitamins and minerals.
Energy Boost: The carbohydrates from the flour and sugar, along with the fat from the oil, provide a quick source of energy. This can be helpful for a rapid pick-me-up, especially during a busy day or after a workout. Enjoying a small treat like this can also contribute to overall well-being by reducing stress and satisfying cravings in moderation.
Remember, this is a delicious dessert to be enjoyed as part of a balanced diet. It’s a wonderful way to treat yourself to something comforting and satisfying!
Serving Suggestions
- Classic Toppings: Serve your warm mug cake with a scoop of vanilla ice cream, a dollop of whipped cream, or a sprinkle of powdered sugar.
- Fruity Freshness: Add a handful of fresh berries like raspberries or strawberries on top. Their tartness beautifully cuts through the richness of the chocolate.
- Decadent Drizzle: A drizzle of chocolate syrup, caramel sauce, or even a spoonful of peanut butter can elevate the flavor and texture.
- Standalone Treat: This Chocolate Mug Cake is perfect as a standalone dessert after dinner, a cozy snack on a chilly evening, or even a quick sweet breakfast indulgence (we won’t tell!).
- Pre-measured Dry Ingredients: While not a traditional meal prep item, you can pre-measure the dry ingredients (flour, sugar, cocoa, baking powder, salt) into small bags or containers. When a craving hits, just dump them into a mug, add the wet ingredients, and microwave!
Storage Tips
Chocolate Mug Cake is best enjoyed immediately, straight from the microwave. It’s designed to be a single-serving, fresh treat. If you happen to have any leftovers (which is unlikely!), you can cover the mug and store it in the fridge for up to 1 day. The texture will change and become denser, but it will still be edible. We do not recommend freezing mug cake, as the texture greatly suffers upon thawing. To reheat, microwave for 10-20 seconds until just warm, but be careful not to overcook it, as it can dry out quickly.
Conclusion
There you have it – the ultimate recipe for a quick, comforting, and utterly delicious Chocolate Mug Cake! It’s truly a magical dessert, transforming simple ingredients into a warm, gooey delight in just minutes. This recipe proves that you don’t need a lot of time or effort to enjoy something truly special.
We absolutely encourage you to try making this yourself. It’s perfect for those moments when a sudden chocolate craving strikes, or when you just need a little pick-me-up. Experiment with different toppings and variations to make it your own unique creation. You’ll be amazed at how satisfying such a simple treat can be.


