
Introduction
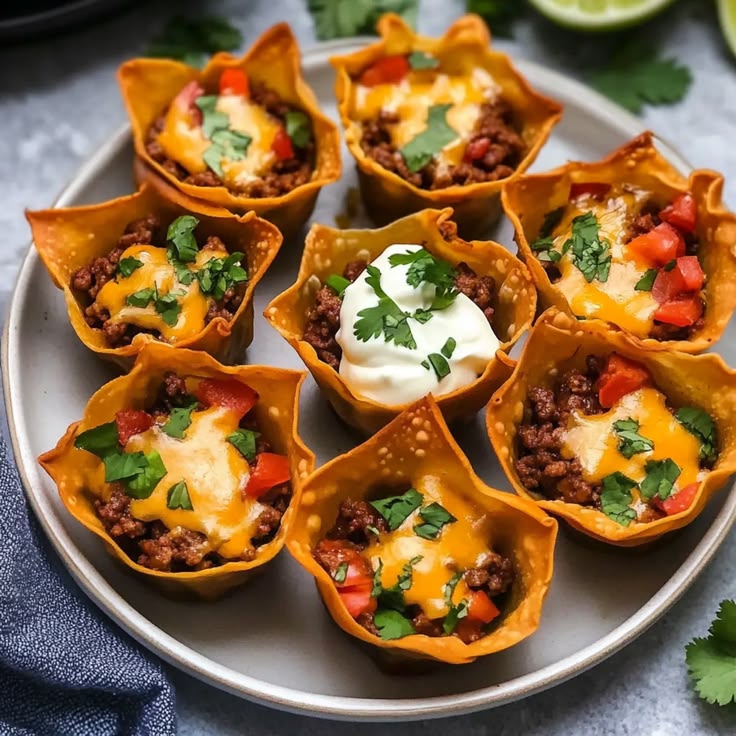
Get ready to meet your new favorite snack or party bite: Cheesy Taco Cups Snack Bake! Imagine all the vibrant, savory flavors of your beloved tacos, but in a fun, bite-sized cup. These little delights feature a crispy tortilla shell, a perfectly seasoned meaty filling, and a generous blanket of melted cheese. They are truly a flavor explosion in every single bite!
The best part? These taco cups are incredibly easy and quick to make. You don’t need any special skills or fancy equipment. With simple ingredients and a standard muffin tin, you can whip up a batch in no time. It’s the perfect recipe for busy weeknights, last-minute gatherings, or when you just crave something wonderfully delicious without the fuss.
So, clear your kitchen counter and get ready for a culinary adventure. We promise these Cheesy Taco Cups will become a cherished recipe in your home. They are fun to make, even more fun to eat, and guaranteed to bring smiles all around. Let’s dive in and create some magic!
Cooking Time & Prep Time
- Prep Time: 20 minutes
- Cooking Time: 18-20 minutes
- Total Time: 38-40 minutes
Small tip: To save even more time, you can chop your onion and garlic a day in advance and store them in an airtight container in the fridge.
Ingredients
This recipe makes 12 delicious Cheesy Taco Cups.
- For the Taco Filling:
- 1 tablespoon olive oil
- 1 pound lean ground beef (or ground turkey/chicken)
- 1 small yellow onion, finely chopped
- 2 cloves garlic, minced
- 1 (1.25 ounce) packet taco seasoning mix
- 1/2 cup water
- 1/4 cup salsa (mild, medium, or hot, to your preference)
- Salt and black pepper to taste
- For the Taco Cups:
- 12 flour tortillas (6-inch street taco size or small corn tortillas)
- 1 1/2 cups shredded Mexican blend cheese (or cheddar, Monterey Jack)
- For the Toppings (Optional):
- Sour cream or Greek yogurt
- Fresh cilantro, chopped
- Diced tomatoes
- Sliced jalapeños
- Shredded lettuce
Step-by-Step Instructions
-
Step 1: Prepare Your Oven and Muffin Tin
Preheat your oven to 375°F (190°C). Lightly spray a 12-cup standard muffin tin with cooking spray. This helps prevent sticking and makes cleanup easier.
Small tip: Ensure your oven is fully preheated before baking for even cooking.
-
Step 2: Cook the Ground Meat
Heat the olive oil in a large skillet over medium-high heat. Add the ground beef (or chosen protein) and cook, breaking it up with a spoon, until it’s fully browned. Drain any excess grease from the skillet.
Small tip: Draining the fat keeps your taco cups from becoming greasy and heavy.
-
Step 3: Sauté Aromatics and Season
Add the chopped onion to the skillet with the cooked meat and cook until softened, about 3-5 minutes. Stir in the minced garlic and cook for another minute until fragrant. Sprinkle in the taco seasoning mix, then pour in the water and salsa.
Small tip: Cooking the onion until soft adds a lovely sweetness to the filling.
-
Step 4: Simmer the Taco Filling
Bring the mixture to a simmer, then reduce the heat to low. Let it cook for 5-7 minutes, stirring occasionally, until the liquid has mostly absorbed and the flavors have melded. Taste and adjust with salt and pepper if needed. Remove from heat.
Small tip: Don’t over-reduce the liquid; a little moisture keeps the filling tender.
-
Step 5: Prepare the Tortilla Cups
Using a round cookie cutter or a sharp knife, cut each 6-inch tortilla into a smaller circle, about 4 inches in diameter. If using smaller street taco tortillas, you might not need to cut them. Gently press one tortilla circle into each cup of the prepared muffin tin, forming a cup shape.
Small tip: If your tortillas are stiff, warm them slightly in the microwave for 10-15 seconds to make them more pliable and prevent tearing.
-
Step 6: Fill the Taco Cups
Spoon about 2 tablespoons of the seasoned taco meat mixture into each tortilla cup. Make sure to distribute the filling evenly among all 12 cups. Don’t overfill them, as we still need room for cheese.
Small tip: Use a small scoop or two spoons for easy and consistent filling distribution.
-
Step 7: Add the Cheese and Bake
Generously sprinkle about 1 tablespoon of shredded cheese over the top of the meat in each cup. Place the muffin tin into the preheated oven. Bake for 18-20 minutes, or until the cheese is melted and bubbly, and the tortilla edges are lightly golden and crispy.
Small tip: Keep an eye on the edges of the tortillas; they can brown quickly.
-
Step 8: Cool and Garnish
Carefully remove the muffin tin from the oven. Let the taco cups cool in the tin for 5 minutes before gently removing them with a butter knife or small spatula. Serve warm with your favorite toppings like sour cream, chopped cilantro, diced tomatoes, or jalapeños.
Small tip: Cooling slightly helps the cups hold their shape better when removed from the tin.
Tips & Variations
- Gluten-Free Option: Easily make this recipe gluten-free by using small corn tortillas instead of flour tortillas. Ensure your taco seasoning is also certified gluten-free.
- Vegan or Vegetarian Option: Replace the ground meat with cooked black beans, lentils, or your favorite plant-based ground crumbles. Sauté with the onion and garlic, then add the taco seasoning and water.
- Add More Vegetables or Protein: Boost the nutrition by adding finely diced bell peppers, corn, or spinach to the meat mixture. You can also use shredded cooked chicken or ground turkey for a leaner protein option.
- Spicy Version: For a kick, add a pinch of cayenne pepper or a dash of hot sauce to the meat filling. You can also top your finished taco cups with sliced fresh or pickled jalapeños.
- Flavor Twists: Experiment with different cheeses like pepper jack for extra spice, or a sharp cheddar for a bolder flavor. A dollop of cream cheese mixed into the meat filling before baking can add extra creaminess.
Nutritional Information
Approximate values per serving (based on 12 servings, using lean ground beef):
- Calories: 210 kcal
- Protein: 15g
- Carbohydrates: 12g
- Fat: 11g
Please note: These values are approximate and may vary depending on the specific brands and types of ingredients used.
Health Benefits
These Cheesy Taco Cups aren’t just delicious; they also offer some great health benefits from their wholesome ingredients.
The lean ground beef provides an excellent source of high-quality protein, essential for muscle repair and growth. It’s also rich in vital nutrients like iron, which helps transport oxygen in the blood, and B vitamins, crucial for energy metabolism.
Cheese, in moderation, contributes calcium for strong bones and teeth. It also offers additional protein and some healthy fats. Opting for a lower-fat cheese can reduce the overall fat content without sacrificing flavor.
The onions and garlic aren’t just for flavor; they are packed with antioxidants and compounds that support immune health. Garlic, in particular, is known for its potential anti-inflammatory properties.
If you choose to add extra vegetables like bell peppers or spinach, you’re boosting the fiber, vitamin, and mineral content even further. These additions contribute to better digestion and overall well-being.
Serving Suggestions
- Party Appetizer: Arrange them on a platter with a variety of dipping sauces like guacamole, salsa, and extra sour cream for a crowd-pleasing party snack.
- Quick Lunch: Pair 3-4 taco cups with a simple side salad dressed with a light vinaigrette for a satisfying and easy lunch.
- Fun Dinner: Serve alongside Mexican rice and refried beans to create a complete and exciting dinner experience that the whole family will love.
- Kid-Friendly Meal: These are perfect for picky eaters! Let kids customize their toppings for an interactive and enjoyable meal.
Storage Tips
Leftover Cheesy Taco Cups can be stored in an airtight container in the refrigerator for up to 3-4 days. While you can freeze the cooked taco meat filling separately, freezing the assembled taco cups is not recommended as the tortillas can become soggy upon thawing. To reheat, place them on a baking sheet and warm in a preheated oven at 350°F (175°C) for 8-10 minutes, or until heated through and the tortillas are crisp again. A microwave can be used, but the tortillas may lose their crispness.
Conclusion
There you have it – a truly delightful and incredibly versatile recipe for Cheesy Taco Cups Snack Bake! These flavorful bites are the perfect fusion of convenience and deliciousness. They bring all the beloved tastes of a taco into a fun, easy-to-eat package, making them an instant hit with everyone who tries them.
We truly encourage you to give this recipe a try. It’s a fantastic way to enjoy a meal or snack that feels special without requiring hours in the kitchen. The simple steps and readily available ingredients mean you can whip up a batch whenever the craving strikes.
So, gather your ingredients, follow these easy steps, and prepare to impress yourself, your family, and your friends. These Cheesy Taco Cups are not just food; they’re an experience, perfect for sharing joy and deliciousness around your table. Happy cooking!


