
Introduction
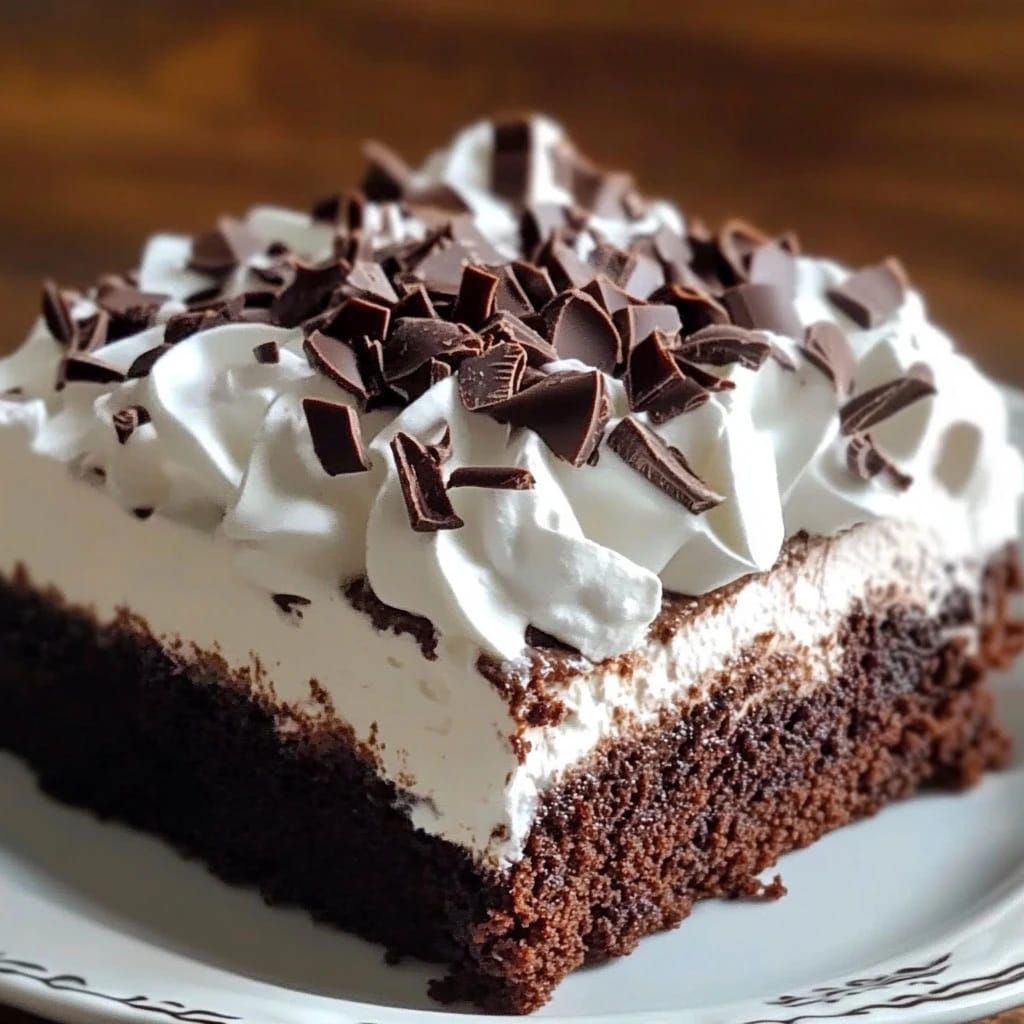
Get ready to discover your new favorite dessert! This Brownie Refrigerator Cake is pure magic. Imagine layers of fudgy brownies, creamy cheesecake filling, and a rich chocolate ganache, all chilled to perfection. It’s a decadent treat that tastes like it took hours, but it’s wonderfully simple to put together.
The best part? No baking required! That’s right, you don’t even need to turn on your oven. This no-bake wonder is perfect for hot days or when you just want a delicious dessert without all the fuss. It’s quick, easy, and delivers big on flavor, making it ideal for busy weeknights or impromptu gatherings.
So, if you’re looking for a show-stopping dessert that’s incredibly easy and utterly delicious, you’ve found it! Gather your ingredients and get ready to create something truly special. Your taste buds (and your family and friends) will thank you!
Cooking Time & Prep Time
- Prep Time: 30 minutes
- Chilling Time: 4 hours (minimum)
- Total Time: 4 hours 30 minutes
Small tip: The chilling time is crucial for the cake to set properly. Don’t rush it! For best results, chill overnight.
Ingredients
This recipe makes approximately 8-10 generous servings.
For the Brownie Layer:
- 1 (13×9 inch) pan of pre-made brownies (store-bought or your favorite recipe, cooled and cut into 1-inch squares)
- 1/2 cup milk (any kind works)
For the Cream Cheese Filling:
- 8 oz (226g) cream cheese, softened
- 1/2 cup powdered sugar (confectioners’ sugar)
- 1 teaspoon vanilla extract
- 1 cup heavy whipping cream, cold
For the Chocolate Ganache:
- 1 cup semi-sweet chocolate chips
- 1/2 cup heavy whipping cream
For Garnish (Optional):
- Chocolate shavings
- Sprinkles
- Fresh berries (strawberries, raspberries)
Step-by-Step Instructions
-
Step 1: Prepare Your Pan
Line a 9×5 inch loaf pan (or an 8×8 inch square pan for a wider cake) with parchment paper. Make sure to leave an overhang on the sides. This will help you lift the cake out easily later. A little non-stick spray on the pan before the parchment can help it stick better.
Small tip: Using parchment paper is key for a clean removal. Don’t skip this step!
-
Step 2: Prepare the Brownie Layer
Take your pre-made brownies and cut them into bite-sized 1-inch squares. Arrange about half of the brownie squares in a single layer at the bottom of your prepared pan. Press them down gently to form a somewhat even base. Pour half of the milk evenly over the brownie layer. This helps moisten the brownies and makes them extra fudgy.
-
Step 3: Make the Cream Cheese Filling
In a large mixing bowl, beat the softened cream cheese with an electric mixer until smooth and creamy. Add the powdered sugar and vanilla extract, continuing to beat until well combined and fluffy. In a separate, chilled bowl, whip the cold heavy cream until stiff peaks form. Gently fold the whipped cream into the cream cheese mixture until no streaks remain. Be careful not to overmix.
Small tip: Make sure your cream cheese is truly softened to avoid lumps in your filling. You can leave it on the counter for about 30 minutes.
-
Step 4: Assemble the First Layer
Spread about half of the cream cheese filling evenly over the brownie layer in the pan. Use an offset spatula or the back of a spoon to smooth it out. Try to get it as flat as possible, as this will be the middle of your cake.
-
Step 5: Add the Second Brownie Layer
Carefully place the remaining brownie squares on top of the cream cheese filling, arranging them in another single layer. Gently press them down. Pour the remaining milk evenly over this second brownie layer. Then, spread the rest of the cream cheese filling on top of the second brownie layer, smoothing it out nicely.
-
Step 6: Prepare the Chocolate Ganache
Place the chocolate chips in a heatproof bowl. In a small saucepan, heat the heavy cream over medium heat until it just begins to simmer around the edges. Do not let it boil vigorously. Pour the hot cream over the chocolate chips. Let it sit for 5 minutes without stirring. Then, whisk gently until the chocolate is completely melted and the mixture is smooth and glossy.
Small tip: If your ganache isn’t fully smooth, you can microwave it for 10-15 second intervals, stirring in between, until it’s perfect.
-
Step 7: Pour the Ganache
Pour the slightly cooled ganache evenly over the top cream cheese layer of the cake. Gently tilt the pan to spread the ganache from edge to edge. If you like, you can create a swirled pattern with a knife or toothpick for a decorative touch.
-
Step 8: Chill the Cake
Cover the pan loosely with plastic wrap. Place the cake in the refrigerator and chill for at least 4 hours, or preferably overnight. This is crucial for the cake to set and for the flavors to meld beautifully.
-
Step 9: Garnish and Serve
Once chilled, use the parchment paper overhang to carefully lift the cake out of the pan and onto a serving platter. Remove the parchment paper. Garnish with chocolate shavings, sprinkles, or fresh berries if desired. Slice with a warm, sharp knife (run under hot water and wipe clean between slices) and serve immediately. Enjoy your delicious no-bake creation!
Tips & Variations
- Gluten-Free Option: Simply use your favorite store-bought gluten-free brownies or make a batch from a gluten-free brownie mix. All other ingredients are naturally gluten-free!
- Vegan/Vegetarian Option: This cake can easily be made vegan! Use plant-based brownies, dairy-free cream cheese, and a vegan heavy whipping cream alternative (like full-fat coconut cream, chilled, with the solid part scooped out). Ensure your chocolate chips are dairy-free.
- Add More Goodness: For a slight protein boost and crunch, add a layer of chopped walnuts or pecans between the brownie and cream cheese layers. You could also fold in finely chopped strawberries or raspberries into the cream cheese filling for a fruity twist and added vitamins.
- Spicy Kick: For a sophisticated spicy chocolate experience, add a pinch (1/8 teaspoon) of cayenne pepper to your chocolate ganache. It adds a wonderful warmth that complements the rich chocolate flavor.
- Flavor Variations: Try adding different extracts to the cream cheese filling, like a touch of almond extract, mint extract, or even a tablespoon of instant espresso powder for a mocha flavor. You can also experiment with different chocolate chips for the ganache, such as dark chocolate or milk chocolate.
Nutritional Information
Approximate values per serving (based on 10 servings):
- Calories: 480 kcal
- Protein: 5g
- Carbohydrates: 50g
- Fat: 30g
Note: These values are estimates and may vary depending on the specific brands and types of ingredients used.
Health Benefits
While this is certainly a treat, some of its ingredients do offer a few benefits!
- Dark Chocolate: If you opt for semi-sweet or dark chocolate in your ganache, you’re getting a dose of antioxidants. These compounds help fight free radicals in your body and may contribute to heart health. Dark chocolate is also known to boost mood!
- Dairy (Cream Cheese & Heavy Cream): For those who consume dairy, cream cheese and heavy cream provide calcium, which is essential for strong bones and teeth. They also offer some protein and B vitamins.
- Berries (if used as garnish): Adding fresh berries like strawberries or raspberries not only brightens the dish but also adds vitamins, fiber, and more antioxidants. They are a wonderful way to incorporate a little extra nutrition.
- Nuts (if added): If you choose to include chopped nuts like walnuts or pecans, you’ll be adding healthy fats, omega-3 fatty acids (especially from walnuts), fiber, and additional protein. These can contribute to satiety and overall heart health.
Serving Suggestions
- Perfect Party Dessert: This cake is a fantastic centerpiece for any gathering. It looks impressive and serves a crowd easily.
- Coffee Break Treat: Pair a slice with a warm cup of coffee, espresso, or your favorite tea for a delightful afternoon pick-me-up.
- A La Mode: For an extra decadent experience, serve a slice with a scoop of vanilla bean ice cream or a dollop of extra whipped cream.
Storage Tips
This Brownie Refrigerator Cake keeps beautifully in the fridge. Store any leftovers in an airtight container in the refrigerator for up to 3-4 days. It’s best enjoyed cold. While you can freeze the cake, the texture of the cream cheese filling might change slightly upon thawing, becoming a bit softer. If freezing, wrap individual slices tightly in plastic wrap and then foil. Thaw in the refrigerator overnight. Reheating is not recommended for this cold dessert; simply let it sit at room temperature for 10-15 minutes before serving if you prefer it slightly less firm.
Conclusion
There you have it – a truly irresistible Brownie Refrigerator Cake that brings together the best of fudgy brownies and creamy cheesecake, all wrapped in a luscious chocolate ganache. It’s the ultimate no-bake dessert for any occasion, promising rich flavors and a delightful texture without ever turning on the oven.
We hope you feel inspired to try this recipe. It’s surprisingly simple to make, and the results are incredibly rewarding. Imagine the smiles when you serve up this beautiful, decadent treat!
So go ahead, whip up this amazing no-bake cake and share it with your loved ones. It’s guaranteed to be a hit and quickly become a favorite in your recipe collection. Happy no-baking!


