
Introduction
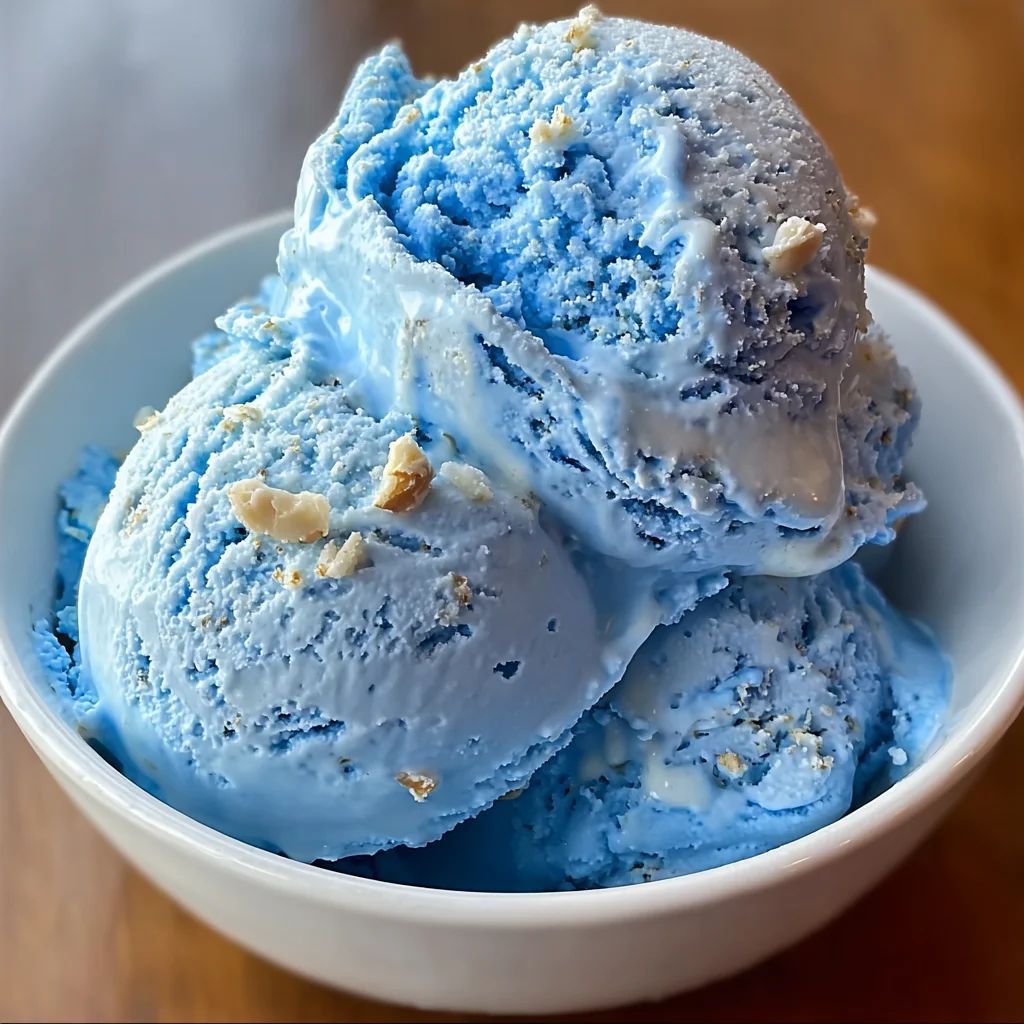
Get ready to take a delicious trip down memory lane with our incredible Blue Moon Ice Cream recipe! This iconic treat, famous for its vibrant blue hue and unique, mysterious flavor, is a true Midwestern classic. Imagine a delightful blend of vanilla, almond, and sometimes a hint of citrus or fruit, all swirled into a creamy, dreamy scoop. It’s a flavor that’s hard to pinpoint, making every spoonful an exciting adventure for your taste buds.
You might think making homemade ice cream is complicated, but I promise you, this recipe is surprisingly simple. We’ll walk through each step together, ensuring you get that perfect, smooth, and intensely flavorful ice cream without any fuss. Forget those overly sweet, artificial versions from the store; this homemade Blue Moon is a game-changer, offering a depth of flavor and creaminess that is simply unmatched.
So, dust off your ice cream maker and prepare for a truly nostalgic experience. Whether you’re reliving childhood memories or discovering this whimsical flavor for the first time, you’re in for a treat. Let’s dive in and create some magic in your kitchen!
Cooking Time & Prep Time
- Prep Time: 20 minutes
- Chilling Time: 4 hours (minimum) to overnight
- Churning Time: 20-30 minutes
- Freezing Time: 4-6 hours (for firming up)
- Total Active Time: 40-50 minutes
- Total Inactive Time: 8-12 hours
Small tip: The chilling time for the ice cream base is crucial for the best texture, so don’t rush it! A well-chilled base churns faster and results in smoother ice cream.
Ingredients
This recipe makes approximately 6-8 servings.
For the Ice Cream Base:
- 2 cups (470ml) heavy cream
- 1 cup (240ml) whole milk
- ¾ cup (150g) granulated sugar
- ¼ teaspoon salt
- 5 large egg yolks
- 1 teaspoon pure vanilla extract
- 1 teaspoon pure almond extract
- ½ teaspoon lemon extract (optional, for a brighter flavor)
- Blue gel food coloring (start with ¼ teaspoon, add more to desired shade)
Step-by-Step Instructions
-
Step 1: Prepare the Cream Mixture
In a medium saucepan, combine the heavy cream, whole milk, granulated sugar, and salt. Heat this mixture over medium heat, stirring occasionally, until the sugar dissolves and small bubbles appear around the edges. Do not boil it.
Small tip: Keep an eye on the heat; you want it hot, but not scorching. Stirring helps prevent scorching on the bottom.
-
Step 2: Temper the Egg Yolks
While the cream mixture heats, whisk the egg yolks in a separate medium bowl until they are light yellow and slightly thickened. Once the cream mixture is hot, slowly ladle about half a cup of the hot liquid into the whisked egg yolks, whisking constantly. This “tempers” the yolks, preventing them from scrambling.
Small tip: Whisk vigorously as you add the hot liquid to the yolks. This ensures they warm up gently and smoothly, creating a stable base.
-
Step 3: Combine and Cook the Custard
Pour the tempered egg yolk mixture back into the saucepan with the remaining hot cream mixture. Return the saucepan to medium-low heat. Cook, stirring constantly with a wooden spoon or spatula, until the custard thickens enough to coat the back of the spoon (about 5-8 minutes).
Small tip: Do not let the mixture boil! If it gets too hot, the eggs can curdle. Cook until it reaches about 175-180°F (79-82°C) if you have a thermometer.
-
Step 4: Strain and Chill the Base
Remove the custard from the heat. Pour it through a fine-mesh sieve into a clean bowl to catch any small bits of egg or lumps, ensuring a super smooth ice cream. Stir in the vanilla extract, almond extract, and lemon extract (if using).
Small tip: Straining is a crucial step for achieving that silky, professional ice cream texture. Don’t skip it!
-
Step 5: Add the Blue Color
Now for the fun part! Add ¼ teaspoon of blue gel food coloring to the custard base. Stir well until the color is evenly distributed. If you desire a deeper, more vibrant blue, add a tiny bit more food coloring, stirring after each addition, until you reach your preferred shade.
Small tip: Gel food coloring provides a more intense color without watering down the base, so a little goes a long way.
-
Step 6: Chill Thoroughly
Cover the bowl with plastic wrap, pressing it directly onto the surface of the custard to prevent a skin from forming. Refrigerate the ice cream base for at least 4 hours, or preferably overnight. It must be completely cold before churning.
Small tip: An overnight chill really makes a difference in the final texture and churn time. Plan ahead for the best results!
-
Step 7: Churn the Ice Cream
Once the base is thoroughly chilled, pour it into your ice cream maker’s frozen bowl. Churn according to the manufacturer’s instructions, typically for 20-30 minutes, until the ice cream is thick and resembles soft-serve consistency.
Small tip: Make sure your ice cream maker bowl has been frozen for at least 24 hours prior to churning for optimal performance.
-
Step 8: Freeze to Firm
Transfer the churned ice cream to an airtight container. Press plastic wrap directly onto the surface of the ice cream to minimize ice crystal formation. Place the container in the freezer for at least 4-6 hours, or until it reaches your desired firm consistency.
Small tip: For the creamiest scoop, let the ice cream sit at room temperature for 5-10 minutes before serving.
Tips & Variations
- Gluten-Free Option: This Blue Moon Ice Cream recipe is naturally gluten-free! Enjoy it as is, or be mindful of any gluten-containing toppings you might add.
- Vegan Option: For a delicious vegan version, substitute the heavy cream with full-fat coconut cream (chilled, scoop out the thick part) and the milk with full-fat coconut milk. Replace egg yolks with 2 tablespoons of cornstarch or arrowroot powder whisked into a small amount of the cold coconut milk before heating, then proceed with thickening. Use a plant-based sugar if preferred.
- Adding More Flavor/Texture: While not traditional for “vegetables or protein” in ice cream, you can swirl in a spoonful of almond butter (for protein) or a purée of blueberries or raspberries (for a fruit “vegetable” boost and color variation) during the last few minutes of churning.
- Spicy Version: For an adventurous twist, add a tiny pinch (⅛ teaspoon) of cayenne pepper to the cream mixture during Step 1. This will create a subtle warmth that enhances the other flavors. You could also swirl in a spicy dark chocolate fudge sauce after churning.
- Other Flavor Tips: Experiment with different extracts! Try a few drops of orange blossom water for a floral note, or a tiny bit of bubblegum flavoring for a truly unique, kid-friendly twist. You can also add mix-ins like white chocolate chips, colorful sprinkles, or crushed vanilla wafers after churning.
Nutritional Information
Approximate values per serving (based on 8 servings):
- Calories: 350-400 kcal
- Protein: 4-6g
- Carbohydrates: 30-35g
- Fat: 25-30g
Note: These values are approximate and may vary depending on the specific brands and amounts of ingredients used.
Health Benefits
While ice cream is certainly a treat, our homemade Blue Moon Ice Cream offers a few benefits, especially when made with quality ingredients. The main components contribute positively in moderation.
Dairy products like milk and heavy cream are excellent sources of calcium, which is vital for strong bones and teeth. They also provide phosphorus and vitamin D (if fortified), further supporting bone health.
The protein content from the milk and egg yolks contributes to muscle repair and growth, and helps you feel satisfied. Eggs are also packed with essential vitamins like B12 and minerals like selenium.
The sugar provides a quick energy boost, making this ice cream a wonderful pick-me-up. Enjoying a delicious treat like Blue Moon Ice Cream can also have a positive impact on your mood, offering a moment of pure enjoyment and nostalgia.
By making it at home, you control the ingredients, avoiding artificial additives often found in commercial ice creams. This allows for a fresher, more natural flavor experience.
Serving Suggestions
- Serve classic scoops in waffle cones or small bowls for a delightful dessert.
- Create a whimsical sundae by adding whipped cream, colorful sprinkles, and a cherry on top.
- Pair a scoop with a slice of warm apple pie or a rich chocolate brownie for an elevated dessert experience.
- Make a fun “Blue Moon Float” by adding a scoop or two to a glass of lemon-lime soda or cream soda.
- Use it as a base for a unique milkshake! Blend with a little extra milk until smooth and creamy.
Storage Tips
Homemade Blue Moon Ice Cream is best enjoyed within 1-2 weeks for optimal freshness and texture. Always store it in an airtight container in the coldest part of your freezer to prevent ice crystals from forming. While it can technically last longer, its texture might degrade over time. This ice cream is not suitable for refrigeration for long periods, as it will melt. Reheating is not applicable for ice cream; simply let it soften slightly at room temperature for a few minutes before scooping.
Conclusion
There you have it – your very own homemade Blue Moon Ice Cream! This recipe brings together the joy of a unique, nostalgic flavor with the satisfaction of creating something truly special in your kitchen. Its vibrant blue color and mysterious, creamy taste make it an instant favorite for kids and adults alike.
Making ice cream from scratch is such a rewarding experience, and this recipe proves it doesn’t have to be difficult. You’ve now mastered a classic, creating a dessert that’s far superior to anything you’d buy. The fresh ingredients and careful steps result in an incredibly smooth, rich, and perfectly flavored treat.
So, don’t wait! Gather your ingredients, get your ice cream maker ready, and dive into this delightful project. Share your amazing Blue Moon Ice Cream with family and friends, and watch their faces light up with every spoonful. Enjoy this taste of pure happiness!


