
Introduction
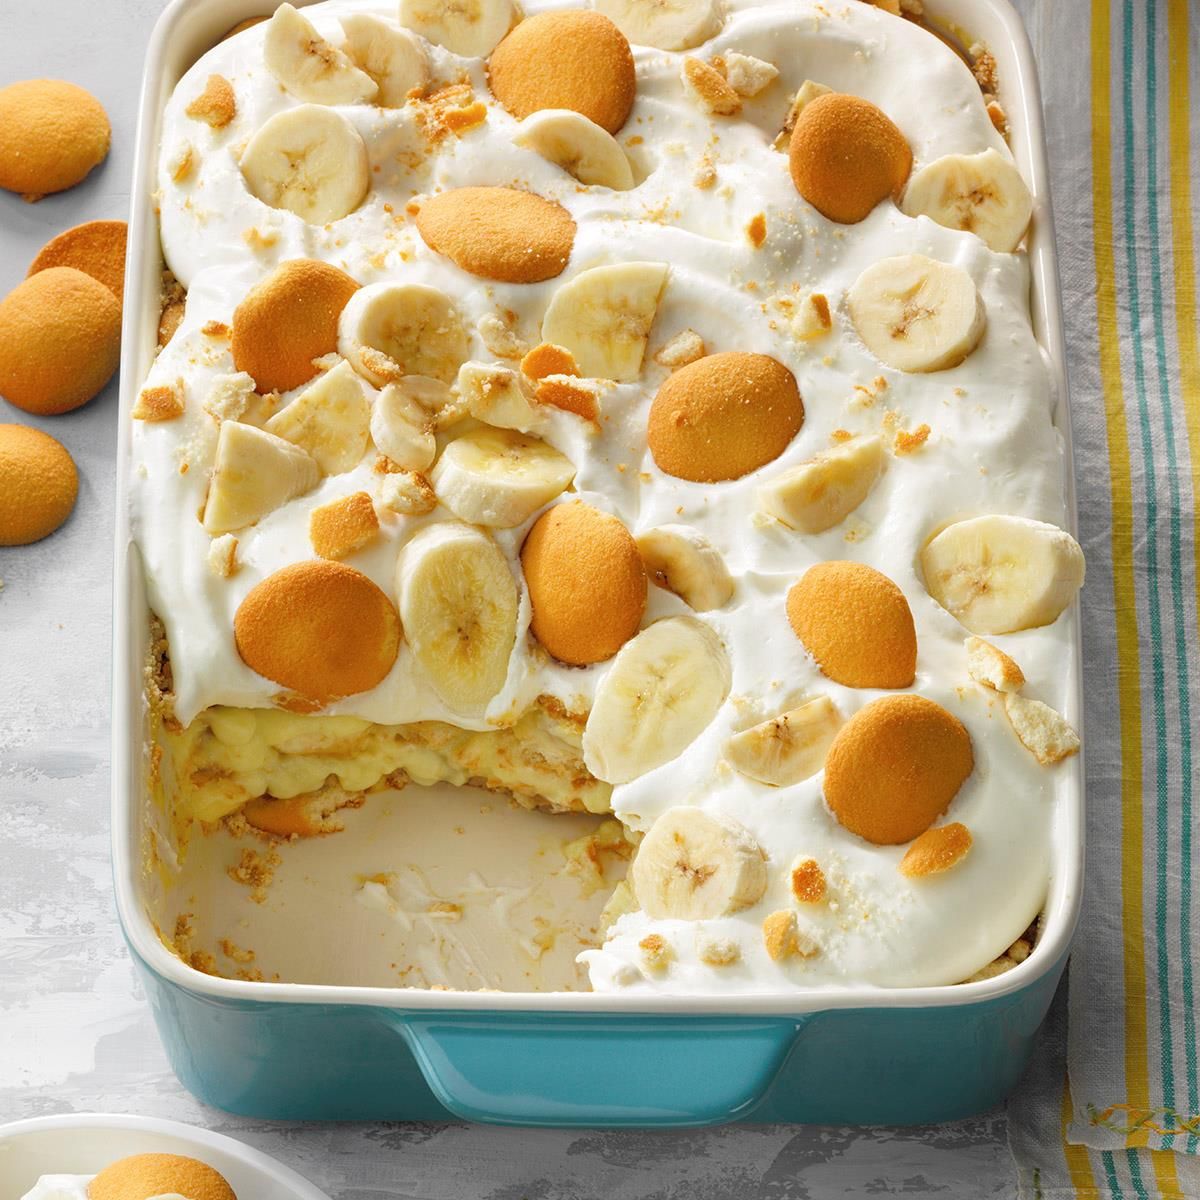
Get ready to dive spoon-first into a bowl of pure comfort! Banana Pudding is a timeless American classic, cherished for its delightful layers and incredibly creamy texture. Imagine sweet, ripe bananas nestled between soft vanilla wafers, all swimming in a rich, velvety homemade custard. It’s a dessert that brings smiles and a touch of nostalgic joy to every bite.
Many people think homemade custard is tricky, but I promise you, this recipe is surprisingly simple to master. With straightforward steps and common pantry ingredients, you’ll whip up this impressive dessert without breaking a sweat. It’s mostly about gentle stirring and patient chilling, making it a perfect project for any home cook, even beginners.
So, clear your counter, gather your ingredients, and prepare to create a truly unforgettable dessert. This Banana Pudding is more than just a recipe; it’s an invitation to make sweet memories. Let’s get cooking!
Cooking Time & Prep Time
- Prep Time: 25 minutes
- Cooking Time: 15 minutes
- Total Time: 40 minutes (plus at least 4 hours chilling time)
Small tip: The chilling time is crucial for the flavors to meld and the pudding to set perfectly. Don’t rush this step for the best results!
Ingredients
This recipe makes 8 generous servings.
For the Homemade Vanilla Pudding
- 2 cups whole milk
- 1/2 cup granulated sugar
- 1/4 cup cornstarch
- 1/4 teaspoon salt
- 2 large egg yolks
- 2 tablespoons unsalted butter
- 1 teaspoon pure vanilla extract
For the Layers and Assembly
- 1 (11-ounce) box vanilla wafers (about 70-80 cookies)
- 4-5 ripe but firm bananas, sliced into 1/4-inch rounds
For the Topping
- 1 cup heavy cream, very cold
- 2 tablespoons powdered sugar
- 1/2 teaspoon pure vanilla extract
Step-by-Step Instructions
-
Step 1: Prepare the Pudding Base
In a medium saucepan, whisk together the granulated sugar, cornstarch, and salt until well combined. In a separate bowl, lightly beat the two egg yolks. Gradually whisk in about 1/2 cup of the whole milk into the egg yolks to temper them.
Small tip: Tempering the egg yolks prevents them from scrambling when added to the hot milk mixture.
-
Step 2: Cook the Pudding
Pour the remaining 1 1/2 cups of whole milk into the saucepan with the dry ingredients. Whisk constantly over medium heat until the mixture is smooth and begins to warm. Slowly pour the tempered egg yolk mixture into the saucepan, whisking continuously.
Continue to cook, whisking constantly, for 5-7 minutes until the pudding thickens considerably and coats the back of a spoon. It should come to a gentle simmer with a few bubbles.
-
Step 3: Finish the Pudding
Remove the saucepan from the heat. Stir in the unsalted butter and pure vanilla extract until the butter is completely melted and incorporated. The pudding will be smooth and glossy.
Pour the pudding into a clean bowl. Press a piece of plastic wrap directly onto the surface of the pudding to prevent a skin from forming. Let it cool on the counter for about 30 minutes, then refrigerate for at least 1 hour, or until completely cool.
-
Step 4: Slice the Bananas
While the pudding cools, prepare your bananas. Peel and slice the ripe bananas into even 1/4-inch rounds. Keep them covered lightly until ready to assemble to prevent excessive browning.
Small tip: Use bananas that are ripe (some brown spots) but still firm. Overly soft bananas can become mushy in the pudding.
-
Step 5: Prepare Your Dish
Choose a clear, 9×13-inch baking dish or a large trifle bowl to showcase the beautiful layers. This will make serving easy and visually appealing.
-
Step 6: Assemble the Pudding Layers
Start with a single layer of vanilla wafers on the bottom of your chosen dish. Arrange a layer of sliced bananas over the wafers. Spoon about one-third of the cooled vanilla pudding evenly over the bananas.
Repeat these layers: wafers, then bananas, then pudding. Continue until all ingredients are used, ending with a final layer of pudding on top. Ensure the pudding is spread to the edges.
-
Step 7: Chill the Pudding
Cover the dish tightly with plastic wrap. Refrigerate the banana pudding for at least 4 hours, or preferably overnight. This allows the wafers to soften and the flavors to fully develop and meld together.
Small tip: Longer chilling time results in a more cohesive and flavorful pudding. Overnight is truly best!
-
Step 8: Prepare the Whipped Cream Topping
Just before serving, pour the very cold heavy cream into a large mixing bowl. Add the powdered sugar and vanilla extract. Using an electric mixer, beat on medium-high speed until soft peaks form.
Be careful not to overbeat, or you’ll end up with butter!
-
Step 9: Garnish and Serve
Remove the chilled banana pudding from the refrigerator. Gently spread the freshly whipped cream over the top of the pudding. You can make decorative swirls with a spoon or spatula. Serve immediately and enjoy!
Tips & Variations
- Gluten-Free Option: Easily make this recipe gluten-free by using your favorite brand of gluten-free vanilla wafers. The pudding itself is naturally gluten-free as it uses cornstarch, not flour.
- Vegan/Vegetarian Option: For a delicious vegan version, use unsweetened plant-based milk (like almond or oat milk), vegan butter, and a suitable egg replacer (such as a flax egg or commercial egg substitute). Top with a plant-based whipped cream or coconut cream.
- Add More Protein: Stir 1/4 cup of unflavored or vanilla protein powder into the cooled pudding before assembly for an extra protein boost. Alternatively, top with a dollop of Greek yogurt instead of whipped cream, or sprinkle finely chopped nuts like pecans or walnuts over the top for healthy fats and protein.
- Spicy Twist: For a surprising warmth, add a tiny pinch (1/8 teaspoon) of cayenne pepper or a small dash of ground ginger along with the cornstarch to the pudding mixture. This creates a subtle, intriguing heat that complements the sweet bananas beautifully.
- Flavor Variations: Experiment with different cookies like Biscoff or chocolate wafers. You can also add a layer of caramel drizzle, chocolate chips, or toasted shredded coconut between the pudding layers for extra flavor and texture.
Nutritional Information
Approximate values per serving (based on 8 servings):
- Calories: 410 kcal
- Protein: 7g
- Carbohydrates: 60g
- Fat: 18g
Please note: Nutritional values may vary depending on the specific brands and amounts of ingredients used.
Health Benefits
While banana pudding is a treat, its main ingredients do offer some wonderful health benefits:
- Bananas: These sweet fruits are powerhouses of potassium, an essential mineral for heart health and maintaining fluid balance. They also provide a good source of Vitamin B6, which is important for brain health, and Vitamin C, an antioxidant that supports the immune system. The fiber in bananas aids in healthy digestion.
- Milk: Whole milk contributes calcium, which is vital for strong bones and teeth. It also provides Vitamin D (if fortified), another key nutrient for bone health and immune function, and a good amount of protein for muscle repair and growth.
- Eggs: Egg yolks, used in our pudding, are rich in protein, which is essential for building and repairing tissues. They also contain choline, an important nutrient for brain health and metabolism, and various vitamins like A, D, E, and K.
- Butter: While used in moderation, butter provides some fat-soluble vitamins like A and E. It also adds a satisfying richness that contributes to the overall enjoyment of the dessert.
Serving Suggestions
- Serve this comforting dessert chilled, straight from the refrigerator, for the best texture and flavor.
- It’s the perfect sweet ending to any meal, from a casual family dinner to a festive holiday gathering.
- Elevate your serving by garnishing individual portions with a few extra banana slices, a sprinkle of cinnamon, or a delicate vanilla wafer.
- Consider serving small portions alongside a hot cup of coffee, a soothing herbal tea, or a glass of cold milk for a delightful afternoon treat.
Storage Tips
Store any leftover banana pudding tightly covered with plastic wrap in the refrigerator. It will keep well for 3-4 days, though the bananas may start to brown slightly and the wafers will become very soft. Freezing is generally not recommended for banana pudding, as the bananas tend to become mushy and discolored upon thawing, and the pudding texture can change. This dessert is best enjoyed chilled, so no reheating is required or recommended.
Conclusion
There you have it – a truly classic Banana Pudding that is as simple to make as it is delicious to eat! This recipe proves that you don’t need fancy techniques to create a dessert that tastes like a warm hug. The creamy custard, sweet bananas, and tender wafers come together in perfect harmony, making it an irresistible treat.
I genuinely encourage you to give this recipe a try. You’ll be amazed at how easy it is to achieve such a rich and comforting flavor. Plus, the joy of making something so beloved from scratch is incredibly rewarding.
Whip up a big batch for your next family dinner, a potluck with friends, or simply as a special treat for yourself. Sharing this homemade Banana Pudding is a wonderful way to spread happiness and create lasting sweet memories. Happy baking!


