
Introduction
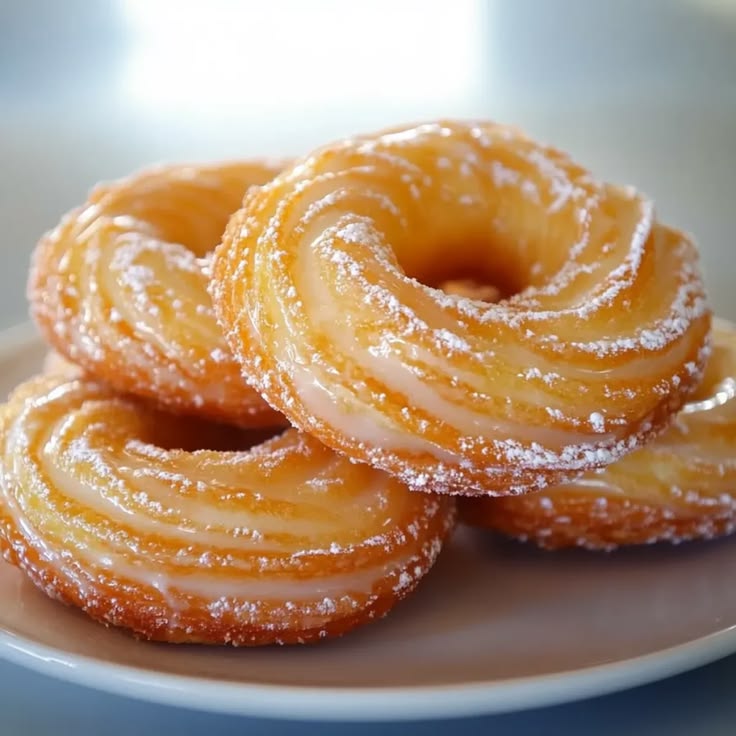
Get ready to discover a truly magical treat: Baked French Cruller Donuts! These aren’t your average donuts. Imagine delicate, airy pastry with beautiful fluted edges, lightly crisped on the outside and wonderfully soft within. They are an elegant dessert, a delightful breakfast, and a perfect partner for your morning coffee or afternoon tea. Each bite is a whisper of sweet vanilla, making them incredibly special.
The best part? These crullers are baked, not fried! This means less mess in your kitchen and a lighter, less greasy indulgence. We use a classic choux pastry base, which might sound fancy, but it’s surprisingly simple to master. With clear steps and a little patience, you’ll create bakery-worthy donuts right in your own home, without the fuss of hot oil.
So, why wait? This recipe is designed for everyone, from beginner bakers to seasoned pros. It’s a fun project that yields impressive results. Gather your ingredients and let’s create some delicious, beautiful Baked French Cruller Donuts together. Your taste buds will thank you!
Cooking Time & Prep Time
- Prep Time: 30 minutes
- Cooking Time: 25 minutes
- Total Time: 55 minutes
Small tip: You can make the choux pastry ahead of time and refrigerate it for up to 24 hours. Just bring it to room temperature before piping.
Ingredients
Makes 12 donuts
For the Choux Pastry
- 1 cup (240ml) water
- ½ cup (113g) unsalted butter, cut into cubes
- ¼ teaspoon salt
- 1 cup (120g) all-purpose flour, sifted
- 4 large eggs, at room temperature
- 1 teaspoon vanilla extract (optional, but recommended)
For the Simple Glaze
- 1 ½ cups (180g) powdered sugar, sifted
- 3-4 tablespoons milk (any kind) or water
- ½ teaspoon vanilla extract
Step-by-Step Instructions
-
Step 1: Preheat Oven & Prepare Pan
Preheat your oven to 400°F (200°C). Line a large baking sheet with parchment paper. If you have a donut pan, you can lightly grease and flour it instead, but piping onto parchment works beautifully too.
Small tip: Using parchment paper makes cleanup super easy and prevents sticking.
-
Step 2: Make the Choux Pastry Base
In a medium saucepan, combine the water, butter, and salt. Heat over medium-high heat, stirring occasionally, until the butter is completely melted and the mixture comes to a rolling boil. This ensures the butter is fully incorporated.
-
Step 3: Add Flour
Remove the saucepan from the heat. Add all of the sifted flour at once. Stir vigorously with a wooden spoon until the mixture comes together and forms a ball. Continue stirring for about 1-2 minutes, pressing the dough against the sides of the pan. This cooks out excess moisture.
Small tip: Don’t skip this step! Cooking the flour helps create that perfect airy texture.
-
Step 4: Cool Slightly
Transfer the dough ball to a large mixing bowl. Let it cool for 5-7 minutes. It should still be warm but not so hot that it cooks the eggs when added. You can stir it occasionally to help it cool faster.
-
Step 5: Incorporate Eggs
Add the eggs one at a time, mixing thoroughly after each addition. You can use a stand mixer with a paddle attachment or a hand mixer. The dough will look curdled and separated at first, but keep mixing until each egg is fully incorporated and the dough is smooth and glossy. Stir in the vanilla extract with the last egg.
Small tip: The dough should be thick but fall slowly from a spoon in a “V” shape. If it’s too stiff, add a tiny bit more egg.
-
Step 6: Pipe the Dough
Transfer the choux pastry to a piping bag fitted with a large open star tip (like an Ateco 8B or Wilton 1M). Pipe 3-inch wide donut shapes onto the prepared baking sheet. You can pipe two concentric circles, one on top of the other, to create a classic cruller shape with height.
Small tip: Practice piping on a separate piece of parchment if you’re new to it. Even imperfect shapes taste delicious!
-
Step 7: Bake the Crullers
Bake for 20-25 minutes, or until the crullers are puffed, golden brown, and feel light when lifted. Do not open the oven door during the first 15 minutes of baking, as this can cause them to deflate. Once baked, turn off the oven and leave the crullers inside with the door ajar for 5-10 minutes. This helps them dry out and prevents them from collapsing.
-
Step 8: Prepare the Glaze
While the crullers cool slightly, whisk together the powdered sugar, milk, and vanilla extract in a medium bowl until smooth. Adjust the consistency by adding more milk for a thinner glaze or more powdered sugar for a thicker glaze. It should be thick enough to coat a spoon.
-
Step 9: Glaze the Donuts
Carefully remove the warm crullers from the oven. Dip the top of each cruller into the glaze, letting any excess drip off. You can dip them twice for a thicker coating if you like.
-
Step 10: Let Set & Serve
Place the glazed crullers on a wire rack to allow the glaze to set. Serve them warm or at room temperature. They are best enjoyed fresh on the day they are made!
Tips & Variations
- Gluten-Free Option: For a gluten-free version, use a 1:1 gluten-free all-purpose flour blend. You might need to adjust the liquid slightly, as gluten-free flours can absorb differently. Start with the same amount and add a tablespoon or two of water if the dough seems too stiff after adding the eggs.
- Vegan Option: To make these crullers vegan, substitute the butter with a good quality plant-based butter (stick form works best). For the eggs, you can use a commercial egg replacer, or try a “flax egg” (1 tbsp ground flaxseed + 3 tbsp water per egg, let sit for 5 mins). For the glaze, use plant-based milk.
- Add More Protein: While a donut isn’t typically a protein powerhouse, you can boost your meal by serving these crullers alongside a dollop of Greek yogurt or a protein smoothie. For the crullers themselves, a drizzle of almond butter or peanut butter (mixed with a little powdered sugar and milk for consistency) can add a protein kick.
- Spicy Version: For a fun twist, add a tiny pinch (⅛ teaspoon) of cayenne pepper to your chocolate glaze. This creates a subtle warmth that pairs surprisingly well with sweet chocolate. You could also infuse a plain glaze with a very small amount of finely minced fresh ginger.
- Other Flavor Tips: Experiment with different glazes! Try a citrus glaze by replacing some of the milk with lemon or orange juice and adding zest. A chocolate glaze (powdered sugar, cocoa powder, milk) is always a hit. You can also sprinkle with cinnamon sugar, sprinkles, or finely chopped nuts before the glaze sets.
Nutritional Information
Approximate values per serving (based on 12 servings):
- Calories: 230 kcal
- Protein: 5g
- Carbohydrates: 30g
- Fat: 11g
Note: Nutritional values are estimates and may vary depending on specific brands and exact quantities of ingredients used.
Health Benefits
While these are a treat, baking them offers some benefits over their fried counterparts!
- Reduced Fat: Baking instead of deep-frying significantly reduces the overall fat content, particularly unhealthy trans fats often found in frying oils. This makes them a lighter indulgence.
- Eggs for Protein & Nutrients: Eggs are a fantastic source of high-quality protein, which is essential for muscle repair and overall body function. They also provide important vitamins like D and B12, and choline, which supports brain health.
- Control Over Ingredients: Making crullers at home gives you complete control. You can choose high-quality butter and fresh ingredients. You can also adjust the amount of sugar in the glaze to your preference, making it less sweet than many store-bought options.
- Mindful Indulgence: Enjoying a homemade treat in moderation can be part of a balanced diet. The satisfaction of baking something delicious yourself can be a mood booster and encourages mindful eating.
Serving Suggestions
- Serve these warm crullers with a freshly brewed cup of coffee or a comforting mug of tea.
- They make a fantastic addition to a brunch spread, alongside fresh fruit, scrambled eggs, and bacon.
- Enjoy them as a delightful dessert after dinner, perhaps with a scoop of vanilla ice cream or a dollop of whipped cream and fresh berries.
- For meal prep, you can bake the crullers ahead of time and store them unglazed. Prepare the glaze just before serving for the freshest taste.
Storage Tips: Store leftover baked crullers in an airtight container at room temperature for up to 2 days. The glaze may soften slightly over time. For longer storage, unglazed crullers can be frozen for up to 1 month. Thaw at room temperature, then glaze before serving. To reheat, warm briefly in a preheated oven at 300°F (150°C) for 5-7 minutes, or microwave for 10-15 seconds, just until warm.
Conclusion
There you have it – your very own batch of beautiful, delicious Baked French Cruller Donuts! These elegant treats are truly a joy to make and even


