
Introduction
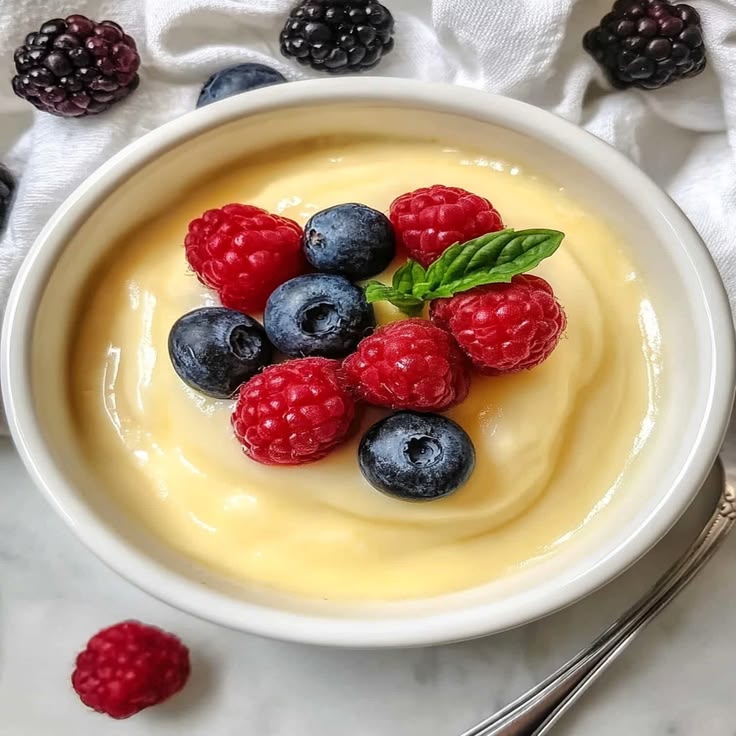
Imagine a spoonful of pure comfort. That’s exactly what homemade vanilla custard offers. It’s a silky-smooth, creamy dream that melts in your mouth with every bite. The rich vanilla flavor is simply divine, making it a timeless dessert for any occasion.
Many people think custard is complicated, but it’s surprisingly easy to make. With just a few basic ingredients and simple steps, you can create this elegant treat in your own kitchen. It doesn’t take much time, and the results are always impressive.
Get ready to impress yourself and your loved ones. This recipe will guide you to creamy perfection. Let’s dive into making the most delicious vanilla custard you’ve ever tasted!
Cooking Time & Prep Time
- Prep Time: 15 minutes
- Cooking Time: 15-20 minutes
- Chill Time: At least 2 hours
- Total Time: Approximately 2 hours 35 minutes (including chill time)
Small tip: The chill time is crucial for the custard to set properly and develop its full flavor. Don’t rush it!
Ingredients
This recipe makes 6 delicious servings.
- 4 large egg yolks
- 1/2 cup (100g) granulated sugar
- 2 cups (480ml) whole milk
- 1/2 cup (120ml) heavy cream
- 1 teaspoon pure vanilla extract (good quality makes a difference!)
- Pinch of salt
Step-by-Step Instructions
-
Step 1: Prepare Your Ingredients
Before you start, gather all your ingredients. This helps ensure a smooth cooking process. Have your egg yolks separated and your milk and cream measured out.
Small tip: Separate cold eggs more easily. Let the yolks come to room temperature while you prepare other ingredients for better emulsification.
-
Step 2: Whisk Egg Yolks and Sugar
In a medium bowl, whisk together the egg yolks and granulated sugar. Whisk vigorously until the mixture is pale yellow and slightly thickened. This takes about 2-3 minutes and creates a lovely ribbon effect.
Small tip: Whisking thoroughly at this stage prevents a grainy texture in your final custard.
-
Step 3: Heat Milk and Cream
In a medium saucepan, combine the whole milk, heavy cream, and a pinch of salt. Heat this mixture over medium heat, stirring occasionally. Bring it just to a simmer; you’ll see small bubbles forming around the edges of the pan. Do not let it boil.
Small tip: Heating slowly helps prevent scorching the milk. Use a heavy-bottomed saucepan for best results.
-
Step 4: Temper the Egg Mixture
This is a crucial step! Slowly pour about half of the hot milk mixture into the egg yolk mixture, whisking constantly. This “tempers” the eggs, gently raising their temperature without scrambling them. Keep whisking to combine thoroughly.
Small tip: Pour in a thin, steady stream while whisking continuously to ensure the eggs temper evenly and don’t cook.
-
Step 5: Cook the Custard
Pour the tempered egg mixture back into the saucepan with the remaining hot milk. Return the saucepan to medium-low heat. Cook, stirring constantly with a wooden spoon or silicone spatula, until the custard thickens enough to coat the back of the spoon. It should reach about 175°F (80°C).
Small tip: Do not let the custard boil once the eggs are added, or it might curdle. Keep the heat low and stir constantly.
-
Step 6: Add Vanilla and Strain
Remove the custard from the heat immediately. Stir in the pure vanilla extract. For an extra smooth custard, pour it through a fine-mesh sieve into a clean bowl or individual serving dishes. This removes any tiny bits of cooked egg.
Small tip: Straining is optional but highly recommended for that perfectly silky texture.
-
Step 7: Chill the Custard
Cover the surface of the custard directly with plastic wrap. This prevents a skin from forming. Place the custard in the refrigerator and chill for at least 2 hours, or until completely set and cold. The longer it chills, the thicker and more flavorful it becomes.
Small tip: Chilling overnight often yields the best texture and deepest flavor.
-
Step 8: Serve and Enjoy
Once chilled, your homemade vanilla custard is ready to serve! Enjoy it plain for its pure, creamy goodness, or add your favorite toppings. It’s a delightful treat that everyone will love.
Small tip: A sprinkle of nutmeg or a fresh berry garnish adds a lovely touch.
Tips & Variations
- Gluten-Free Option: This recipe is naturally gluten-free! Enjoy it as is.
- Vegetarian Option: This recipe is already vegetarian. For a vegan version, try using a plant-based milk (like full-fat oat or soy milk) and a cornstarch slurry or silken tofu instead of eggs. You’ll need to adjust quantities for thickness.
- Make it a More Complete Dessert: Serve your custard with a side of fresh berries (strawberries, blueberries, raspberries) or sliced bananas. A sprinkle of chopped nuts like almonds or pistachios adds healthy fats and crunch.
- Spiced or Citrusy Version: Instead of a spicy kick, try adding a hint of warmth or zest. Infuse the milk with a cinnamon stick, a few cardamom pods, or a strip of orange or lemon zest while heating. Strain before tempering the eggs.
- Chocolate Custard: For a decadent twist, whisk 2 tablespoons of unsweetened cocoa powder into the sugar and egg yolks in Step 2. You can also melt 2 ounces of dark chocolate into the hot milk mixture before tempering.
Nutritional Information
Approximate values per serving (based on 6 servings):
- Calories: 250 kcal
- Protein: 7g
- Carbohydrates: 22g
- Fat: 15g
Please note: These values are approximate and may vary depending on the specific brands and quantities of ingredients used.
Health Benefits
Homemade vanilla custard, while a treat, also offers some nutritional benefits thanks to its core ingredients.
Milk is an excellent source of calcium, which is vital for strong bones and teeth. It also provides Vitamin D, which helps your body absorb that calcium, and B vitamins that support energy metabolism. Whole milk provides healthy fats that help with satiety.
Eggs are nutritional powerhouses. They are a complete protein source, meaning they contain all nine essential amino acids your body needs. Egg yolks specifically are rich in choline, important for brain health, and contain vitamins A, D, E, and K.
Vanilla extract, especially pure vanilla, contains antioxidants. These compounds help protect your cells from damage caused by free radicals. Beyond nutrition, the aroma of vanilla has been linked to mood-boosting properties.
Enjoying a moderate portion of this homemade custard can be part of a balanced diet. It provides essential nutrients in a delicious and satisfying way.
Serving Suggestions
- Classic Dessert: Serve chilled in individual ramekins, perhaps with a light dusting of nutmeg or a sprig of fresh mint.
- Fruit Medley: Top with a colorful array of fresh berries, sliced peaches, or a tropical fruit salsa for added freshness and texture.
- Caramel Drizzle: A light drizzle of homemade caramel sauce or a store-bought dulce de leche takes this custard to the next level of indulgence.
- Breakfast Parfait: Layer chilled custard with granola and fresh fruit in a glass for a delightful, decadent breakfast or brunch treat.
- Pie Filling: This custard can also be used as a luscious filling for a pre-baked pie crust, creating a simple yet elegant custard pie.
Storage Tips
Store leftover vanilla custard in an airtight container in the refrigerator. It will keep well for up to 3-4 days. Make sure to cover the surface directly with plastic wrap to prevent a skin from forming and to maintain its creamy texture. Freezing is not recommended, as the texture of the custard can become grainy and separate upon thawing. If you wish to serve it warm, gently reheat it in a saucepan over very low heat, stirring constantly, until just warm. Be careful not to boil it, or the eggs might curdle. It is truly best served chilled or slightly warm.
Conclusion
There you have it – the secret to making incredibly smooth and rich homemade vanilla custard! It’s a simple pleasure that delivers big on flavor and comfort. The creamy texture and warm vanilla notes make it a dessert that truly soothes the soul.
Don’t be intimidated by the process; with these clear steps and helpful tips, you’ll be a custard pro in no time. The satisfaction of creating something so delicious from scratch is truly rewarding. Give it a try this week!
Whip up a batch for your next family dinner, a special occasion, or just because you deserve a treat. Share this creamy perfection with friends and family, and watch their faces light up with every spoonful. Happy cooking!


