
Introduction
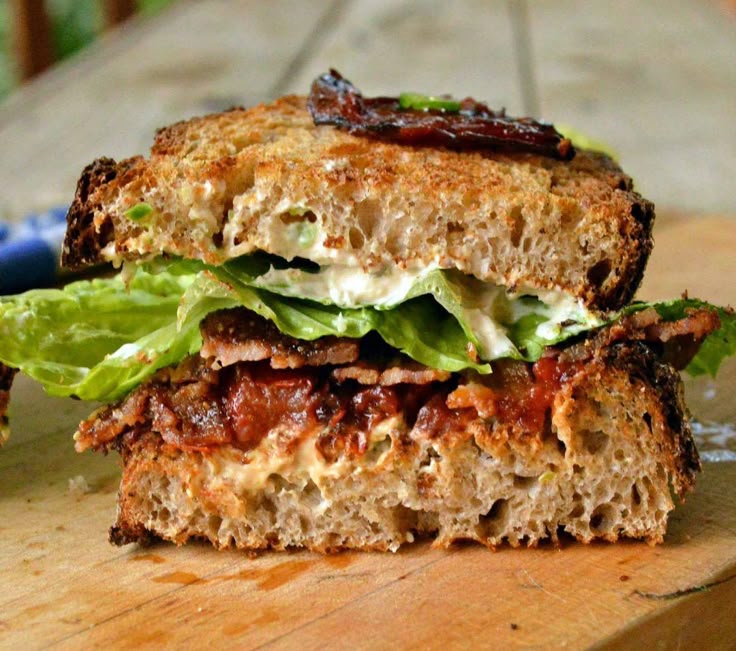
Get ready for a flavor explosion! Today, we’re diving into the world of Candied Bacon BLT Sliders. This dish takes the classic BLT sandwich and elevates it to an irresistible, bite-sized experience. Sweet and savory candied bacon meets crisp lettuce and juicy tomatoes, all nestled in soft slider buns. It’s a symphony of textures and tastes that will make your taste buds sing!
You might think something this delicious would be complicated, but think again! These sliders are surprisingly easy and quick to whip up. With just a few simple steps, you can transform everyday ingredients into a gourmet treat. It’s perfect for a weekend brunch, a party appetizer, or a fun weeknight dinner.
So, are you ready to impress your family and friends with a dish that’s both familiar and exciting? Trust us, once you try these Candied Bacon BLT Sliders, they’ll become a new favorite in your recipe rotation. Let’s get cooking!
Cooking Time & Prep Time
- Prep Time: 20 minutes
- Cooking Time: 25 minutes
- Total Time: 45 minutes
Small tip: You can prepare the candied bacon a day in advance to save time on the day of serving. Store it in an airtight container at room temperature.
Ingredients
Makes 12 sliders
For the Candied Bacon
- 12 slices thick-cut bacon
- 1/4 cup light brown sugar, packed
- 1/2 teaspoon black pepper (freshly ground, if possible)
For the Sliders
- 12 Hawaiian sweet rolls or mini brioche buns
- 1/2 cup mayonnaise
- 1 tablespoon Dijon mustard
- 1/2 teaspoon garlic powder
- 1/4 cup finely chopped fresh chives (optional)
- 2 cups shredded romaine lettuce or butter lettuce leaves
- 1 pint cherry or grape tomatoes, thinly sliced
Step-by-Step Instructions
-
Step 1: Prepare the Candied Bacon
Preheat your oven to 375°F (190°C). Line a baking sheet with parchment paper or foil, then place an oven-safe wire rack on top. This helps the bacon crisp up evenly.
Small tip: Using a wire rack allows air to circulate around the bacon, resulting in perfectly crispy candied bacon.
-
Step 2: Season the Bacon
Lay the bacon slices in a single layer on the wire rack. In a small bowl, combine the brown sugar and black pepper. Sprinkle this mixture evenly over both sides of the bacon slices. Press it gently to adhere.
-
Step 3: Bake the Candied Bacon
Bake for 18-25 minutes, or until the bacon is crispy and caramelized. Keep a close eye on it, as cooking times can vary. It will crisp up more as it cools.
Small tip: The sugar can burn quickly, so check frequently after 15 minutes. If it looks like it’s burning, reduce the heat slightly.
-
Step 4: Cool the Bacon
Carefully remove the baking sheet from the oven. Let the candied bacon cool completely on the wire rack. As it cools, it will become perfectly crisp and shatteringly delicious. Break each slice in half or thirds to fit the slider buns.
-
Step 5: Prepare the Slider Sauce
While the bacon cools, prepare the delicious slider sauce. In a small bowl, whisk together the mayonnaise, Dijon mustard, and garlic powder. If using, stir in the fresh chives.
Small tip: For a touch of heat, add a pinch of cayenne pepper to the sauce.
-
Step 6: Prepare the Buns and Vegetables
Slice the Hawaiian rolls or brioche buns in half horizontally. Arrange the shredded lettuce and sliced tomatoes on a platter for easy assembly. Make sure your tomatoes are thinly sliced for the best bite.
-
Step 7: Assemble the Sliders
Spread a generous amount of the prepared sauce on both the top and bottom halves of each slider bun. This ensures every bite is flavorful. Don’t be shy with the sauce!
-
Step 8: Layer the Ingredients
On the bottom half of each bun, layer with a small amount of shredded lettuce. Top the lettuce with a few slices of the fresh tomatoes. Finally, add 1-2 pieces of the glorious candied bacon.
-
Step 9: Finish and Serve
Place the top half of the bun over the bacon to complete each slider. Arrange them on a serving platter and serve immediately. Watch them disappear!
Tips & Variations
- Gluten-Free Option: Easily make these sliders gluten-free by using your favorite gluten-free slider buns or lettuce wraps instead of bread. The candied bacon and sauce are naturally gluten-free.
- Vegan/Vegetarian Option: For a delicious plant-based version, swap the bacon for crispy smoked tempeh or mushroom “bacon.” Use vegan mayonnaise for the sauce. The sweet and savory notes will still shine through!
- Add More Vegetables or Protein: Boost the veggie power by adding thinly sliced avocado, cucumber, or red onion. For extra protein, consider adding a thin slice of grilled chicken breast or turkey.
- Spicy Version: If you love a little heat, add a pinch of red pepper flakes to the brown sugar mixture for the bacon. You can also mix a dash of sriracha or hot sauce into the slider mayonnaise for an extra kick.
- Flavor Tip: Try adding a drizzle of maple syrup to the brown sugar for the candied bacon for an even deeper, richer sweetness. A sprinkle of smoked paprika can also add a lovely smoky depth.
Nutritional Information
Approximate values per serving (based on 12 servings):
- Calories: 280-320
- Protein: 10-12g
- Carbohydrates: 20-25g
- Fat: 18-22g
Note: Nutritional values may vary depending on specific ingredients used, such as brand of bacon, type of bun, and amount of sauce.
Health Benefits
While these sliders are a treat, some ingredients offer nutritional value. Bacon provides protein, which is essential for muscle repair and growth. Opting for leaner cuts can help manage fat intake.
Lettuce, especially darker varieties like romaine or butter lettuce, is a good source of vitamins A and K. These vitamins are important for vision, bone health, and blood clotting. Lettuce also provides dietary fiber, aiding digestion.
Tomatoes are packed with Vitamin C, an antioxidant that supports the immune system and skin health. They also contain lycopene, a powerful antioxidant known for its potential benefits for heart health and cancer prevention.
Even small additions like Dijon mustard and chives offer benefits. Dijon mustard provides trace minerals, and chives are rich in vitamins K and C, as well as antioxidants, contributing to overall well-being.
Serving Suggestions
- Serve these sliders as a fantastic appetizer at your next party or gathering. They are perfect finger food!
- Pair them with a light side salad dressed with a vinaigrette for a balanced lunch.
- Make them a main course alongside a bowl of creamy tomato soup or a side of crispy sweet potato fries.
- For meal prep, you can make the candied bacon and sauce ahead of time. Store them separately and assemble the sliders just before serving to keep them fresh.
Storage Tips
Leftover candied bacon can be stored in an airtight container at room temperature for up to 2-3 days, or in the refrigerator for up to a week. The prepared slider sauce will keep in an airtight container in the fridge for up to 3-4 days. Assembled sliders are best eaten fresh, but can be stored in an airtight container in the refrigerator for up to 1 day. We do not recommend freezing assembled sliders as the lettuce and tomatoes will become soggy upon thawing. To reheat candied bacon, warm it gently in a toaster oven or a dry skillet until crisp again.
Conclusion
There you have it – the recipe for Candied Bacon BLT Sliders, a dish that truly delivers on flavor and fun. The delightful crunch of the sweet and savory bacon, the crisp freshness of the lettuce and tomato, and the creamy, tangy sauce all come together in one perfect bite. It’s a simple concept, executed to perfection, that will leave everyone wanting more.
Don’t hesitate to give this recipe a try! It’s proof that sometimes, the most extraordinary flavors come from unexpected twists on beloved classics. You’ll be amazed at how easily you can create something so incredibly delicious and satisfying.
So gather your ingredients, follow these easy steps, and prepare to delight your taste buds. These Candied Bacon BLT Sliders are meant to be shared, so invite your family and friends over and enjoy a truly memorable meal together. Happy cooking!


