
Introduction
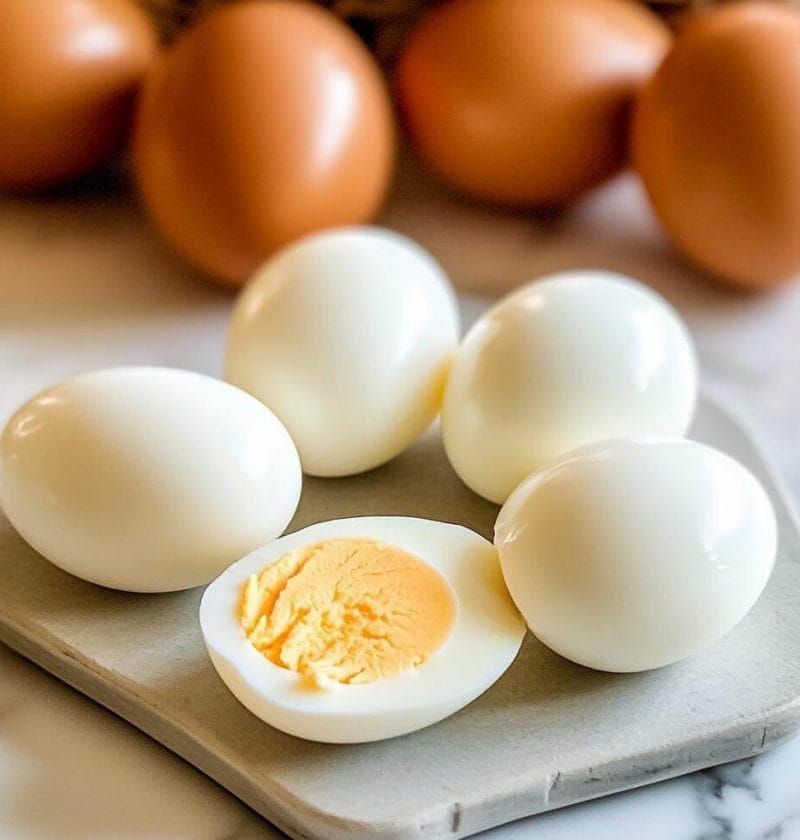
There’s something wonderfully simple and endlessly versatile about a perfectly cooked hard-boiled egg. It’s a humble culinary marvel, offering a creamy, rich yolk encased in a firm, tender white. Whether you enjoy it plain with a sprinkle of salt and pepper, or as a star ingredient in a vibrant salad, it’s a timeless classic that brings comfort and satisfaction to any meal.
Many people shy away from making hard-boiled eggs, fearing the dreaded struggle of peeling. You know the frustration: bits of precious egg white clinging stubbornly to the shell, leaving you with a cratered, unappealing result. But what if we told you there’s a secret to effortlessly peeling every single time? It’s easier than you think, and quick to master!
Today, we’re going to unlock the secrets to not just cooking, but truly mastering the art of perfectly peeled hard-boiled eggs. Say goodbye to ragged whites and hello to smooth, beautiful eggs ready for any dish. Get ready to impress yourself and everyone else with your newfound skill!
Cooking Time & Prep Time
- Prep Time: 5 minutes
- Cooking Time: 12-15 minutes (for large eggs)
- Total Time: 17-20 minutes
Small tip: The cooking time is for large eggs. Adjust by 1-2 minutes less for medium eggs, or 1-2 minutes more for extra-large eggs.
Ingredients
This recipe makes 6 servings.
- 6 large eggs (preferably 1-2 weeks old, not super fresh)
- Water (enough to cover the eggs by at least an inch)
- Ice (about 2-3 cups)
- A large bowl (for the ice bath)
Step-by-Step Instructions
Step 1: Choose Your Eggs Wisely
The secret to easy peeling often starts before you even boil. For best results, use eggs that are at least a week to 10 days old. Very fresh eggs tend to cling more tightly to their shells, making them harder to peel cleanly.
Small tip: If you only have very fresh eggs, don’t worry! The other steps will still help, but slightly older eggs give you an extra edge.
Step 2: Place Eggs in a Pot
Gently place your eggs in a single layer at the bottom of a saucepan. Be careful not to crack them. Crowding the pot can lead to uneven cooking, so use a pot large enough to comfortably hold all your eggs.
Small tip: Using tongs or a slotted spoon helps prevent accidental cracks when placing eggs.
Step 3: Cover with Cold Water
Pour cold water over the eggs until they are covered by at least one inch of water. Starting with cold water helps the eggs cook more evenly and prevents the whites from becoming rubbery. It also reduces the chance of cracking.
Small tip: Ensure all eggs are fully submerged. If any eggs float, they might not cook properly.
Step 4: Bring to a Rolling Boil
Place the pot on the stove over high heat. Bring the water to a rapid, rolling boil. Once the water is boiling vigorously, immediately turn off the heat. Do not let the eggs continue to boil actively.
Small tip: Stay close to the stove. As soon as you see that strong boil, it’s time to move to the next step.
Step 5: Cover and Let Stand
Once the heat is off, immediately cover the pot with a lid. Let the eggs sit in the hot water, off the heat, for 12-15 minutes. This gentle cooking method uses residual heat to perfectly cook the eggs without overcooking them.
Small tip: Set a timer! This step is crucial for achieving that perfect firm, yet creamy, yolk.
Step 6: Prepare the Ice Bath
While the eggs are resting, prepare an ice bath. Fill a large bowl with cold water and plenty of ice cubes. This chilling step is absolutely critical for easy peeling. It stops the cooking process and causes the egg white to contract, separating it from the shell membrane.
Small tip: The more ice, the better. You want the water to be very cold.
Step 7: Transfer Eggs to Ice Bath
Once your timer goes off, carefully drain the hot water from the pot. Using a slotted spoon or tongs, immediately transfer the cooked eggs into the prepared ice bath. Let them sit in the ice bath for at least 5-10 minutes, or until they are completely cool to the touch.
Small tip: Don’t skip or shorten this step! It’s the most important secret to perfect peeling.
Step 8: Peel Your Eggs
Once the eggs are thoroughly chilled, it’s time for the moment of truth. Take an egg from the ice bath. Gently tap it on a hard surface all around its circumference, creating tiny cracks everywhere. Then, gently roll the egg between your hands to further loosen the shell. Start peeling from the wider end, where there’s usually a small air pocket. The shell should come off in larger pieces, often bringing the membrane with it. You can even peel them under a gentle stream of running water to help wash away small shell fragments.
Small tip: If you encounter a stubborn spot, try peeling under cool running water. The water helps to get under the membrane and gently separate it from the egg white.
Tips & Variations
- Gluten-Free Option: Hard-boiled eggs are naturally gluten-free! They are a fantastic, healthy snack or ingredient for anyone avoiding gluten.
- Vegan or Vegetarian Option: While hard-boiled eggs are a vegetarian staple, they are not vegan. For a delicious vegan alternative in recipes like “egg” salad or as a protein topping, consider using seasoned mashed chickpeas or firm tofu.
- Add More Vegetables or Protein: Hard-boiled eggs are perfect for boosting protein in salads like Cobb or Niçoise. Slice them over avocado toast, or add them to stir-fries and ramen bowls for extra richness.
- Spicy Version: For a kick, make spicy deviled eggs by adding a pinch of cayenne pepper or a dash of hot sauce to the yolk mixture. Or, slice hard-boiled eggs and sprinkle them with chili flakes and a drizzle of sriracha for a fiery snack.
- Flavor Tip: Pickled Eggs: For a unique flavor, try pickling your perfectly peeled hard-boiled eggs! Submerge them in a brine of vinegar, water, sugar, salt, and spices like peppercorns, mustard seeds, and dill for a few days.
Nutritional Information
Approximate values per serving (based on 1 large hard-boiled egg):
- Calories: 78 kcal
- Protein: 6 g
- Carbohydrates: 0.6 g
- Fat: 5 g
Note: Nutritional values may vary depending on the exact size of eggs used.
Health Benefits
Hard-boiled eggs are a powerhouse of nutrition, offering a wealth of benefits in a small package.
They are an excellent source of high-quality protein, essential for muscle repair, growth, and overall body function. Protein also helps you feel full and satisfied, aiding in weight management.
Eggs are packed with vitamins and minerals. They provide a significant amount of Vitamin B12, crucial for nerve function and red blood cell formation. You’ll also get Vitamin D, important for bone health and immunity, and Vitamin A, vital for vision and skin.
Don’t forget the choline! Eggs are one of the best dietary sources of this essential nutrient, which plays a key role in brain development, memory, and liver function. They also contain selenium, an important antioxidant.
The healthy fats in eggs contribute to satiety and help your body absorb fat-soluble vitamins. Enjoying hard-boiled eggs regularly can be a simple, delicious way to boost your daily nutrient intake.
Serving Suggestions
- Classic Snack: Simply sprinkle with a pinch of salt and black pepper for a quick, protein-packed snack.
- Salad Star: Slice or chop them to add rich flavor and texture to any green salad, potato salad, or pasta salad.
- Breakfast Boost: Serve alongside toast, avocado, or fresh fruit for a complete breakfast.
- Deviled Eggs: Halve the eggs, scoop out the yolks, mix with mayonnaise, mustard, and seasonings, then pipe back into the whites for a crowd-pleasing appetizer.
- Ramen & Soups: Cut them in half and float them on top of a bowl of ramen, pho, or any hearty soup for added protein and richness.
Storage Tips
Perfectly peeled hard-boiled eggs can be stored in an airtight container in the refrigerator for up to 7 days. If you haven’t peeled them yet, unpeeled hard-boiled eggs can last for up to 1 week in the fridge. We do not recommend freezing hard-boiled eggs, as the whites can become rubbery and watery upon thawing. There’s no need to reheat them; hard-boiled eggs are best enjoyed cold or at room temperature.
Conclusion
And there you have it! The secret to mastering the art of perfectly peeled hard-boiled eggs is no longer a mystery. With just a few simple steps and a couple of key tricks – choosing slightly older eggs and, most importantly, giving them a proper ice bath – you can say goodbye to frustrating, ragged eggs forever.
Hard-boiled eggs are truly a kitchen chameleon. They’re a healthy, convenient snack, a versatile ingredient for countless dishes, and a fantastic way to add protein to any meal. Now that you’re armed with the knowledge for flawless peeling, you can confidently prepare them for any occasion.
So, go ahead, give this method a try! You’ll be amazed at the beautiful, smooth results. Share your perfectly peeled creations with family and friends, and enjoy the delicious satisfaction of a job well done. Happy cooking!


