
Introduction
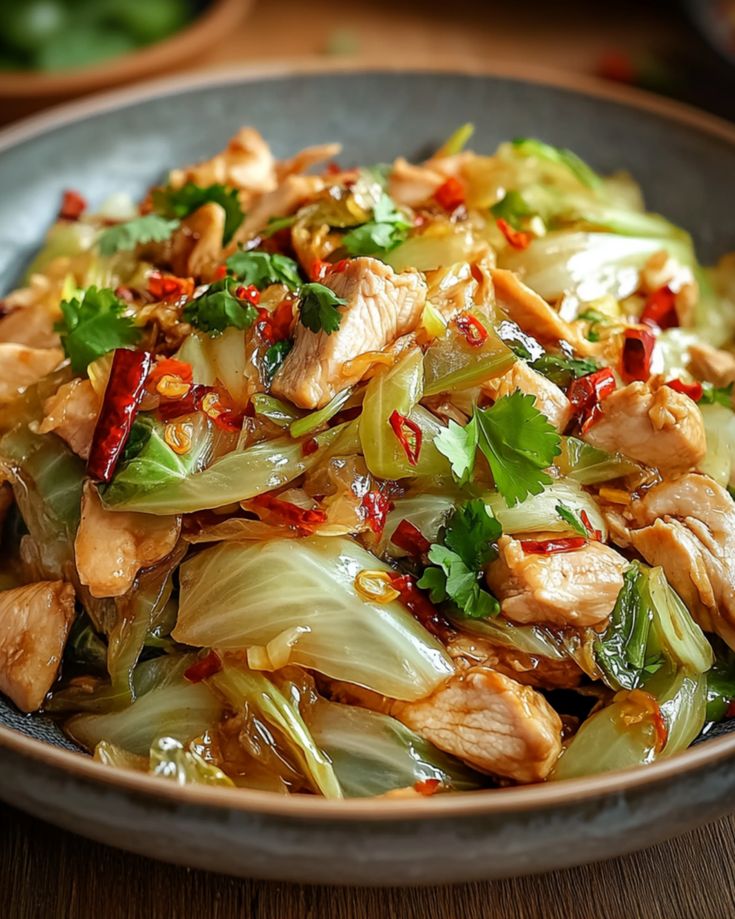
Do you ever find yourself thinking about that amazing Chinese food from the mall food court? The kind that was perfectly sweet, a little savory, and always had that irresistible crispy coating? You know, the one you still dream about! Well, get ready, because today we’re bringing that nostalgic flavor right into your kitchen with our “I Still Dream About That Mall Chinese Chicken” recipe.
This dish is all about delicious, tender chicken pieces coated in a glossy, sticky sauce that hits all the right notes. It’s incredibly satisfying and surprisingly simple to make. Forget long waits and mystery ingredients; our recipe uses everyday items to recreate that beloved taste. You’ll be amazed at how quickly you can whip up this family-favorite meal.
So, if you’re ready to relive those delicious memories, or perhaps create new ones, this recipe is for you. It’s a guaranteed crowd-pleaser that’s perfect for a weeknight dinner or a fun weekend treat. Let’s get cooking and make those mall food dreams a reality!
Cooking Time & Prep Time
Prep Time: 20 minutes
Cooking Time: 25 minutes
Total Time: 45 minutes
Small tip: You can chop your chicken and mix the sauce ingredients ahead of time to make cooking even faster.
Ingredients
This recipe makes 4 generous servings.
For the Chicken
- 1.5 lbs boneless, skinless chicken thighs or breasts, cut into 1-inch pieces
- 1/2 cup cornstarch
- 1/4 cup all-purpose flour
- 1 large egg, beaten
- 1/2 teaspoon salt
- 1/4 teaspoon black pepper
- 3-4 cups vegetable oil (or other neutral oil) for frying
For the Sauce
- 1/2 cup low-sodium soy sauce
- 1/2 cup chicken broth
- 1/2 cup granulated sugar
- 1/4 cup rice vinegar (unseasoned)
- 2 tablespoons cornstarch
- 1 tablespoon grated fresh ginger
- 2 cloves garlic, minced
- 1 teaspoon sesame oil
- 1/4 teaspoon red pepper flakes (optional, for a hint of heat)
For Garnish (Optional)
- 2 tablespoons toasted sesame seeds
- 2 green onions, thinly sliced
Step-by-Step Instructions
-
Step 1: Prepare the Chicken
Pat the chicken pieces very dry with paper towels. This helps the coating stick better. In a medium bowl, whisk together the cornstarch, flour, salt, and pepper. In another bowl, beat the egg.
Small tip: Drying the chicken is a crucial step for crispy results!
-
Step 2: Coat the Chicken
Dip each piece of chicken into the beaten egg, letting any excess drip off. Then, dredge the chicken in the cornstarch mixture, ensuring it’s fully coated. Place the coated chicken on a plate or baking sheet.
Small tip: Work in batches to ensure each piece is well-coated.
-
Step 3: Prepare the Sauce
In a medium bowl or liquid measuring cup, whisk together all the sauce ingredients: soy sauce, chicken broth, sugar, rice vinegar, cornstarch, grated ginger, minced garlic, sesame oil, and red pepper flakes (if using). Whisk until the cornstarch is fully dissolved.
Small tip: Make sure there are no lumps of cornstarch for a smooth sauce.
-
Step 4: Fry the Chicken
Heat the vegetable oil in a large, deep skillet or Dutch oven over medium-high heat until it reaches 350-375°F (175-190°C). Carefully add the coated chicken pieces to the hot oil, making sure not to overcrowd the pan. Fry in batches for 4-6 minutes, or until golden brown and cooked through.
Small tip: Use a thermometer to check oil temperature for best frying results. Overcrowding the pan will lower the oil temperature and make the chicken less crispy.
-
Step 5: Drain the Chicken
Once cooked, remove the chicken with a slotted spoon and place it on a wire rack set over paper towels. This allows excess oil to drain off and helps keep the chicken crispy. Repeat with the remaining chicken batches.
Small tip: Don’t stack the chicken; allow air to circulate around each piece.
-
Step 6: Cook the Sauce
Carefully pour out all but about 1 tablespoon of oil from the skillet. Return the skillet to medium heat. Pour in the prepared sauce mixture. Bring it to a gentle simmer, whisking constantly. The sauce will thicken quickly as it heats.
Small tip: Keep whisking to prevent the sauce from sticking and to ensure even thickening.
-
Step 7: Combine and Serve
Once the sauce has thickened to your desired consistency (it should be glossy and able to coat the back of a spoon), add the fried chicken pieces back into the skillet. Toss gently to coat all the chicken evenly with the delicious sauce. Serve immediately, garnished with toasted sesame seeds and sliced green onions if desired.
Small tip: Serve right away to enjoy the chicken at its crispiest before the sauce softens the coating.
Tips & Variations
- Gluten-Free Option: Use tamari instead of soy sauce and ensure your chicken broth is gluten-free. For the coating, use a 1:1 gluten-free all-purpose flour blend along with cornstarch.
- Vegan/Vegetarian Option: Replace chicken with firm tofu or tempeh. Press and drain tofu well before cutting into cubes and coating. Use vegetable broth instead of chicken broth.
- Add More Vegetables or Protein: Stir-fry some broccoli florets, bell peppers, or snap peas in a separate pan and add them to the chicken and sauce just before serving. You can also add shrimp or thinly sliced pork for extra protein.
- Spicy Version: Increase the red pepper flakes in the sauce to 1/2-1 teaspoon, or add a dash of sriracha along with the other sauce ingredients for a bolder kick.
- Extra Flavor Boost: A tiny splash of rice wine (Shaoxing wine) can be added to the sauce for an authentic Chinese flavor depth. Just a tablespoon will do!
Nutritional Information
Approximate values per serving (based on 4 servings):
- Calories: 650 kcal
- Protein: 35g
- Carbohydrates: 55g
- Fat: 32g
Note: These values are approximate and may vary depending on specific ingredients used, exact oil absorption during frying, and portion sizes.
Health Benefits
This “Mall Chinese Chicken” recipe, while a delicious indulgence, also brings some health benefits thanks to its key ingredients:
Chicken: A fantastic source of lean protein, essential for muscle repair, growth, and overall body function. It also provides important vitamins like Niacin (B3) and B6, which are crucial for energy metabolism.
Garlic: Known for its powerful immune-boosting properties due to compounds like allicin. Garlic can help reduce inflammation and has antioxidant benefits, supporting your body’s defenses.
Ginger: This fragrant root is a powerhouse of anti-inflammatory and antioxidant compounds. It’s often used to aid digestion, soothe nausea, and may even help reduce muscle pain.
Sesame Oil: While used in small amounts for flavor, sesame oil contains healthy monounsaturated and polyunsaturated fats. It also provides antioxidants and may contribute to heart health.
By making this dish at home, you have control over the quality of ingredients, allowing you to choose lower-sodium soy sauce or adjust sugar levels, making it a more wholesome option than traditional takeout.
Serving Suggestions
- Classic Pairing: Serve this chicken over a bed of fluffy white or brown rice to soak up all that incredible sauce.
- Lighter Option: Pair it with steamed broccoli, stir-fried mixed vegetables, or a simple side salad for a fresher meal.
- Noodle Delight: Toss it with some lo mein noodles or ramen for a hearty, complete meal that’s sure to satisfy.
- Meal Prep Idea: Cook a larger batch of chicken and sauce, then portion it out with rice and steamed veggies into individual containers for easy lunches throughout the week.
Storage Tips
Leftover “I Still Dream About That Mall Chinese Chicken” can be stored in an airtight container in the refrigerator for up to 3-4 days. While the chicken won’t be as crispy as when freshly made, it will still be incredibly flavorful. You can freeze the cooked chicken and sauce together in a freezer-safe container for up to 2-3 months. To reheat, thaw overnight in the fridge if frozen, then gently warm in a skillet over medium-low heat or in the microwave until heated through. Adding a tiny splash of water or broth can help loosen the sauce if it’s too thick.
Conclusion
There you have it – your very own taste of that unforgettable mall food court magic, made with love right in your kitchen! This “I Still Dream About That Mall Chinese Chicken” is truly special. It’s got that perfect balance of sweet and savory, a delightful sticky glaze, and tender chicken that will transport you back to those nostalgic moments.
Don’t be intimidated; this recipe is designed to be straightforward and fun. The aroma alone as it cooks will have everyone gathered around, eager for a taste. You’ll be amazed at how simple it is to achieve such big, satisfying flavors.
So go ahead, give it a try this week! Gather your ingredients, put on your apron, and get ready to create a meal that will not only satisfy your cravings but also bring joy to your table. Share this delicious creation with your family and friends, and watch their faces light up with every bite. Happy cooking!


