
Introduction
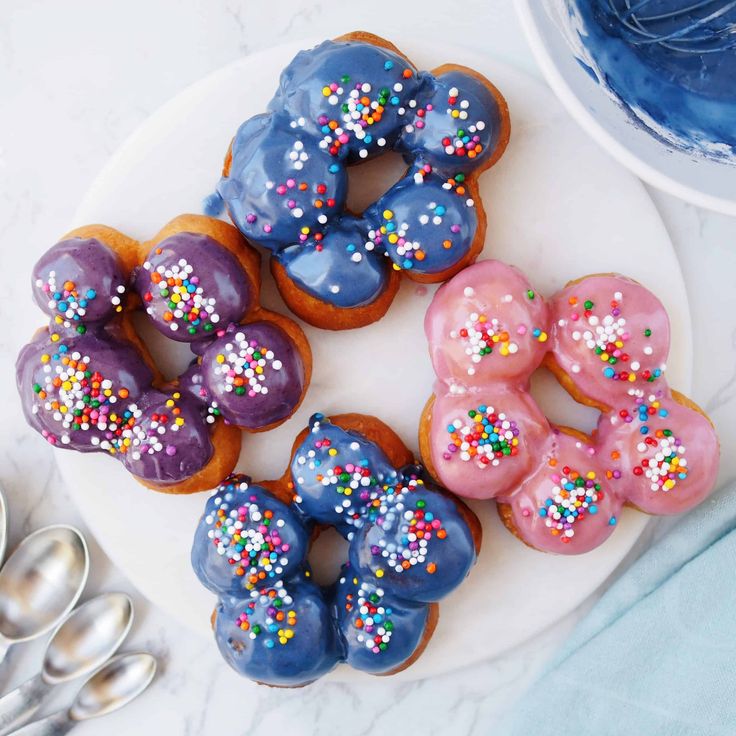
Get ready to discover your new favorite treat: Baked Mochi Donuts! These delightful donuts are a unique twist on a classic. They boast an incredibly chewy, bouncy texture on the inside, with a slightly crisp exterior. Often called “pon de ring” style donuts, they are truly special and incredibly addictive.
What makes these mochi donuts so wonderful is how simple they are to create at home. Forget deep-frying and messy oil. We’re baking these beauties, which means less fuss and a lighter result. The process is straightforward, perfect for bakers of all skill levels, and surprisingly quick to put together.
If you love the satisfying chewiness of mochi and the comforting sweetness of a donut, you absolutely must try this recipe. Gather your ingredients, put on your apron, and let’s make some magic in the kitchen. You’re going to love every single bite!
Cooking Time & Prep Time
- Prep Time: 25 minutes
- Cooking Time: 15 minutes
- Total Time: 40 minutes
Small tip: You can prepare your glazes while the donuts are baking to save time and have them ready for dipping as soon as they cool slightly.
Ingredients
This recipe makes 12-14 mochi donuts.
For the Baked Mochi Donuts:
- 1 cup (120g) glutinous rice flour (mochiko)
- 1/2 cup (60g) all-purpose flour
- 1/2 cup (100g) granulated sugar
- 2 teaspoons baking powder
- 1/4 teaspoon salt
- 1 large egg
- 1/2 cup (120ml) whole milk (or any milk alternative)
- 1/4 cup (56g) unsalted butter, melted
- 1 teaspoon vanilla extract
For the Vanilla Glaze:
- 1 cup (120g) powdered sugar
- 2 tablespoons milk (or water)
- 1/2 teaspoon vanilla extract
For the Chocolate Glaze:
- 1 cup (120g) powdered sugar
- 3 tablespoons unsweetened cocoa powder
- 3 tablespoons milk (or water)
Step-by-Step Instructions
-
Step 1: Preheat Oven and Prepare Pan
Preheat your oven to 350°F (175°C). Lightly grease a non-stick donut pan. If you don’t have a donut pan, you can form rings on a parchment-lined baking sheet, but the pan helps them keep their shape beautifully.
Small tip: A light spray with baking non-stick spray works perfectly for greasing your donut pan.
-
Step 2: Combine Dry Ingredients
In a large mixing bowl, whisk together the glutinous rice flour, all-purpose flour, granulated sugar, baking powder, and salt. Make sure there are no lumps and everything is well combined.
-
Step 3: Combine Wet Ingredients
In a separate medium bowl, whisk the egg until it’s slightly frothy. Then, add the milk, melted butter, and vanilla extract. Whisk until all the wet ingredients are fully incorporated.
-
Step 4: Combine Wet and Dry Mixtures
Pour the wet ingredients into the dry ingredients. Stir gently with a spatula or wooden spoon until just combined. Be careful not to overmix; a few small lumps are okay.
Small tip: Overmixing can lead to tougher donuts. Mix only until the flour streaks disappear.
-
Step 5: Fill Donut Pan
Transfer the donut batter into a piping bag fitted with a large round tip, or simply snip off the corner of a sturdy Ziploc bag. Pipe the batter into the prepared donut pan, filling each cavity about two-thirds full.
Small tip: For the classic “pon de ring” look, pipe small balls of dough in a circle to form a donut shape. This creates those lovely pull-apart sections.
-
Step 6: Bake the Donuts
Bake for 12-15 minutes, or until the donuts are golden brown and spring back when lightly touched. The exact time may vary slightly depending on your oven.
-
Step 7: Cool the Donuts
Remove the donut pan from the oven. Let the donuts cool in the pan for about 5 minutes before carefully transferring them to a wire rack to cool completely. They will be delicate when hot.
-
Step 8: Prepare the Glazes
While the donuts cool, prepare your glazes. For the Vanilla Glaze: whisk powdered sugar, milk, and vanilla extract until smooth. For the Chocolate Glaze: whisk powdered sugar, cocoa powder, and milk until smooth. Adjust milk amounts for desired consistency.
Small tip: Start with less milk and add more gradually until you reach a thick but pourable consistency for your glazes.
-
Step 9: Glaze and Serve
Once the donuts are cool, dip each donut into your desired glaze. You can dip one side or both. Let any excess drip off, then place them back on the wire rack for the glaze to set. Serve and enjoy your delicious homemade mochi donuts!
Tips & Variations
- Gluten-Free Option: This recipe is already mostly gluten-free due to the glutinous rice flour! Simply substitute the 1/2 cup all-purpose flour with an equal amount of a gluten-free all-purpose flour blend (ensure it contains xanthan gum for best texture).
- Vegan Option: Replace the egg with a flax egg (1 tbsp ground flaxseed + 3 tbsp water, let sit for 5 minutes). Use a plant-based milk (almond, soy, or oat milk work great) and a plant-based butter alternative.
- Add Fruit or Flavor: Mix in 1/4 cup of finely chopped fresh berries (like blueberries or raspberries) into the batter before baking. You can also add citrus zest (lemon or orange) for a bright flavor.
- Matcha Green Tea Glaze: For a unique flavor, whisk 1-2 teaspoons of matcha powder into your powdered sugar before adding milk for a vibrant green tea glaze.
- Sprinkle Fun: After glazing, immediately sprinkle with colorful sprinkles, toasted sesame seeds, or chopped nuts for extra texture and visual appeal.
Nutritional Information
Approximate values per serving (based on 14 servings):
- Calories: 170
- Protein: 2g
- Carbohydrates: 30g
- Fat: 5g
Note: These values are approximate and may vary depending on specific ingredients and brands used.
Health Benefits
While these are a delightful treat, some ingredients offer nutritional benefits.
Glutinous rice flour, the star ingredient, is naturally gluten-free. It provides a good source of carbohydrates for energy. While it’s not a powerhouse of vitamins, it is a staple food in many cultures, offering sustained energy.
Eggs contribute high-quality protein, essential for muscle repair and growth. They also contain important vitamins like B12, D, and choline, which supports brain health. Choline is especially important for memory and mood regulation.
Milk, whether dairy or plant-based, provides calcium for strong bones and teeth. Dairy milk also offers potassium and Vitamin D. Plant-based milks are often fortified with similar nutrients, making them a good alternative.
Overall, these donuts offer a satisfying treat that can be enjoyed in moderation. They provide a quick energy boost and the joy of a homemade dessert.
Serving Suggestions
- Serve warm with a cup of coffee or tea for a delightful breakfast or afternoon snack.
- Arrange on a platter for a unique party dessert. They are always a conversation starter!
- Enjoy them plain, with just a dusting of powdered sugar, for a less sweet option.
- Drizzle with melted chocolate or a fruit coulis for an extra gourmet touch.
Storage Tips
Store leftover baked mochi donuts in an airtight container at room temperature for up to 2 days. They are best enjoyed fresh on the day they are made for maximum chewiness. You can freeze unglazed donuts for up to 1 month; wrap them individually in plastic wrap and then place them in a freezer-safe bag. To reheat, thaw at room temperature and then warm briefly in a microwave for 10-15 seconds, or in a toaster oven until soft.
Conclusion
And there you have it – your very own batch of irresistible Baked Mochi Donuts! These treats are truly special, offering a unique bouncy and chewy texture that sets them apart from traditional donuts. The ease of baking them at home, without the mess of frying, makes them an absolute winner in our kitchen.
We encourage you to give this recipe a try. You’ll be amazed at how simple it is to create such a delightful and impressive dessert. The smell of freshly baked donuts filling your home is a bonus!
Whip up a batch to share with family and friends, or keep them all to yourself – we won’t tell! Enjoy the pure joy of these chewy, sweet, and perfectly baked mochi donuts. Happy baking!


