
Introduction
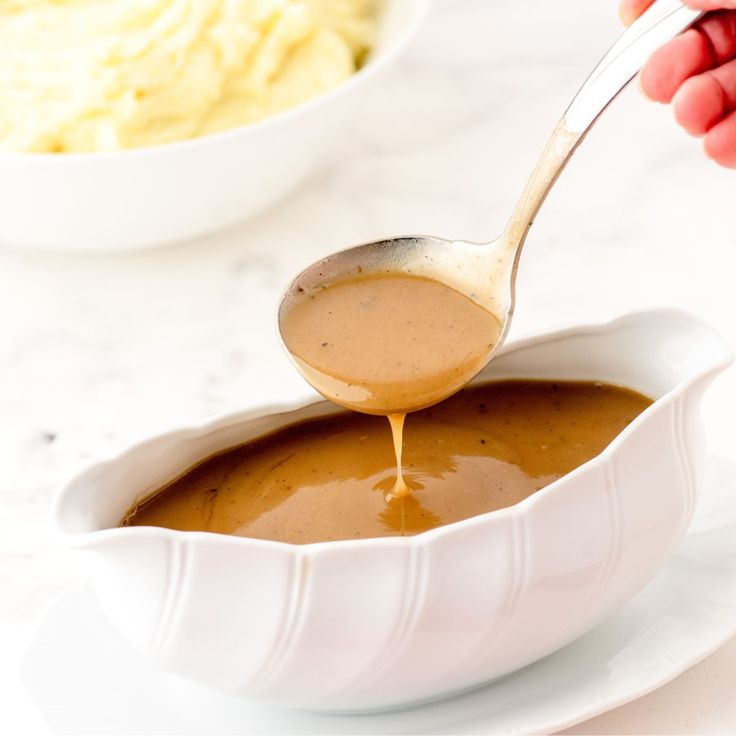
Gravy made from drippings is the ultimate culinary magic trick! It transforms the savory juices left behind from roasted meats into a rich, velvety sauce. This isn’t just any gravy; it’s a concentrated burst of flavor, perfectly complementing your holiday roasts, weeknight chicken, or Sunday pot roast. It’s the secret weapon that elevates a good meal to an unforgettable feast, making every bite incredibly satisfying and comforting.
You might think making gravy from scratch sounds complicated, but I promise it’s surprisingly easy and quick. With just a few simple ingredients and the delicious pan drippings you already have, you can whip up a luscious gravy in minutes. It’s a fantastic way to utilize every bit of flavor from your cooked meats, ensuring nothing goes to waste and everything tastes amazing.
So, whether you’re a seasoned chef or a kitchen beginner, don’t shy away from this classic. Get ready to turn those humble drippings into a show-stopping gravy that will impress everyone at your table. Let’s dive in and create some deliciousness together!
Cooking Time & Prep Time
- Prep Time: 5 minutes
- Cooking Time: 10 minutes
- Total Time: 15 minutes
Small tip: Have all your ingredients measured and ready before you start. This makes the process incredibly smooth and quick!
Ingredients
Makes 4-6 servings
For the Gravy Base
- 2-3 tablespoons reserved pan drippings (fat and juices) from roasted meat
- 2-3 tablespoons all-purpose flour
For Flavor & Thinning
- 2 cups liquid (chicken, beef, or vegetable broth, or a combination of broth and water)
- 1/2 teaspoon salt, or to taste
- 1/4 teaspoon black pepper, or to taste
- Optional: 1/2 teaspoon dried herbs (like thyme, sage, or rosemary), finely crushed
- Optional: A splash of wine (red or white) or sherry for extra depth
Step-by-Step Instructions
-
Step 1: Separate the Drippings
After roasting your meat, carefully pour all the pan drippings into a heatproof measuring cup or a fat separator. Let it sit for a few minutes to allow the fat to rise to the top. Skim off about 2-3 tablespoons of the fat and return it to your roasting pan or a medium saucepan. Discard any excess fat, but keep the flavorful meat juices (broth) for later.
Small tip: If you don’t have enough fat, you can supplement with butter or oil to reach the required amount.
-
Step 2: Make the Roux
Place the roasting pan (or saucepan) with the reserved fat over medium heat on your stovetop. Once the fat is shimmering, sprinkle in the all-purpose flour. Whisk continuously for 1-2 minutes, creating a smooth paste known as a roux. This step cooks out the raw flour taste and will be the base for your thick, rich gravy.
Small tip: Cook the roux until it’s a light golden brown for a richer flavor, but be careful not to burn it.
-
Step 3: Whisk in Liquid
Gradually pour in the 2 cups of liquid (broth, or broth mixed with the reserved meat juices) into the roux, whisking constantly. Start with a small amount to create a thick paste, then slowly add the rest. This continuous whisking is crucial to prevent lumps and ensure a silky-smooth gravy.
Small tip: If you have any lumps, don’t panic! You can press them against the side of the pan with your whisk to break them up, or even strain the gravy later if needed.
-
Step 4: Simmer and Thicken
Bring the gravy mixture to a gentle simmer, still whisking occasionally. Let it simmer for 3-5 minutes, or until it reaches your desired thickness. The gravy will thicken as it cooks and cools slightly. If it becomes too thick, simply add a splash more broth or water until it’s just right.
Small tip: Gravy often thickens more as it cools, so aim for a slightly thinner consistency than you ultimately desire.
-
Step 5: Season and Serve
Remove the gravy from the heat. Stir in the salt, black pepper, and any optional herbs or a splash of wine/sherry. Taste and adjust the seasonings as needed. Remember that your pan drippings already have flavor, so season carefully. Serve your homemade gravy immediately, hot and delicious, over your favorite dishes!
Small tip: A tiny pinch of sugar can sometimes balance the savory flavors if the gravy tastes a bit too sharp.
Tips & Variations
- Gluten-Free Option: Instead of flour, make a cornstarch slurry. Dissolve 1-2 tablespoons of cornstarch in 2-3 tablespoons of cold water. Once your liquid is simmering, whisk in the slurry gradually until the gravy thickens.
- Vegan/Vegetarian Option: Skip the meat drippings. Use a neutral oil (like olive or canola) for the roux. Use a rich vegetable broth as your liquid. A tablespoon of nutritional yeast can add a savory, umami depth.
- Add More Vegetables or Protein: For extra texture and flavor, sauté finely diced onions, mushrooms, or shallots in the pan drippings before adding the flour. You can also stir in finely shredded leftover meat at the end.
- Spicy Version: Add a pinch of cayenne pepper, a dash of your favorite hot sauce, or a tiny amount of finely minced jalapeño (seeds removed) to the gravy while it simmers.
- Herbaceous Boost: Experiment with different fresh or dried herbs. Fresh rosemary, thyme, or sage, finely chopped, can be stirred in at the very end for a bright, aromatic finish.
- Richness with Wine: Deglaze your roasting pan with a splash of red or white wine (about 1/4 cup) after removing the meat. Scrape up any browned bits from the bottom of the pan, then proceed with the recipe using this flavorful liquid as part of your 2 cups.
Nutritional Information
Approximate values per serving (based on 6 servings):
- Calories: 70-90
- Protein: 2-4g
- Carbohydrates: 5-7g
- Fat: 4-6g
Please note: Nutritional values may vary significantly depending on the type of drippings used (e.g., chicken vs. beef), the amount of fat skimmed, and the specific brand of broth and other ingredients. These are approximate estimates.
Health Benefits
While gravy is often seen as an indulgent treat, homemade gravy from drippings can offer some surprising benefits, especially when made thoughtfully. The foundation of this gravy often comes from good quality broths and natural pan juices.
Using homemade or high-quality store-bought broths means you’re incorporating a liquid rich in minerals like calcium, magnesium, and phosphorus. If you’ve used a bone broth, it can also provide collagen, which is beneficial for joint health and skin elasticity.
The herbs often added to gravy, such as thyme, sage, and rosemary, are not just for flavor. They are packed with antioxidants and have anti-inflammatory properties. These small additions contribute to your daily intake of beneficial plant compounds.
Gravy also provides a sense of comfort and satisfaction, which is important for overall well-being. Enjoying a delicious, homemade dish can reduce stress and enhance the dining experience, contributing to a balanced and happy lifestyle.
Serving Suggestions
- Classic Pairing: This gravy is absolutely divine over roasted turkey, chicken, beef, or pork. It’s the quintessential sauce for holiday meals!
- Mashed Potato Perfection: Drizzle generously over creamy mashed potatoes, alongside stuffing, or roasted vegetables for the ultimate comfort food plate.
- Elevate Everyday Meals: Use it to transform simple weeknight meals. Pour it over meatloaf, hot open-faced sandwiches, or even just plain rice for an instant flavor boost.
- Breakfast Comfort: Believe it or not, a savory gravy can be fantastic over biscuits for a hearty breakfast or brunch, especially if you’ve made a sausage gravy variation.
- Meal Prep Ideas: Make a larger batch of gravy and portion it into small containers. It’s perfect for quickly upgrading future meals or adding to leftover roasted meats.
Storage Tips
Homemade gravy can be stored in an airtight container in the refrigerator for 3-4 days. It thickens considerably when cold, so don’t be alarmed. You can also freeze gravy for up to 3 months in freezer-safe containers or bags. To reheat, gently warm it on the stovetop over low heat, whisking constantly, and add a splash of broth or water to thin it back to your desired consistency. Avoid boiling rapidly, as this can sometimes cause the fat to separate.
Conclusion
And there you have it – a truly magnificent gravy made from scratch, using all those wonderful pan drippings! It’s incredible how a few simple steps can transform humble pan juices into such a rich, flavorful, and comforting sauce. This homemade gravy isn’t just a condiment; it’s the heart of so many cherished meals, bringing depth and warmth to every plate.
Don’t ever be intimidated by making gravy again. With this easy-to-follow recipe, you’re now equipped to create a velvety, delicious gravy that will impress everyone. It’s a skill that pays off in big flavor dividends and makes you feel like a true kitchen wizard.
So go ahead, give it a try with your next roast. Gather your loved ones around the table, pour that glorious gravy, and savor the moments. Happy cooking, and even happier eating!


