
Introduction
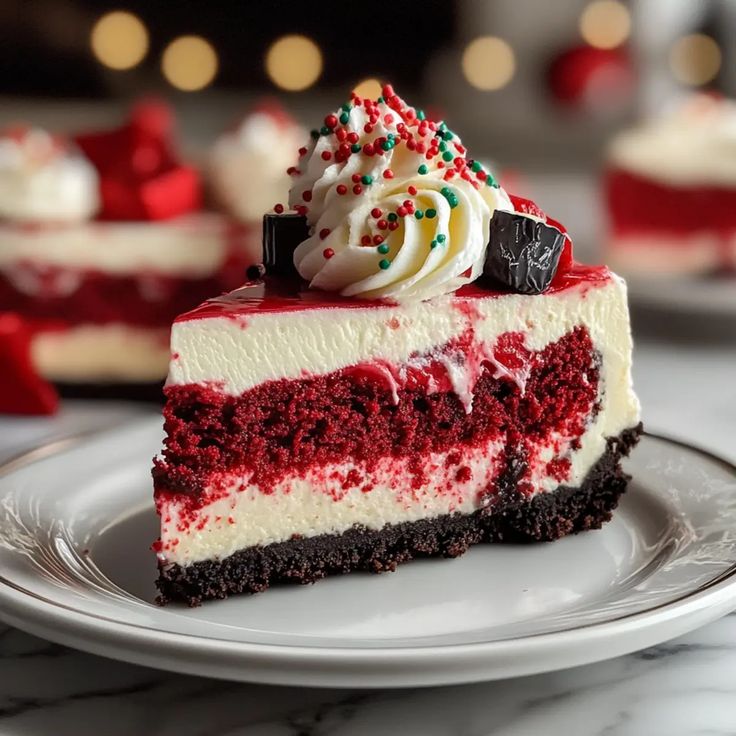
Get ready to dazzle your taste buds with our stunning Christmas Red Velvet Cheesecake! This isn’t just a dessert; it’s a festive masterpiece. Imagine a rich, tangy red velvet cheesecake, vibrant in color, sitting on a crunchy chocolate cookie crust. It’s perfectly balanced with a luscious cream cheese frosting and a sprinkle of holiday cheer.
You might think cheesecake is complicated, but this recipe is surprisingly straightforward. We’ve broken down every step to make it simple and fun for home bakers of all levels. There are no tricky techniques here, just easy-to-follow instructions that guarantee a show-stopping dessert for your holiday table.
So, why wait? Gather your ingredients and let’s create some magic in the kitchen. This Red Velvet Cheesecake is sure to become a new favorite tradition, bringing joy and deliciousness to your Christmas celebrations. Your family and friends will absolutely love it!
Cooking Time & Prep Time
- Prep Time: 45 minutes
- Cooking Time: 60 minutes
- Chilling Time: 4 hours (minimum)
- Total Time: 5 hours 45 minutes (including chilling)
Small tip: The chilling time is crucial for a perfectly set cheesecake, so don’t rush this step!
Ingredients
Makes 12 servings
For the Chocolate Cookie Crust
- 1 ½ cups (about 180g) chocolate sandwich cookies (like Oreos), finely crushed
- ¼ cup (56g) unsalted butter, melted
- 2 tablespoons granulated sugar
For the Red Velvet Cheesecake Filling
- 24 ounces (680g) cream cheese, softened
- 1 ½ cups (300g) granulated sugar
- 4 large eggs
- 1 teaspoon vanilla extract
- 1 teaspoon white vinegar
- 1 teaspoon unsweetened cocoa powder
- 2 tablespoons (30ml) red food coloring (liquid or gel)
- ½ cup (120g) sour cream
For the Cream Cheese Frosting Topping
- 8 ounces (226g) cream cheese, softened
- ½ cup (113g) unsalted butter, softened
- 3 cups (360g) powdered sugar, sifted
- 1 teaspoon vanilla extract
For Garnish (Optional)
- Fresh cranberries
- Rosemary sprigs
- White chocolate shavings
Step-by-Step Instructions
-
Step 1: Prepare the Crust
Preheat your oven to 350°F (175°C). In a medium bowl, combine the crushed chocolate cookies, melted butter, and 2 tablespoons of granulated sugar. Mix until well combined. Press this mixture firmly into the bottom of a 9-inch springform pan. Small tip: Use the bottom of a glass to get an even, compact crust.
-
Step 2: Bake the Crust
Bake the crust for 8-10 minutes. This helps to set it and make it extra crispy. Remove from the oven and set aside to cool slightly while you prepare the filling. Lower the oven temperature to 325°F (160°C).
-
Step 3: Prepare the Cheesecake Filling Base
In a large bowl, using an electric mixer, beat the softened cream cheese until smooth and creamy. Gradually add the 1 ½ cups of granulated sugar, beating until just combined. Do not overmix. Small tip: Make sure your cream cheese is at room temperature to avoid lumps.
-
Step 4: Add Wet Ingredients and Color
Beat in the eggs one at a time, mixing just until each is incorporated. Stir in the vanilla extract, white vinegar, cocoa powder, and red food coloring. Mix until the color is uniform and vibrant. Finally, fold in the sour cream until just combined.
-
Step 5: Assemble and Bake the Cheesecake
Pour the red velvet cheesecake filling over the cooled crust in the springform pan. Place the springform pan on a baking sheet. Bake for 55-65 minutes, or until the edges are set and the center still has a slight jiggle. Small tip: A water bath can help prevent cracks, but it’s not strictly necessary for this recipe if you prefer to skip it.
-
Step 6: Cool the Cheesecake
Turn off the oven and prop the oven door open slightly. Let the cheesecake cool in the oven for 1 hour. This slow cooling helps prevent cracks. Remove from the oven and let cool completely on a wire rack at room temperature.
-
Step 7: Chill Thoroughly
Once completely cool, cover the cheesecake loosely with plastic wrap. Refrigerate for at least 4 hours, or preferably overnight. Chilling is essential for a firm, sliceable cheesecake. Small tip: Chilling overnight gives the best texture and flavor.
-
Step 8: Make the Cream Cheese Frosting
While the cheesecake chills, prepare the frosting. In a medium bowl, beat the softened cream cheese and butter together until smooth. Gradually add the sifted powdered sugar, beating until light and fluffy. Stir in the vanilla extract. Small tip: Sifting powdered sugar prevents lumps in your frosting.
-
Step 9: Decorate and Serve
Once the cheesecake is thoroughly chilled, carefully remove it from the springform pan. Spread the cream cheese frosting evenly over the top. Garnish with fresh cranberries, rosemary sprigs, and white chocolate shavings for a festive touch. Slice and serve!
Tips & Variations
- Gluten-Free Option: Use gluten-free chocolate sandwich cookies for the crust. Ensure all other ingredients are certified gluten-free.
- Vegan or Vegetarian Option: For a vegan version, use plant-based cream cheese, vegan butter, and a flax egg substitute (1 tbsp ground flaxseed + 3 tbsp water per egg). You’ll also need vegan sour cream. The texture may vary slightly but will still be delicious.
- Add More Protein/Substance: Incorporate finely chopped pecans or walnuts into the cookie crust for added texture and healthy fats. You can also use a high-protein cream cheese if available.
- A Spicier Version: For a subtle kick, add ¼ teaspoon of ground ginger or a pinch of cayenne pepper to the cheesecake filling. It will enhance the red velvet flavor without making it overtly spicy.
- Flavor Boost: Add a splash of almond extract or a touch of orange zest to the cheesecake filling for an extra layer of flavor. You can also use a dark chocolate ganache as an alternative topping.
Nutritional Information
Approximate values per serving (based on 12 servings):
- Calories: 580 kcal
- Protein: 9g
- Carbohydrates: 65g
- Fat: 33g
Note: Nutritional values are approximate and may vary depending on specific ingredients and brands used.
Health Benefits
While this is a decadent dessert, some ingredients offer nutritional perks!
- Cream Cheese and Sour Cream: These dairy products are good sources of calcium, which is essential for strong bones and teeth. They also provide protein, important for muscle repair and growth.
- Eggs: Eggs are a complete protein source, meaning they contain all nine essential amino acids. They are also rich in vitamins D and B12, and choline, which supports brain health.
- Cocoa Powder: Unsweetened cocoa powder, even in small amounts, contains antioxidants called flavonoids. These compounds can help protect your cells from damage and support heart health.
- Fresh Cranberries and Rosemary (Garnish): If you choose to garnish with these, cranberries are packed with antioxidants and vitamin C, while rosemary offers anti-inflammatory properties. They add a fresh, healthy touch to an otherwise rich treat.
Serving Suggestions
- With a Warm Beverage: Pair a slice of this cheesecake with a hot cup of coffee, tea, or a festive mug of mulled wine.
- As the Star of the Show: This cheesecake is substantial enough to be the main dessert for any holiday gathering. Serve it after a light meal.
- Individual Portions: For easy serving at a party, slice the chilled cheesecake into individual portions and place them on small dessert plates before guests arrive.
- Meal Prep Ideas: You can prepare the crust and bake the cheesecake a day or two in advance. Store it, well-covered, in the refrigerator. Make the frosting on the day of serving for ultimate freshness.
Storage Tips
This Christmas Red Velvet Cheesecake keeps beautifully in the refrigerator for up to 4-5 days when covered tightly. You can also freeze individual slices or the whole cheesecake (without frosting) for up to 1 month. Wrap it tightly in plastic wrap, then in foil. Thaw in the refrigerator overnight before frosting and serving. We do not recommend reheating cheesecake; it’s best served chilled.
Conclusion
There you have it – a truly spectacular Christmas Red Velvet Cheesecake that’s as delightful to make as it is to eat! Its festive colors, rich flavors, and creamy texture make it the perfect centerpiece for your holiday dessert table. It’s a recipe designed to bring smiles and sweet memories.
Don’t be intimidated by cheesecake; this recipe is your friendly guide to success. Follow the steps, trust the process, and you’ll be rewarded with a dessert that tastes like pure holiday magic. Imagine the compliments you’ll receive!
So go ahead, put on some festive music, get baking, and share this incredible creation with your loved ones. It’s more than just a dessert; it’s a celebration of togetherness and deliciousness. Happy baking, and happy holidays!


