
Introduction
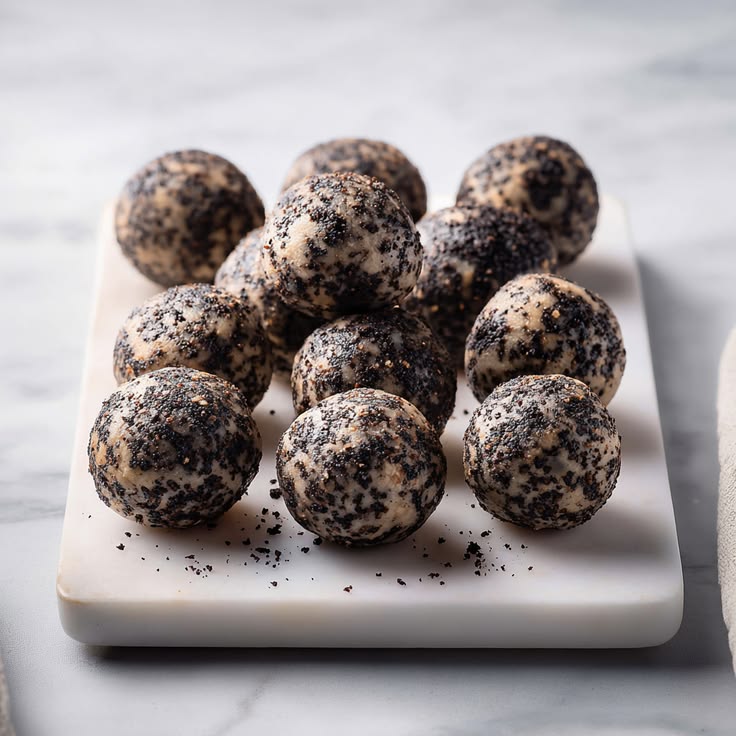
Are you ready for a treat that tastes like pure indulgence but secretly fuels your body? Get ready to meet your new favorite snack: Oreo Protein Balls! Imagine the classic, irresistible flavor of America’s favorite cookie, transformed into a bite-sized, protein-packed powerhouse. These little wonders are soft, chewy, and bursting with that iconic chocolatey goodness, making them the perfect pick-me-up any time of day.
What makes these protein balls so special? They’re incredibly easy to whip up! Forget about turning on the oven or dealing with complicated steps. This recipe comes together in minutes with just a few simple ingredients. It’s all about mixing, rolling, and chilling. You’ll be amazed at how quickly you can create such a satisfying and delicious snack that tastes like a dessert from your favorite bakery.
Whether you need a quick breakfast on the go, a post-workout refuel, or a guilt-free sweet treat, these Oreo Protein Balls are here to save the day. They’re fun to make, even more fun to eat, and a fantastic way to satisfy your cravings while staying on track with your health goals. So, gather your ingredients and let’s get rolling – your taste buds (and your muscles!) will thank you!
Cooking Time & Prep Time
- Prep Time: 20 minutes
- Cooking Time: 0 minutes
- Total Time: 20 minutes (plus chilling time)
Small tip: The chilling time is crucial for the balls to set properly and achieve the best texture. Don’t skip it!
Ingredients
This recipe makes approximately 15-18 delicious Oreo Protein Balls.
- 15 Oreo cookies (about 1.5 cups crushed)
- 1/2 cup vanilla or chocolate protein powder (whey or plant-based)
- 1/4 cup powdered sugar (confectioners’ sugar)
- 4 oz cream cheese, softened (about half a standard block)
- 2 tablespoons milk (any kind: dairy, almond, oat)
- 1 teaspoon vanilla extract
- Optional: 2-3 extra Oreo cookies, finely crushed, for rolling
Step-by-Step Instructions
Step 1: Prepare the Oreo Crumbs
Start by crushing your Oreo cookies. You can do this by placing them in a zip-top bag and crushing them with a rolling pin until they resemble fine crumbs. Alternatively, use a food processor for a quicker and finer result. Set aside about 2 tablespoons of the crumbs if you plan to use them for rolling later.
Small tip: For an extra fine crumb, remove the cream filling from the Oreos before crushing. This also slightly reduces sweetness.
Step 2: Combine Wet Ingredients
In a medium mixing bowl, add the softened cream cheese, milk, and vanilla extract. Use an electric mixer or a sturdy whisk to beat these ingredients together until they are smooth and well combined. Make sure there are no lumps of cream cheese remaining.
Small tip: Ensure your cream cheese is at room temperature. This makes it much easier to mix smoothly and prevents lumps in your batter.
Step 3: Add Dry Ingredients
To the wet ingredient mixture, add the protein powder and powdered sugar. Mix everything together on low speed, or by hand, until just combined. The mixture will be quite thick at this stage, and that’s perfectly normal.
Small tip: Start mixing slowly to avoid a cloud of protein powder! Gradually increase speed if using an electric mixer.
Step 4: Incorporate Oreo Crumbs
Now, add the majority of your crushed Oreo crumbs to the bowl. Mix them into the protein ball mixture until they are evenly distributed. You might need to use your hands or a strong spatula to fully incorporate all the crumbs, as the mixture will be very thick and sticky.
Small tip: If the mixture seems too dry, add milk one teaspoon at a time. If it’s too wet, add a tiny bit more protein powder or powdered sugar until it’s pliable.
Step 5: Roll the Balls
Take small portions of the mixture, about 1 tablespoon each, and roll them between your palms to form smooth, uniform balls. Place the rolled balls on a parchment-lined baking sheet or plate. This will prevent them from sticking.
Small tip: If the mixture is too sticky, lightly dampen your hands with water or spray them with a little non-stick spray before rolling.
Step 6: Optional Coating
If you saved some finely crushed Oreo crumbs, roll each protein ball in them for an extra layer of Oreo flavor and a beautiful finish. You can also use sprinkles, cocoa powder, or melted chocolate for a different coating.
Small tip: For a cleaner coating, gently press the ball into the crumbs rather than rolling too vigorously.
Step 7: Chill and Enjoy
Once all the balls are rolled and coated (if desired), place the baking sheet in the refrigerator. Chill the Oreo Protein Balls for at least 30 minutes, or up to an hour, until they are firm. This chilling time helps them set and improves their texture and flavor. Once firm, they are ready to enjoy!
Small tip: Store any leftover balls in an airtight container in the refrigerator to keep them fresh and firm.
Tips & Variations
- Gluten-Free Option: Easily make these gluten-free by using gluten-free Oreo cookies (many brands offer them now!) and ensuring your protein powder is certified gluten-free.
- Vegan/Vegetarian Option: For a vegan version, use plant-based cream cheese, plant-based milk (like almond or oat), and a vegan protein powder. Most Oreos are “accidentally vegan,” but always check the label to be sure.
- Boost Protein/Fiber: Increase the protein by adding a tablespoon of nut butter (peanut, almond, cashew) to the mixture. For extra fiber, mix in 1-2 tablespoons of ground flaxseed or chia seeds.
- Spiced Version: For a subtle warmth, add a tiny pinch (1/8 teaspoon) of cinnamon or a very small dash of cayenne pepper to the dry ingredients before mixing. This can add an unexpected depth to the chocolate flavor.
- Flavor Swaps: Experiment with different protein powder flavors! Chocolate protein powder will intensify the chocolate flavor, while a cookies & cream protein powder would be a dream. You could also mix in mini chocolate chips or sprinkles for extra fun.
Nutritional Information
Approximate values per serving (based on 16 servings):
- Calories: 110-130 kcal
- Protein: 7-9 g
- Carbohydrates: 12-15 g
- Fat: 4-6 g
Please note: Nutritional values are approximate and can vary significantly based on the specific brands of ingredients (especially protein powder and Oreos) and the exact size of your protein balls.
Health Benefits
These Oreo Protein Balls are more than just a tasty treat; they offer some great benefits too!
- High in Protein: The star ingredient, protein powder, is essential for muscle repair and growth. It also helps you feel fuller for longer, which can be great for managing cravings and supporting weight management.
- Energy Boost: With a good balance of carbohydrates from the Oreos and powdered sugar, and protein, these balls provide a quick and sustained energy release, perfect for pre- or post-workout fuel.
- Calcium from Dairy: If you use traditional cream cheese and dairy milk, you’ll get a boost of calcium. Calcium is vital for strong bones and teeth, and it plays a role in nerve function and muscle contraction.
- Convenient & Controlled Snacking: Making your own protein balls allows you to control the ingredients and portion sizes. This helps avoid overly processed snacks and provides a healthier alternative to store-bought treats.
Serving Suggestions
- Quick Snack: Grab one or two for an easy, satisfying snack between meals.
- Dessert Alternative: Serve them as a healthier, portion-controlled dessert after dinner or with your afternoon coffee.
- Pre/Post-Workout Fuel: Their protein and carb content make them ideal for boosting energy before a workout or aiding muscle recovery afterward.
- Lunchbox Treat: Pop one into a lunchbox for a fun and nutritious addition to school or work lunches.
Storage Tips: Store your Oreo Protein Balls in an airtight container in the refrigerator. They will stay fresh and firm for up to 5-7 days. For longer storage, you can freeze them for up to 1-2 months. To enjoy from frozen, simply let them thaw in the refrigerator for a few hours or at room temperature for about 15-20 minutes. There’s no need to reheat them; they are best enjoyed chilled!
Conclusion
And there you have it – your very own batch of incredibly delicious and secretly nutritious Oreo Protein Balls! These little bites truly offer the best of both worlds: the nostalgic, comforting taste of your favorite cookie combined with the goodness of protein. They are proof that healthy eating can be exciting, convenient, and utterly delightful. No baking, minimal effort, and maximum flavor – what’s not to love?
We absolutely encourage you to give this recipe a try. It’s a fantastic way to satisfy your sweet tooth without derailing your health goals. You’ll be amazed at how quickly these come together and how much you’ll enjoy having them on hand for those busy days or sudden cravings. Plus, they’re so much fun to make, even the kids can join in!
So go ahead, whip up a batch (or two!) and share these amazing Oreo Protein Balls with your family and friends. They’re perfect for parties, potlucks, or just as a special treat for yourself. Enjoy the smiles and compliments that are sure to come your way!


