
Introduction
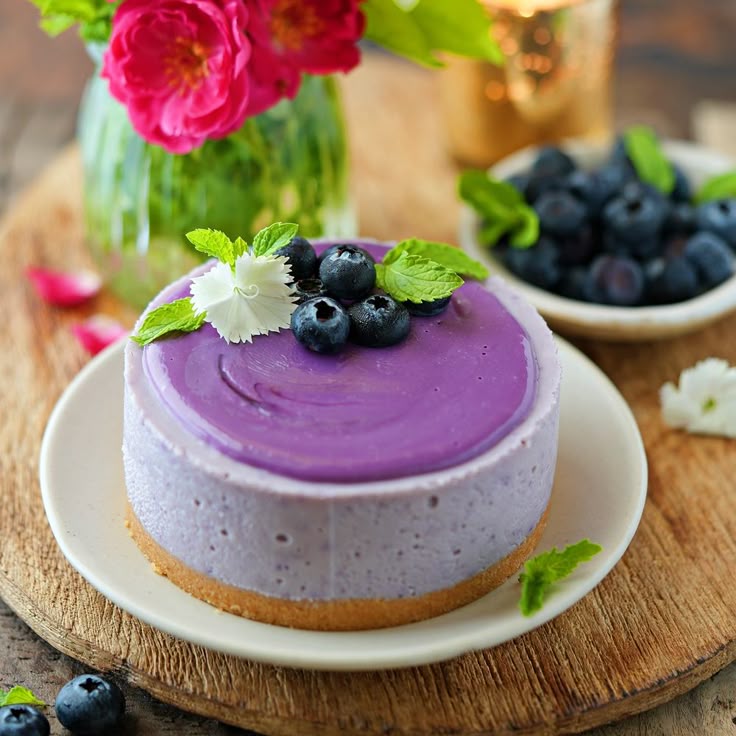
Get ready for a dessert that’s pure joy in every bite! This No Bake Blueberry Cheesecake is a dream come true for anyone who loves creamy, fruity treats. It features a crunchy graham cracker crust, a luscious, tangy cream cheese filling, and a vibrant blueberry topping. It’s a showstopper that tastes incredibly gourmet, but is surprisingly simple to make.
The best part? No oven required! That’s right, you can create this stunning dessert without turning on your oven. It’s quick to assemble and then chills to perfection in your fridge. This makes it ideal for warm weather gatherings, busy weeknights, or whenever you crave something sweet without the fuss of baking.
So, whether you’re a seasoned dessert maker or just starting out, this recipe is perfect for you. It’s incredibly forgiving and promises delicious results every time. Gather your ingredients and let’s make some magic – your taste buds will thank you!
Cooking Time & Prep Time
Prep Time: 30 minutes
Chill Time: 4 hours (minimum)
Total Time: 4 hours 30 minutes
Small tip: For the best results, plan to make this cheesecake the day before you want to serve it. An overnight chill allows it to set perfectly and enhances all the flavors!
Ingredients
This recipe makes 8 generous servings.
For the Graham Cracker Crust
- 1 ½ cups graham cracker crumbs (about 10-12 full sheets)
- ¼ cup granulated sugar
- 6 tablespoons unsalted butter, melted
For the Cheesecake Filling
- 2 (8-ounce) blocks full-fat cream cheese, softened
- ½ cup granulated sugar
- 1 teaspoon vanilla extract
- 1 tablespoon fresh lemon juice
- 1 ½ cups heavy cream, very cold
For the Blueberry Topping
- 2 cups fresh or frozen blueberries (do not thaw if frozen)
- ¼ cup granulated sugar
- 1 tablespoon fresh lemon juice
- 1 tablespoon cornstarch
- 2 tablespoons cold water
For Garnish (Optional)
- Fresh mint leaves
- Extra fresh blueberries
Step-by-Step Instructions
-
Step 1: Prepare the Crust
In a medium bowl, combine the graham cracker crumbs and ¼ cup granulated sugar. Pour in the melted butter and mix well until the crumbs are evenly moistened. They should resemble wet sand.
Small tip: You can crush graham crackers by placing them in a Ziploc bag and rolling over them with a rolling pin, or by using a food processor.
-
Step 2: Press the Crust into the Pan
Press the crumb mixture firmly into the bottom of a 9-inch springform pan. Use the bottom of a glass or your fingers to create an even, compact layer. Place the pan in the refrigerator while you prepare the filling.
Small tip: Make sure the crust is really packed down. This helps it hold together when you slice the cheesecake.
-
Step 3: Make the Cream Cheese Base
In a large bowl, using an electric mixer, beat the softened cream cheese, ½ cup granulated sugar, vanilla extract, and lemon juice until smooth and creamy. Scrape down the sides of the bowl to ensure everything is fully combined. Set aside.
Small tip: Ensure your cream cheese is truly at room temperature. This prevents lumps and ensures a super smooth filling.
-
Step 4: Whip the Heavy Cream
In a separate, very cold bowl (metal bowls work great for this), whip the cold heavy cream with an electric mixer on medium-high speed until stiff peaks form. Be careful not to over-whip, or it will become grainy.
Small tip: Chilling your mixing bowl and beaters for 10-15 minutes before whipping can help the cream whip up faster and firmer.
-
Step 5: Combine Filling Ingredients
Gently fold the whipped cream into the cream cheese mixture in three additions. Use a spatula and fold until just combined. Overmixing can deflate the whipped cream, making your cheesecake less airy.
Small tip: Folding gently means incorporating the ingredients without beating out the air you just whipped into the cream.
-
Step 6: Assemble the Cheesecake
Pour the cheesecake filling over the chilled graham cracker crust. Spread it evenly with an offset spatula or the back of a spoon. Cover the springform pan loosely with plastic wrap and refrigerate for at least 4 hours, or preferably overnight, until firm.
Small tip: Giving the pan a gentle tap on the counter can help release any air bubbles and create a smoother top surface.
-
Step 7: Prepare the Blueberry Topping
While the cheesecake chills, prepare the topping. In a small saucepan, combine the blueberries, ¼ cup granulated sugar, and 1 tablespoon lemon juice. Cook over medium heat, stirring occasionally, until the blueberries begin to break down and release their juices, about 5-7 minutes.
Small tip: If using frozen blueberries, they will release more liquid, so be patient and let it simmer.
-
Step 8: Thicken the Topping
In a small cup, whisk together the cornstarch and cold water until smooth. Pour this slurry into the simmering blueberry mixture, stirring constantly. Continue to cook for another 1-2 minutes until the topping thickens. Remove from heat and let it cool completely to room temperature.
Small tip: Cooling the topping completely is crucial. If it’s warm, it will melt the cheesecake filling.
-
Step 9: Serve the Cheesecake
Once the cheesecake is firm, carefully remove the sides of the springform pan. Spoon the cooled blueberry topping over the cheesecake. Garnish with fresh mint leaves and extra blueberries, if desired. Slice and serve immediately.
Small tip: To get clean slices, dip your knife in hot water and wipe it clean between each cut.
Tips & Variations
- Gluten-Free Option: Easily make this gluten-free by using gluten-free graham cracker crumbs for the crust. Many brands offer excellent gluten-free alternatives that taste just as good.
- Vegan/Vegetarian Option: For a vegan version, use a plant-based graham cracker (or vegan digestive biscuits), vegan butter, and substitute the cream cheese with a dairy-free cream cheese alternative. For the heavy cream, use a full-fat coconut cream (chilled, scoop out the thick cream) or a vegan whipping cream.
- Add More Goodness: While this is a dessert, you could boost nutrition by adding a tablespoon of chia seeds to the blueberry topping for extra fiber and omega-3s, or stir in a scoop of unflavored collagen powder to the cream cheese mixture for protein.
- A Zesty Kick: For a spicy twist (though unusual for cheesecake!), you could add a tiny pinch of cayenne pepper to the graham cracker crust for a subtle warmth, or a very small amount of finely minced jalapeño to the blueberry topping for an unexpected sweet-heat combination.
- Flavor Variations: Swap out blueberries for other berries like raspberries, blackberries, or mixed berries for the topping. You can also add lemon zest to the cream cheese filling for an extra bright, citrusy flavor. A drizzle of chocolate sauce or a sprinkle of toasted coconut flakes would also be delicious!
Nutritional Information
Approximate values per serving (based on 8 servings):
- Calories: 480 kcal
- Protein: 6g
- Carbohydrates: 45g
- Fat: 32g
Please note: These values are approximate and may vary depending on the specific brands and exact amounts of ingredients used.
Health Benefits
This blueberry cheesecake isn’t just delicious; it also brings some health benefits, thanks to its star ingredients.
Blueberries are tiny powerhouses of nutrition. They are packed with antioxidants, especially anthocyanins, which give them their beautiful blue color. These antioxidants help fight free radicals in the body, potentially reducing cellular damage and supporting overall health.
Beyond antioxidants, blueberries are a good source of Vitamin C, which is vital for immune function and skin health. They also provide Vitamin K, important for blood clotting and bone health, and manganese, a mineral involved in bone development and metabolism.
While often associated with indulgence, cream cheese and heavy cream provide calcium and phosphorus, which are essential for strong bones and teeth. Full-fat dairy also offers fat-soluble vitamins like A, D, E, and K, though in smaller amounts in this context.
Lemon juice, used in both the filling and topping, adds a burst of Vitamin C and contributes to a healthy immune system. It also helps with the absorption of iron from other foods.
Serving Suggestions
- Serve chilled, straight from the fridge, for the best texture and flavor.
- This cheesecake is a perfect dessert on its own, but it also pairs beautifully with a hot cup of coffee or a light herbal tea.
- For a delightful contrast, serve a small slice alongside a scoop of vanilla bean ice cream or a dollop of extra whipped cream.
- This recipe is fantastic for meal prep! Make the cheesecake ahead of time, chill it, and store it without the topping. Add the blueberry topping just before serving each slice.
Storage Tips: This No Bake Blueberry Cheesecake keeps wonderfully in the refrigerator. Cover it loosely with plastic wrap or aluminum foil. It will stay fresh for up to 3-4 days. You can freeze the cheesecake (without the topping) for longer storage. Wrap it tightly in plastic wrap, then aluminum foil. It will keep for up to 1 month. Thaw in the refrigerator overnight before serving. Reheating is not recommended for cheesecake; it’s best served cold.
Conclusion
There you have it – a magnificent No Bake Blueberry Cheesecake that’s incredibly easy to make and utterly delicious. It’s the perfect blend of creamy, sweet, and tangy, with that satisfying crunch from the graham cracker crust. This dessert truly proves that you don’t need an oven to create something spectacular.
So, go ahead and give this recipe a try! You’ll be amazed at how simple it is to achieve such a professional-looking and tasting dessert. It’s a fantastic recipe to have in your repertoire, ready for any occasion or just a sweet treat for yourself.
Whip up this delightful cheesecake and watch the smiles light up around your table. It’s a wonderful way to share a little homemade happiness with your family and friends. Enjoy every luscious bite!


