
Introduction
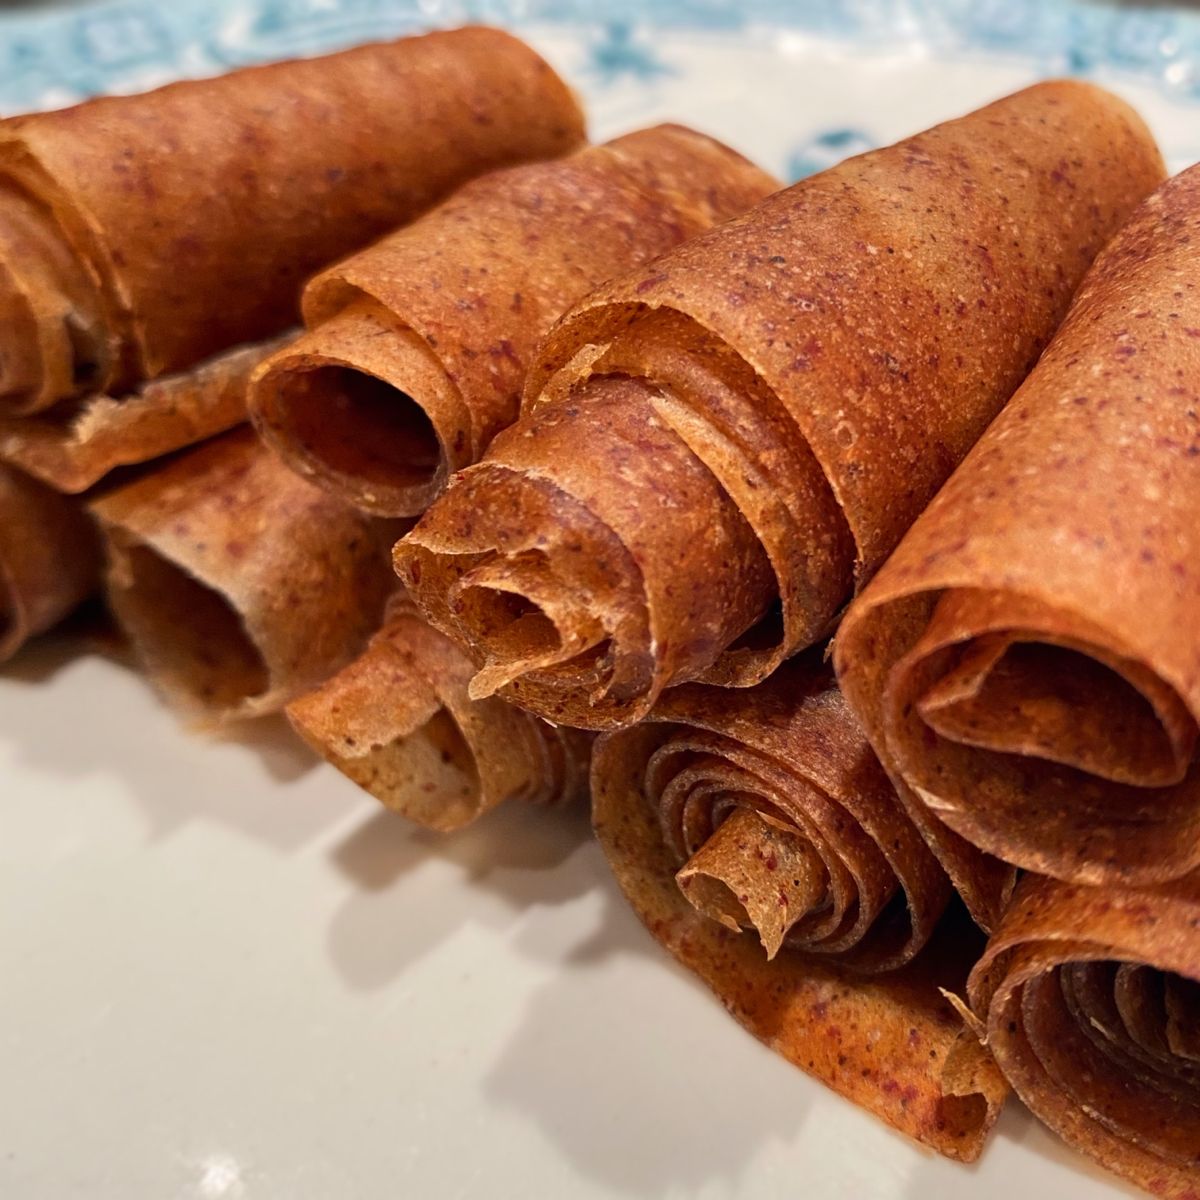
Get ready to create a truly delightful and wholesome snack that will transport you straight back to childhood: Apple Cinnamon Fruit Leather! This treat is bursting with the sweet, tangy flavor of fresh apples, perfectly complemented by the warm, comforting spice of cinnamon. It’s chewy, naturally sweet, and incredibly satisfying – a perfect pick-me-up any time of day that feels like a special indulgence without any guilt.
You might think making fruit leather is complicated, but I promise it’s surprisingly simple and mostly hands-off. The process involves just a few easy steps: cooking down your fruit, blending it into a smooth puree, and then letting your oven or dehydrator work its magic. It’s a fantastic way to use up extra apples, and you’ll love knowing exactly what goes into every delicious bite.
So, why not give this recipe a try? You’ll be amazed at how easy it is to create your own homemade fruit leather. It’s a fun project for the whole family and a wonderful addition to your healthy snack rotation. Let’s get cooking and fill your home with the incredible aroma of apples and cinnamon!
Cooking Time & Prep Time
- Prep Time: 20 minutes
- Cooking Time: 6-8 hours (dehydration)
- Total Time: 6 hours 20 minutes – 8 hours 20 minutes
Small tip: The cooking time for dehydration can vary significantly based on your oven’s calibration or dehydrator model, and the thickness of your fruit puree. Start checking around the 6-hour mark!
Ingredients
This recipe makes approximately 10 servings (about 10-12 strips of fruit leather).
- 6 large (about 3 pounds) firm apples (such as Fuji, Gala, or Honeycrisp)
- 1 teaspoon ground cinnamon
- 1 tablespoon fresh lemon juice
- 2-4 tablespoons maple syrup or honey (optional, adjust to your apples’ sweetness)
- 1/4 cup water (only if needed for blending)
Step-by-Step Instructions
-
Step 1: Prepare the Apples
Start by washing your apples thoroughly. You don’t need to peel them; the skins add extra fiber and nutrients, and they’ll blend away smoothly. Core the apples and chop them into roughly 1-inch pieces. This size helps them cook down evenly.
Small tip: Leaving the skins on saves time and adds a lovely depth of color to your finished fruit leather.
-
Step 2: Cook the Apples
Place the chopped apples in a large saucepan or pot. Add 1/4 cup of water to the pot to prevent sticking, even if your apples are juicy. Cover the pot and cook over medium-low heat for 15-20 minutes, stirring occasionally. The apples should become very soft and easily mashable with a spoon.
Small tip: If your apples seem dry, add another tablespoon or two of water to prevent scorching.
-
Step 3: Puree the Apples
Remove the cooked apples from the heat. Carefully transfer the softened apples to a high-speed blender or food processor. Blend until you achieve a completely smooth, lump-free puree. This might take a few minutes. If your blender struggles, add a tiny bit more water, one tablespoon at a time, just until it blends smoothly.
Small tip: Be careful when blending hot liquids. Vent the lid slightly or remove the center cap to allow steam to escape, and start on a low speed.
-
Step 4: Flavor the Puree
Pour the apple puree back into the saucepan (no need to clean it). Stir in the ground cinnamon and fresh lemon juice. Taste the puree. If your apples weren’t very sweet, or if you prefer a sweeter fruit leather, stir in 2-4 tablespoons of maple syrup or honey. Mix everything well to combine.
Small tip: The lemon juice brightens the flavor and helps prevent the puree from browning too much during cooking and dehydration.
-
Step 5: Prepare for Dehydration
Preheat your oven to its lowest setting, usually around 150-170°F (65-77°C). If you have a dehydrator, set it to 135°F (57°C). Line a baking sheet (or dehydrator trays) with parchment paper or a silicone baking mat. Make sure the paper or mat extends slightly beyond the edges of the tray.
Small tip: Silicone mats make removing the finished leather much easier than parchment paper, which can sometimes stick.
-
Step 6: Spread the Puree
Pour the apple puree onto the prepared baking sheet or dehydrator tray. Using an offset spatula or the back of a spoon, spread the puree into a thin, even layer. Aim for about 1/8 to 1/4 inch thick. Try to keep the edges slightly thicker, as they tend to dry faster.
Small tip: An even thickness is crucial for uniform drying. Uneven spots will result in some parts being crispy and others still sticky.
-
Step 7: Dehydrate the Fruit Leather
Place the baking sheet in your preheated oven. Prop the oven door open slightly with a wooden spoon to allow moisture to escape. Dehydrate for 6-8 hours. If using a dehydrator, follow the manufacturer’s instructions for fruit leather, typically 6-10 hours. The leather is done when it’s no longer sticky to the touch and peels easily from the parchment or silicone mat.
Small tip: Rotate the tray halfway through the drying process to ensure even dehydration, especially in an oven.
-
Step 8: Cool and Cut
Once the fruit leather is dry and pliable, remove it from the oven or dehydrator. Let it cool completely on the tray. Cooling makes it easier to handle and cut. Once cool, gently peel the fruit leather off the parchment paper or silicone mat.
Small tip: If it’s still sticky, put it back in the oven or dehydrator for another hour. If it’s too brittle, it’s over-dried but still edible!
-
Step 9: Store Your Fruit Leather
Lay the fruit leather on a piece of fresh parchment paper. Using kitchen shears or a sharp knife, cut the leather into strips or shapes. Roll each strip up with the parchment paper still attached. This prevents the pieces from sticking together. Your delicious homemade fruit leather is now ready to enjoy!
Small tip: Cutting it into individual strips makes it perfect for grab-and-go snacking.
Tips & Variations
- Gluten-Free Option: This Apple Cinnamon Fruit Leather is naturally gluten-free, making it a fantastic snack for those with gluten sensitivities or celiac disease. Enjoy it as is!
- Vegan/Vegetarian Option: This recipe is also naturally vegan and vegetarian. Just ensure you use maple syrup instead of honey if you’re strictly vegan, as honey is an animal product.
- Add More Vegetables or Protein: For an extra nutritional boost, try adding 1/2 cup of finely grated carrots or steamed spinach to the apple puree before blending. You can also mix in 1-2 tablespoons of chia seeds or flax seeds for extra fiber and omega-3s after blending.
- Spicy Version: For a warming kick, add a pinch (1/4 teaspoon) of ground ginger or a tiny dash of cayenne pepper along with the cinnamon. It adds a surprising and delicious depth of flavor.
- Other Flavor Variations: Experiment with different fruit combinations! Try adding pureed pears, peaches, or even a handful of berries to the apple base. You can also swap cinnamon for pumpkin pie spice for an autumn twist, or add a teaspoon of vanilla extract for a richer flavor.
Nutritional Information
Approximate values per serving (based on 10 servings):
- Calories: 70-90
- Protein: 0.5g
- Carbohydrates: 18-23g
- Fat: 0.3g
Note: Nutritional values may vary depending on the specific size and sweetness of apples used, and whether optional sweeteners are added.
Health Benefits
This Apple Cinnamon Fruit Leather isn’t just tasty; it’s packed with wonderful health benefits from its simple, wholesome ingredients.
Apples are a fantastic source of dietary fiber, especially pectin, which supports digestive health and can help regulate blood sugar levels. They also contain important antioxidants like quercetin, which helps fight inflammation and protect your cells from damage. Plus, apples provide a good dose of Vitamin C, boosting your immune system.
Cinnamon is a spice with ancient medicinal properties. It’s known for its powerful antioxidant and anti-inflammatory effects. Studies suggest cinnamon can help lower blood sugar levels and improve insulin sensitivity, making this fruit leather a smarter sweet treat choice.
By making your own fruit leather, you avoid the artificial colors, preservatives, and excessive added sugars often found in store-bought versions. You’re getting pure fruit goodness, concentrated into a convenient, delicious form.
This homemade snack provides natural energy from fruit sugars, along with the fiber to keep you feeling full and satisfied. It’s a smart way to curb sweet cravings and nourish your body with real food.
Serving Suggestions
- On-the-Go Snack: Roll up individual strips of fruit leather for a perfect, mess-free snack in lunchboxes, backpacks, or gym bags.
- Breakfast Topping: Chop cooled fruit leather into small pieces and sprinkle over yogurt, oatmeal, or granola for added sweetness and chewiness.
- Dessert Enhancement: Serve alongside a scoop of vanilla ice cream or a dollop of Greek yogurt for a simple, elegant dessert.
- Cheese Board Addition: Cut into interesting shapes and add to a cheese board for a sweet, fruity counterpoint to savory cheeses.
Storage Tips
Store your Apple Cinnamon Fruit Leather rolled up in parchment paper in an airtight container at room temperature for up to 1-2 weeks. For longer storage, you can keep it in the refrigerator for up to a month. Yes, fruit leather freezes beautifully! To freeze, wrap individual rolls tightly in plastic wrap, then place them in a freezer-safe bag or container for up to 3 months. Thaw at room temperature for about 15-30 minutes before enjoying. Reheating is not typically needed; if it feels a bit stiff, simply let it come to room temperature to soften.
Conclusion
There you have it – a truly wonderful recipe for homemade Apple Cinnamon Fruit Leather! It’s such a simple yet incredibly rewarding treat to make. You get all the natural sweetness of apples, the comforting warmth of cinnamon, and the satisfying chewiness that makes fruit leather so irresistible. Plus, you have the peace of mind knowing exactly what wholesome ingredients went into every single bite.
Don’t be intimidated by the longer “cooking” time; most of it is hands-off dehydration. The effort you put in upfront is minimal, and the reward is a batch of delicious, healthy snacks that everyone will love. It’s a fantastic way to enjoy fruit and a delightful alternative to processed treats.
So go ahead, gather your apples, and get ready to create some kitchen magic. Make a big batch and share the joy with your family and friends. They’ll be so impressed with your homemade creation, and you’ll love having a healthy, tasty snack always at the ready!


