
Introduction
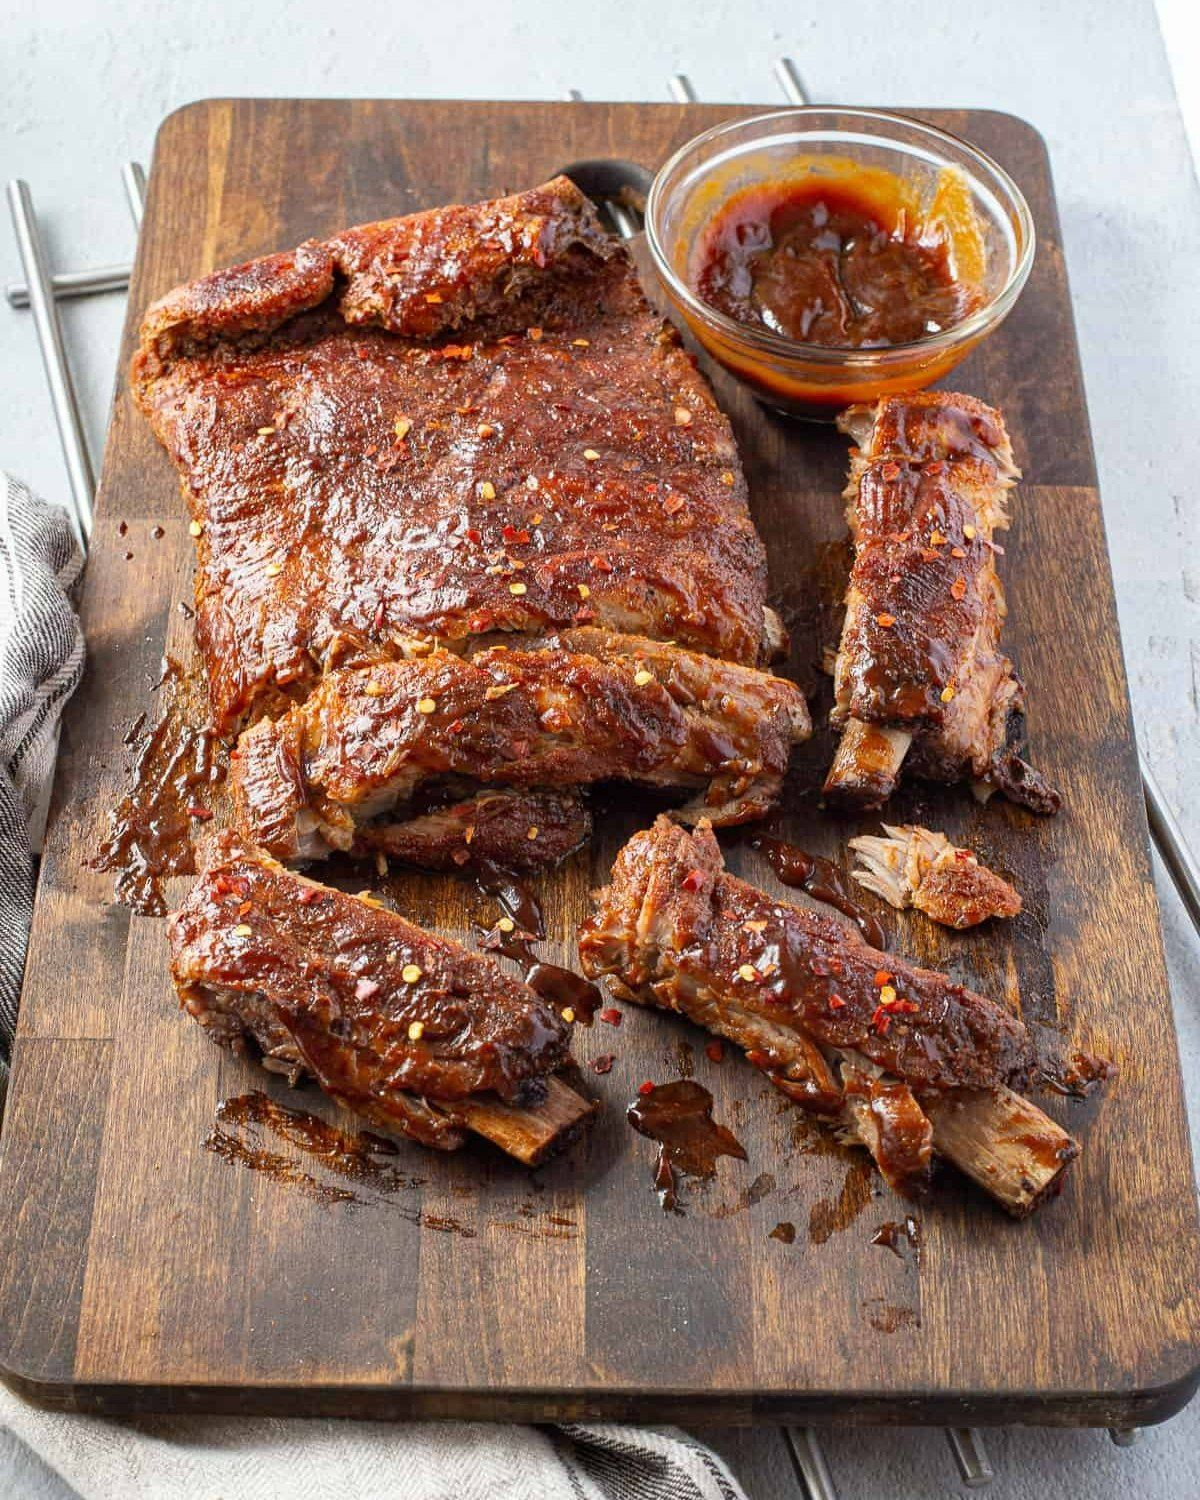
Get ready to make the most incredible ribs right in your own kitchen! Our Dry Rub Ribs recipe brings you tender, fall-off-the-bone meat bursting with amazing flavor. This dish is a true crowd-pleaser, perfect for any gathering or a special family meal. The secret is in our homemade dry rub, which creates a delicious, savory crust that you will absolutely adore.
You might think making ribs is complicated, but it’s surprisingly easy. Most of the cooking time is hands-off, letting your oven do all the hard work. With just a few simple steps and common ingredients, you’ll achieve restaurant-quality ribs without breaking a sweat. The dry rub adds deep flavor without the mess of sticky sauces during cooking, making clean-up a breeze too.
So, are you ready to impress everyone with your BBQ skills? Roll up your sleeves and get ready to create some truly unforgettable ribs. This recipe is designed for success, and we can’t wait for you to try it!
Cooking Time & Prep Time
- Prep Time: 25 minutes
- Cooking Time: 180 minutes
- Total Time: 205 minutes
Small tip: You can mix the dry rub a day or two in advance to save time on cooking day. Store it in an airtight container.
Ingredients
This recipe makes 6 generous servings.
For the Ribs
- 2 racks (about 2.5-3 lbs each) St. Louis style or baby back pork ribs
- 1/2 cup apple cider vinegar (or apple juice)
For the Dry Rub
- 1/4 cup light brown sugar, packed
- 2 tablespoons smoked paprika
- 1 tablespoon garlic powder
- 1 tablespoon onion powder
- 1 tablespoon coarse sea salt
- 1 teaspoon black pepper
- 1 teaspoon chili powder
- 1/2 teaspoon cayenne pepper (optional, for a little heat)
- 1/2 teaspoon ground cumin
Step-by-Step Instructions
-
Step 1: Prepare the Ribs
Start by preparing your ribs. Lay each rack meat-side down on a cutting board. Locate the thin membrane on the back of the ribs. Use a small knife to gently lift a corner of the membrane, then grab it with a paper towel and pull it off completely. This step ensures super tender ribs.
Small tip: If the membrane is stubborn, use the handle of a spoon to help pry it up.
-
Step 2: Mix the Dry Rub
In a medium bowl, combine all the dry rub ingredients: brown sugar, smoked paprika, garlic powder, onion powder, salt, black pepper, chili powder, cayenne pepper (if using), and cumin. Mix everything thoroughly with a spoon or your fingers until well combined. Break up any clumps of brown sugar.
-
Step 3: Apply the Rub
Pat the ribs very dry with paper towels. This helps the rub stick better. Generously sprinkle the dry rub all over both sides of the ribs. Make sure to cover every nook and cranny. Gently massage the rub into the meat. Don’t be shy with the rub; it’s where all the flavor comes from.
Small tip: Wear gloves if you don’t want your hands to get stained by the paprika.
-
Step 4: Let the Ribs Rest
Place the seasoned ribs on a large baking sheet. Cover them loosely with plastic wrap. Let the ribs rest in the refrigerator for at least 30 minutes, or even better, for 2-4 hours. This resting time allows the rub to penetrate the meat and infuse it with flavor.
-
Step 5: Preheat Oven and Prepare Pan
Preheat your oven to 275°F (135°C). Line a large, sturdy baking pan or roasting pan with heavy-duty aluminum foil. You’ll want enough foil to completely seal the ribs inside. This creates a steamy environment for tender cooking.
-
Step 6: Bake the Ribs
Place the seasoned ribs into the foil-lined pan, meat-side up. Pour the apple cider vinegar (or apple juice) into the bottom of the pan, around the ribs, not directly over them. Tightly seal the foil around the ribs, creating a packet. Bake for 2.5 to 3 hours, or until the ribs are very tender. The meat should pull away from the bone easily.
Small tip: Ensure the foil is sealed well to trap all the moisture. This is key for tender ribs.
-
Step 7: Finish the Ribs
Carefully remove the pan from the oven. Open the foil packet (watch out for steam!). Increase the oven temperature to 375°F (190°C). You can optionally brush the ribs with your favorite BBQ sauce at this point for a glaze. Return the uncovered ribs to the oven and bake for another 15-20 minutes, or until the surface is slightly caramelized and has a nice “bark.” Alternatively, you can finish them on a grill for 5-10 minutes per side.
-
Step 8: Rest and Serve
Once finished, remove the ribs from the oven or grill. Let them rest for 10-15 minutes before slicing. Resting allows the juices to redistribute, making the ribs even more succulent. Slice between the bones and serve immediately. Enjoy your amazing homemade ribs!
Tips & Variations
- Gluten-Free Option: Our dry rub is naturally gluten-free! Just ensure that any pre-packaged spices you use are certified gluten-free. If adding BBQ sauce, choose a brand that is clearly labeled gluten-free.
- Vegan/Vegetarian Option: You can adapt this recipe for plant-based eaters. Use large portobello mushroom caps or store-bought seitan ribs. Apply the same dry rub generously. Bake them in a foil packet with a splash of vegetable broth until tender, then finish under the broiler or on the grill for a nice crust.
- Add More Vegetables or Protein: For a more complete meal, roast some chopped root vegetables like potatoes, carrots, and sweet potatoes alongside the ribs in a separate pan. You can also add some smoked sausages or chicken drumsticks to the foil packet for extra protein, ensuring they cook through.
- Spicy Version: If you love heat, increase the amount of cayenne pepper in the dry rub. You can also add a pinch of red pepper flakes or a dash of chipotle powder for a smoky, spicy kick. A finely minced habanero or jalapeño can be added to the liquid in the foil packet for extra heat and flavor.
- Smoky Flavor Boost: For an even deeper smoky flavor without a smoker, add 1-2 teaspoons of liquid smoke to the apple cider vinegar in the foil packet. You can also use smoked sea salt in your rub.
Nutritional Information
Approximate values per serving (based on 6 servings):
- Calories: 450 kcal
- Protein: 35 g
- Carbohydrates: 15 g
- Fat: 25 g
Please note: These values are approximate and may vary depending on the specific ingredients and cuts of meat used.
Health Benefits
Our dry rub ribs offer several health benefits, especially when made at home where you control the ingredients.
Pork ribs are a good source of high-quality protein, which is essential for muscle repair, growth, and overall bodily functions. They also provide important B vitamins like B12 and niacin, vital for energy metabolism and nervous system health. Additionally, pork contains minerals like zinc, important for immune function, and phosphorus, crucial for bone health.
The spices in our dry rub contribute to your health too. Smoked paprika is rich in antioxidants and Vitamin A, supporting eye health and immune function. Garlic and onion powder contain compounds known for their potential immune-boosting and anti-inflammatory properties. Cumin has been studied for its digestive benefits and antioxidant content.
By making your own ribs, you avoid the excessive sodium and artificial additives often found in store-bought or restaurant versions. You can control the amount of sugar and salt, making it a healthier choice for your family. This allows you to enjoy a flavorful meal without unnecessary ingredients.
Remember to balance your meal with plenty of vegetables to get a wide range of nutrients. Enjoying these ribs in moderation as part of a balanced diet can be a delicious way to consume essential nutrients.
Serving Suggestions
- Serve these flavorful ribs with classic BBQ sides like creamy coleslaw, homemade potato salad, or warm cornbread.
- For a lighter meal, pair them with a fresh green salad or grilled vegetables such as corn on the cob, asparagus, or bell peppers.
- These ribs are definitely the star of the show, making them a perfect main dish for any gathering. You can also cut individual ribs to serve as hearty appetizers.
- For meal prep, cook the ribs as directed, then slice and portion them into individual containers. They pair wonderfully with pre-cooked brown rice or quinoa and steamed green beans for easy lunches throughout the week.
Storage Tips: Leftover dry rub ribs can be stored in an airtight container in the refrigerator for up to 3-4 days. You can also freeze them for longer storage; wrap individual ribs tightly in foil, then place them in a freezer-safe bag for up to 3 months. To reheat, thaw frozen ribs in the fridge overnight. Then, warm them gently in a preheated oven at 300°F (150°C) until heated through, or microwave individual portions in short bursts.
Conclusion
There you have it – a recipe for incredibly flavorful, tender, and juicy dry rub ribs that are surprisingly simple to make. This dish truly delivers on taste, with a beautiful bark and meat that practically melts in your mouth. It’s the kind of meal that makes everyone gather around the table, eager for more.
Don’t hesitate to give this recipe a try. You’ll be amazed at how easy it is to achieve such fantastic results right in your own kitchen. The hands-off cooking time means you can relax while your oven does all the hard work, leaving you with more time to enjoy.
So, fire up that oven and get ready to create some unforgettable memories. Share these delicious ribs with your family and friends, and watch their faces light up with every bite. Happy cooking!


