
Introduction
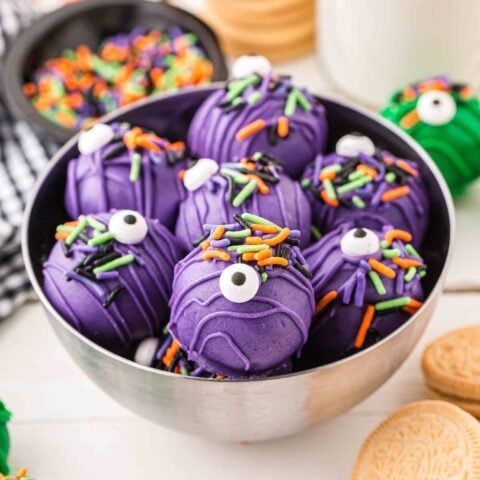
Get ready to enchant your taste buds and spook your friends with our incredible Monster Eyeballs Truffles! These delightful, no-bake treats are perfectly creamy, wonderfully sweet, and incredibly fun to make. Imagine a rich, chocolatey interior, coated in smooth white chocolate, and then transformed into a spooky, realistic eyeball – they’re a showstopper for any Halloween gathering!
The best part? These monster eyeballs are surprisingly easy and quick to whip up. You don’t need any special baking skills or fancy equipment. With just a few simple ingredients and some creative flair, you’ll have a batch of these eerie, edible delights ready in no time. They are the ultimate combination of deliciousness and spooky fun, making them a hit with both kids and adults.
So, gather your ingredients and your brave spirit! Let’s dive into making these adorable (and slightly gross!) Monster Eyeballs Truffles. They are guaranteed to bring smiles, screams, and plenty of “wows” to your Halloween festivities. You’ll be amazed at how simple it is to create such a memorable treat.
Cooking Time & Prep Time
Here’s a quick breakdown of the time you’ll need to create these spooky treats:
- Prep Time: 30 minutes
- Chill Time (initial): 60 minutes
- Decorating Time: 30 minutes
- Total Time: 120 minutes (2 hours)
Small tip: The initial chill time is crucial for getting perfectly firm truffles that are easy to dip. Don’t rush this step!
Ingredients
This recipe makes approximately 24 Monster Eyeballs Truffles, perfect for sharing!
- For the Truffle Base:
- 36 chocolate sandwich cookies (like Oreos), about 1 standard package
- 8 oz (226g) full-fat cream cheese, softened
- For the Coating:
- 12 oz (340g) white chocolate melting wafers or candy melts
- 2-3 drops green or blue gel food coloring (for the iris)
- For Decoration:
- Red gel food coloring or red edible writing gel (for veins)
- Mini chocolate chips or black edible food marker (for pupils)
Step-by-Step Instructions
Step 1: Crush the Cookies
Place the entire package of chocolate sandwich cookies, including the cream filling, into a food processor. Pulse until the cookies are finely crushed into crumbs. You want a texture similar to fine sand, with no large chunks remaining.
Small tip: If you don’t have a food processor, place the cookies in a large zip-top bag and crush them with a rolling pin. Make sure to seal the bag tightly!
Step 2: Mix the Truffle Base
In a large mixing bowl, combine the finely crushed cookie crumbs with the softened cream cheese. Use a stand mixer with a paddle attachment, a hand mixer, or even a sturdy spatula to mix until everything is thoroughly combined. The mixture should be thick, uniform, and able to hold its shape.
Small tip: Ensure your cream cheese is truly softened to room temperature. This makes mixing much easier and prevents lumps.
Step 3: Roll the Eyeballs
Scoop about a tablespoon of the truffle mixture and roll it between your palms to form a smooth ball. Aim for balls that are roughly 1 to 1.5 inches in diameter, resembling the size of a large eyeball. Place the rolled truffles on a baking sheet lined with parchment paper.
Small tip: For uniform sizes, use a small cookie scoop or a measuring spoon. Lightly moisten your hands with water if the mixture becomes too sticky.
Step 4: Chill the Truffles
Once all the truffles are rolled, place the baking sheet in the refrigerator. Let them chill for at least 60 minutes. This chilling time is essential to help the truffles firm up, making them much easier to dip in chocolate without falling apart.
Small tip: You can even chill them for a few hours or overnight if you’re preparing ahead. Just cover the baking sheet loosely with plastic wrap.
Step 5: Melt the White Chocolate
While the truffles are chilling, prepare your white chocolate coating. Melt the white chocolate melting wafers or candy melts according to package directions. You can use a double boiler on the stovetop or melt them in the microwave in 30-second intervals, stirring well after each, until smooth and fluid.
Small tip: Be careful not to overheat white chocolate, as it can seize and become lumpy. Low and slow is the key to a smooth consistency.
Step 6: Color the Iris Chocolate
Once the white chocolate is melted, spoon about 1/4 cup of it into a separate small, heatproof bowl. Add 2-3 drops of green or blue gel food coloring to this smaller portion and stir until the color is vibrant and uniform. Keep the remaining white chocolate plain.
Small tip: Use gel food coloring, not liquid, as liquid can cause the chocolate to seize. A little goes a long way to achieve a bright color.
Step 7: Dip the Truffles
Take the chilled truffles out of the refrigerator. Using a fork or a dipping tool, carefully dip each truffle into the plain melted white chocolate, ensuring it’s fully coated. Gently tap off any excess chocolate, then return the truffle to the parchment-lined baking sheet.
Small tip: Work quickly so the truffles stay cold and the chocolate sets smoothly. If your white chocolate starts to thicken, gently reheat it for a few seconds.
Step 8: Add the Iris
Before the white chocolate coating fully sets on the dipped truffles, take a small spoon or a clean paintbrush. Dollop a small circle of the colored green or blue chocolate onto the center of each white-coated truffle. This will be the iris of your monster eyeball.
Small tip: If the white chocolate sets too fast, you can gently warm the surface with a hairdryer on a low setting for a few seconds to help the colored chocolate adhere.
Step 9: Decorate the Pupils and Veins
While the colored iris is still wet, carefully place a mini chocolate chip in the center of the iris, pointy side down, to create the pupil. Alternatively, use a black edible food marker to draw a small black dot. Once the chocolate has set, use your red gel food coloring or red edible writing gel to draw thin, squiggly “veins” radiating from the iris across the white chocolate.


