
Introduction
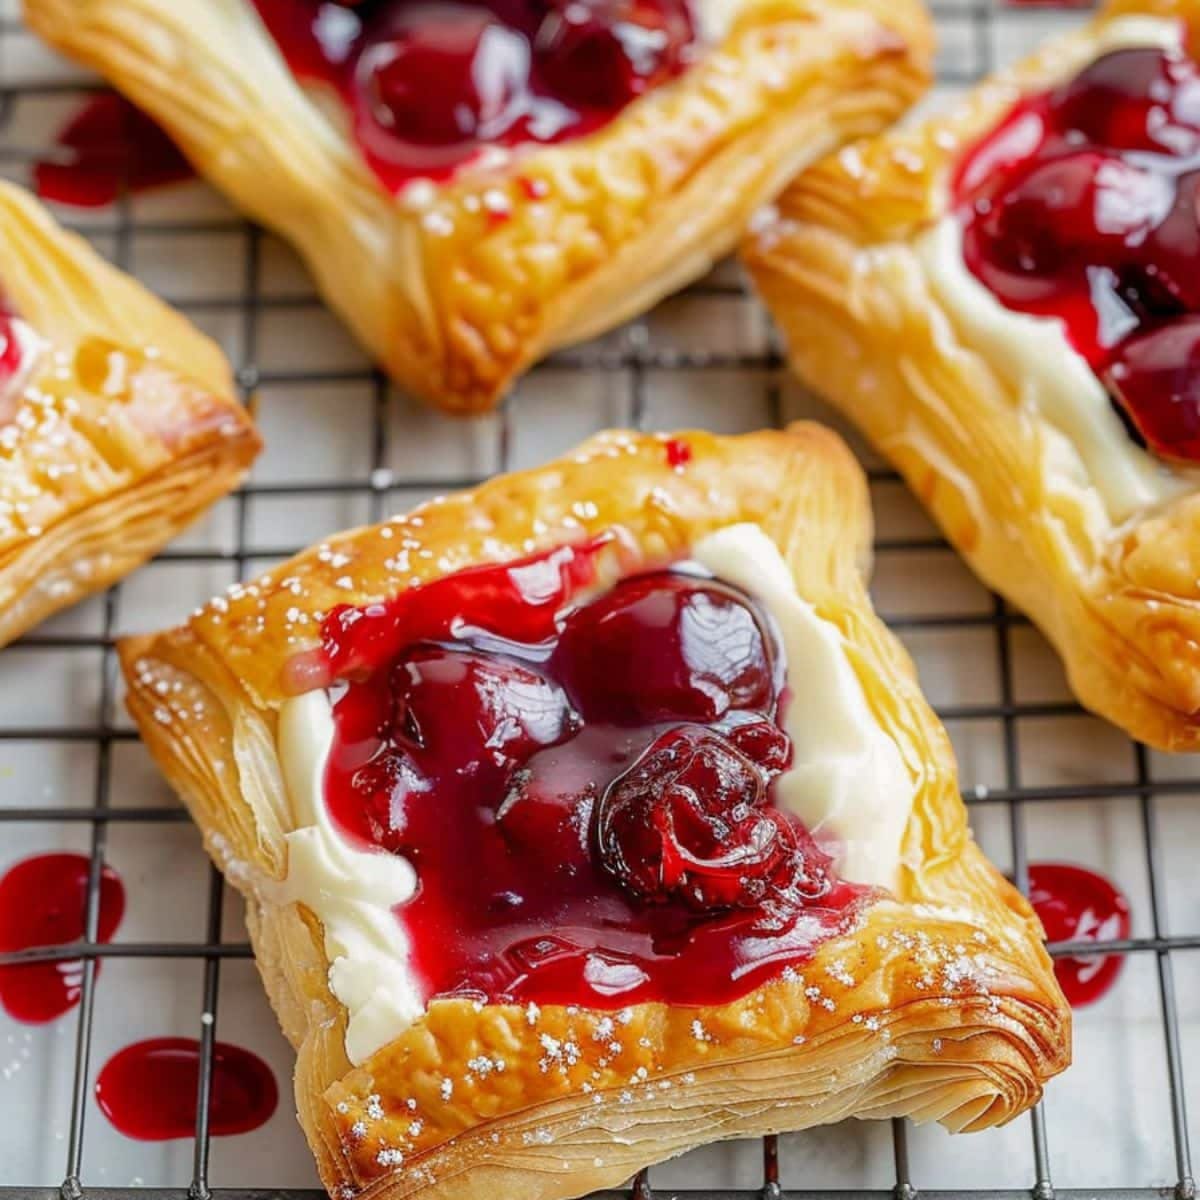
Get ready to brighten your day with these absolutely delightful Mini Cherry Cheese Danishes! Imagine a flaky, golden puff pastry shell, cradling a rich, creamy, and slightly sweet cream cheese filling. Topped with a vibrant burst of tangy-sweet cherry goodness, these mini treats are pure joy in every bite. They’re perfect for breakfast, brunch, or a lovely afternoon snack, offering a touch of bakery elegance right in your own home.
The best part? These danishes are surprisingly easy and quick to make, even for beginner bakers! We’re using a clever shortcut with store-bought puff pastry, which means less time fussing in the kitchen and more time enjoying delicious results. The filling comes together in minutes, and assembly is a breeze. You’ll be amazed at how simple it is to create something so impressive.
So, why wait? Treat yourself, your family, or your friends to these irresistible Mini Cherry Cheese Danishes. They’re guaranteed to put a smile on everyone’s face and make any occasion feel a little more special. Let’s get baking!
Cooking Time & Prep Time
- Prep Time: 25 minutes
- Cooking Time: 18 minutes
- Total Time: 43 minutes
Small tip: To save time, you can prepare the cream cheese filling the day before and store it in the fridge. This makes assembly even quicker on baking day!
Ingredients
Makes 12-16 Mini Danishes
- For the Danishes:
- 1 package (17.3 ounces) frozen puff pastry, thawed (2 sheets)
- 1 large egg, beaten (for egg wash)
- 1 can (21 ounces) cherry pie filling
- 1 tablespoon fresh lemon zest (optional, for the cherry filling)
- For the Cream Cheese Filling:
- 8 ounces cream cheese, softened
- 1/4 cup granulated sugar
- 1 teaspoon vanilla extract
- 1 large egg yolk
- For the Glaze (Optional):
- 1/2 cup powdered sugar
- 1-2 tablespoons milk (or lemon juice for a tangier glaze)
Step-by-Step Instructions
-
Step 1: Prepare Your Workspace and Oven
Preheat your oven to 400°F (200°C). Line two large baking sheets with parchment paper. This will prevent sticking and make cleanup much easier. Ensure your puff pastry sheets are fully thawed but still cold.
Small tip: Thaw puff pastry in the refrigerator overnight or at room temperature for about 30-40 minutes. It should be pliable but not warm and sticky.
-
Step 2: Make the Cream Cheese Filling
In a medium bowl, combine the softened cream cheese, granulated sugar, vanilla extract, and egg yolk. Beat with an electric mixer on medium speed until the mixture is smooth and creamy, with no lumps. Set this aside.
In a separate small bowl, gently stir the lemon zest into the cherry pie filling if you’re using it. The lemon zest adds a wonderful brightness that complements the cherries beautifully.
-
Step 3: Prepare the Puff Pastry
Unroll one sheet of thawed puff pastry onto a lightly floured surface or directly onto your parchment-lined baking sheet. Using a sharp knife or a pizza cutter, cut the pastry sheet into 9 equal squares (a 3×3 grid). Repeat with the second sheet of puff pastry, giving you a total of 18 squares.
Small tip: A ruler can help you cut perfectly even squares, which will make your danishes look uniform and professional.
-
Step 4: Form the Danishes
Gently transfer the pastry squares to your prepared baking sheets, leaving about 2 inches between each. Using your thumb or the back of a spoon, gently press down in the center of each square, creating a slight indentation and forming a raised border around the edges. Be careful not to press all the way through the pastry.
-
Step 5: Fill the Danishes
Spoon about 1 tablespoon of the cream cheese filling into the center indentation of each pastry square. Then, spoon about 1 teaspoon of the cherry pie filling on top of the cream cheese filling. Don’t overfill, or the filling might spill out during baking.
-
Step 6: Apply Egg Wash and Bake
Lightly brush the exposed puff pastry edges (the raised border) with the beaten egg. This egg wash will give your danishes a beautiful golden, shiny crust. Bake in the preheated oven for 16-20 minutes, or until the pastry is puffed, golden brown, and the filling is set.
Small tip: Keep an eye on the danishes towards the end of baking. Ovens can vary, so adjust baking time as needed to prevent burning.
-
Step 7: Cool and Glaze
Once baked, remove the danishes from the oven and transfer them to a wire rack to cool completely. While they cool, prepare the optional glaze: whisk together the powdered sugar and milk (or lemon juice) in a small bowl until smooth. Drizzle the glaze over the cooled danishes just before serving. Enjoy your delicious homemade treats!
Tips & Variations
- Gluten-Free Option: Easily make these danishes gluten-free by using a high-quality gluten-free puff pastry. Many brands now offer excellent options that bake up just as flaky and delicious.
- Vegan/Vegetarian Option: For a vegan version, use a plant-based puff pastry (most are accidentally vegan, but check the label!), vegan cream cheese, and substitute the egg yolk in the filling with 1 tablespoon of cornstarch mixed with 2 tablespoons of plant milk. For the egg wash, use a plant-based milk or a flax egg wash.
- Add More Fiber or Healthy Fats: While this is a treat, you can add a sprinkle of finely chopped almonds or pecans over the cherry filling before baking for extra crunch, fiber, and healthy fats.
- Warming Spice Version: For a cozy twist, add 1/4 teaspoon of ground cinnamon or a tiny pinch of nutmeg to the cream cheese filling. You can also sprinkle a little cinnamon over the cherry filling before baking.
- Other Fruit Fillings: Don’t limit yourself to cherries! Experiment with other pie fillings like apple, blueberry, peach, or even a mixed berry blend. A dollop of lemon curd or a homemade fruit compote would also be fantastic.
Nutritional Information
Approximate values per serving (based on 16 servings):
- Calories: 250 kcal
- Protein: 4g
- Carbohydrates: 28g
- Fat: 15g
Please note that these values are approximate and may vary depending on the specific brands and exact quantities of ingredients used.
Health Benefits
While these Mini Cherry Cheese Danishes are undeniably a delicious treat, some of their key ingredients do offer a few health benefits!
Cherries: The star of our show, cherries, especially tart cherries, are packed with antioxidants. These compounds help fight inflammation and protect your cells from damage. They are also a good source of Vitamin C, which supports your immune system, and can even aid in better sleep due to natural melatonin content.
Cream Cheese: In moderation, cream cheese provides some beneficial nutrients. It’s a source of calcium, which is vital for strong bones and teeth. It also contains a small amount of protein, which is essential for building and repairing tissues in your body. Look for full-fat cream cheese for the best flavor and texture, and enjoy it as part of a balanced diet.
Lemon Zest: The optional lemon zest isn’t just for flavor; it also brings a boost of Vitamin C and other antioxidants. Citrus zest contains beneficial compounds that can support overall health and add a bright, refreshing element to your danishes.
Remember, these danishes are best enjoyed as an occasional treat. Pairing them with a cup of green tea or a side of fresh fruit can help balance your meal and add even more nutrients to your day!
Serving Suggestions
- Breakfast or Brunch Delight: Serve these danishes warm alongside a fresh fruit salad, a strong cup of coffee, or a glass of orange juice for a truly special breakfast or brunch spread.
- Elegant Dessert: Pair a mini danish with a scoop of vanilla bean ice cream or a dollop of whipped cream for a simple yet elegant dessert that’s sure to impress your guests.
- Afternoon Treat: Enjoy one with a cup of tea or a latte for a cozy and comforting afternoon snack. They’re also perfect for potlucks or bake sales!
- Meal Prep Ideas: While best fresh, you can make the cream cheese filling ahead of time. You can also assemble the danishes (without the egg wash) and refrigerate them on the baking sheet for up to 30 minutes before baking, which is great for entertaining.
Storage Tips: Store leftover Mini Cherry Cheese Danishes in an airtight container at room temperature for up to 1 day, or in the refrigerator for up to 3-4 days. They can also be frozen once baked and cooled. Wrap individual danishes tightly in plastic wrap, then place them in a freezer-safe bag or container for up to 1 month. To reheat, thaw frozen danishes in the refrigerator, then warm them in a preheated oven at 300°F (150°C) for about 5-10 minutes, or until just warmed through.
Conclusion
There you have it – a recipe for Mini Cherry Cheese Danishes that’s as simple as it is scrumptious! With their buttery, flaky crust, creamy sweet filling, and bright cherry topping, these little pastries are truly a masterpiece of flavor and texture. They prove that you don’t need to spend hours in the kitchen to create something truly special and delicious.
So, don’t hesitate! Gather your ingredients and give this recipe a try. You’ll be amazed at how easily you can whip up a batch of these bakery-quality treats right in your own home. The aroma alone will make your kitchen feel like a fancy patisserie.
Whether you’re looking for a delightful breakfast, an impressive brunch item, or a sweet treat to share with loved ones, these Mini Cherry Cheese Danishes are the perfect choice. Bake a batch, share the joy, and savor every single bite. Happy baking!


