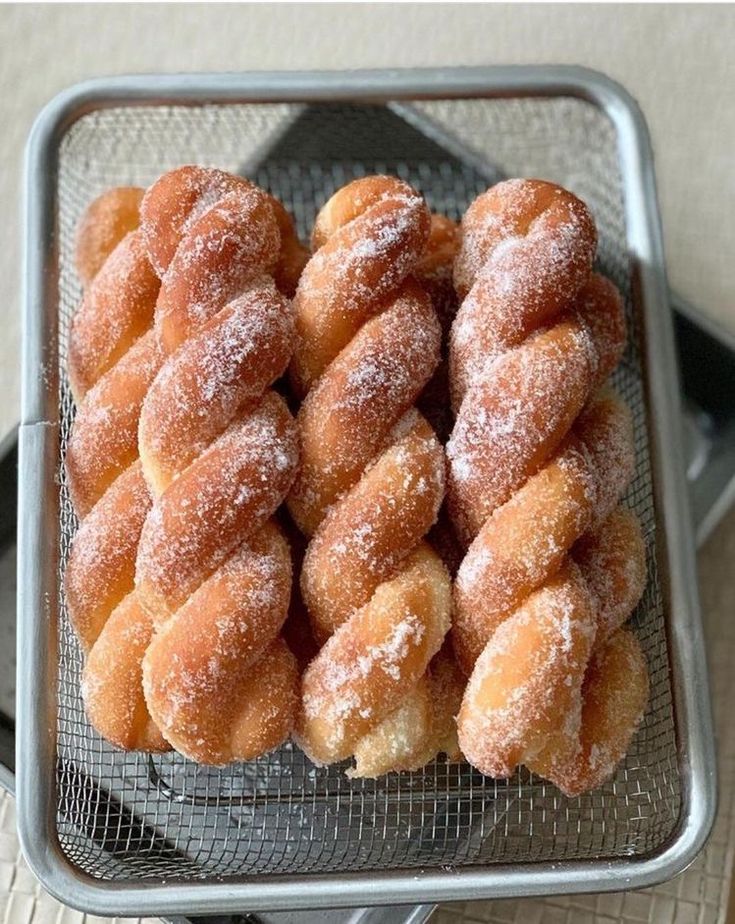

Introduction
Imagine biting into a warm, fluffy, melt-in-your-mouth doughnut, glistening with a sweet, simple glaze. That’s the magic of homemade glazed doughnuts! They are a classic comfort food, bringing back memories of cozy mornings and sweet treats. Nothing beats the taste and texture of a freshly fried doughnut, and this recipe delivers that perfect experience right in your own kitchen.
You might think making doughnuts from scratch is a huge undertaking, but it’s much easier than you imagine. With common pantry ingredients and a straightforward process, you’ll be amazed at how simple it is to create these delightful pastries. The steps are clear, and the reward of that first bite is absolutely worth every moment of effort. Forget the store-bought versions; homemade is truly superior.
So, are you ready to fill your home with the incredible aroma of freshly baked goods and treat yourself to something truly special? This recipe will guide you through every step, ensuring a delicious outcome. Gather your ingredients, put on your apron, and let’s make some unforgettable glazed doughnuts together. Your taste buds will thank you!
Cooking Time & Prep Time
- Active Prep Time: 45 minutes
- Rising Time: 2 hours 30 minutes (approx.)
- Cooking Time: 15 minutes
- Total Time: 3 hours 30 minutes
Small tip: While the rising time is essential, it’s mostly hands-off, allowing you to tackle other tasks or simply relax while your dough works its magic.
Ingredients
This recipe makes approximately 12-15 delicious glazed doughnuts.
For the Dough
- 1 cup (240ml) whole milk, warmed (about 105-115°F / 40-46°C)
- 2 ¼ teaspoons (1 standard packet) active dry yeast
- ¼ cup (50g) granulated sugar, plus 1 teaspoon for yeast
- 1 large egg, at room temperature
- 2 large egg yolks, at room temperature
- ½ teaspoon salt
- ½ teaspoon pure vanilla extract
- 4 cups (500g) all-purpose flour, plus more for dusting
- 6 tablespoons (85g) unsalted butter, softened and cut into pieces
For Frying
- 6-8 cups (1.5-2 liters) vegetable oil, canola oil, or peanut oil, for deep frying
For the Glaze
- 2 cups (240g) powdered sugar, sifted
- ¼ cup (60ml) whole milk
- 1 teaspoon pure vanilla extract
Step-by-Step Instructions
-
Step 1: Activate the Yeast
In a large bowl or the bowl of a stand mixer, combine the warm milk and 1 teaspoon of granulated sugar. Sprinkle the active dry yeast over the top. Let it sit for 5-10 minutes until foamy. This shows your yeast is alive and ready to work.
Small tip: If your yeast doesn’t foam, your milk might be too hot or too cold, or your yeast might be old. Start again with fresh yeast and properly warmed milk.
-
Step 2: Mix Wet Ingredients
To the foamy yeast mixture, add the remaining ¼ cup granulated sugar, the large egg, egg yolks, salt, and vanilla extract. Whisk everything together until well combined. This creates a rich base for your doughnut dough.
Small tip: Using room temperature eggs helps them incorporate more smoothly into the dough and contributes to a better texture.
-
Step 3: Add Flour and Butter
Gradually add the all-purpose flour to the wet ingredients, mixing on low speed with a dough hook (or by hand with a wooden spoon) until a shaggy dough forms. Then, add the softened butter, one piece at a time, allowing each piece to incorporate before adding the next. The dough will look sticky at first.
Small tip: Don’t rush adding the butter; letting it fully incorporate ensures a smooth, rich dough.
-
Step 4: Knead the Dough
Increase the mixer speed to medium-low and knead for 8-10 minutes, or knead by hand on a lightly floured surface for 10-12 minutes. The dough should become smooth, elastic, and pull away from the sides of the bowl. It will still be slightly tacky to the touch.
Small tip: A good way to check if your dough is properly kneaded is the “windowpane test.” Pinch off a small piece of dough and stretch it; if it stretches thin enough to see light through without tearing, it’s ready.
-
Step 5: First Rise
Lightly grease a large bowl with a little oil. Place the dough in the bowl, turning it once to coat. Cover the bowl tightly with plastic wrap or a clean kitchen towel. Let it rise in a warm, draft-free place for 1 to 1.5 hours, or until doubled in size.
Small tip: A slightly warm oven (turned off, with the light on) or a sunny spot on your counter makes an excellent warm place for rising dough.
-
Step 6: Shape the Doughnuts
Gently punch down the risen dough to release the air. Turn it out onto a lightly floured surface. Roll the dough to about ½-inch thickness. Using a 3-inch doughnut cutter (or a round cookie cutter and a smaller cutter for the centers), cut out your doughnuts and doughnut holes. Re-roll scraps gently and cut more until all dough is used.
Small tip: Try not to overwork the dough when re-rolling scraps; this can make the doughnuts tough.
-
Step 7: Second Rise
Carefully transfer the cut doughnuts and holes to baking sheets lined with parchment paper. Leave about 2 inches between each doughnut. Loosely cover them with plastic wrap or a clean kitchen towel. Let them rise in a warm, draft-free place for another 30-45 minutes, or until visibly puffy.
Small tip: This second rise is crucial for light and airy doughnuts, so don’t skip or shorten it.
-
Step 8: Heat the Oil
While the doughnuts are rising for the second time, pour the frying oil into a large, heavy-bottomed pot or Dutch oven. Heat the oil over medium heat until it reaches 350°F (175°C). Use a candy thermometer to monitor the temperature accurately.
Small tip: Maintaining a consistent oil temperature is key to perfectly cooked doughnuts – too low, and they’re greasy; too high, and they burn outside before cooking inside.
-
Step 9: Fry the Doughnuts
Carefully lower 2-3 doughnuts (don’t overcrowd the pot) into the hot oil using a slotted spoon or spider. Fry for 60-90 seconds per side, until golden brown. The doughnut holes will cook faster, about 30-45 seconds per side.
Small tip: Fry in small batches to keep the oil temperature from dropping too much.
-
Step 10: Drain and Cool Slightly
Once golden, remove the doughnuts from the oil with a slotted spoon and place them on a wire rack set over a baking sheet lined with paper towels. This allows excess oil to drain off. Let them cool for a few minutes while you prepare the glaze.
Small tip: Glazing warm (but not hot) doughnuts allows the glaze to set beautifully without melting completely.
-
Step 11: Make the Glaze
In a medium bowl, whisk together the sifted powdered sugar, milk, and vanilla extract until smooth and free of lumps. Adjust the consistency with a tiny bit more milk or powdered sugar if needed – it should be thick enough to coat a spoon but still pourable.
Small tip: Sifting powdered sugar prevents lumps and ensures a silky-smooth glaze.
-
Step 12: Glaze the Doughnuts and Serve
Dip each warm doughnut into the glaze, turning to coat both sides. Place them back on the wire rack to allow any excess glaze to drip off and set. Serve immediately and enjoy the pure bliss of homemade glazed doughnuts!
Small tip: These doughnuts are best enjoyed fresh, ideally within a few hours of frying.
Tips & Variations
- Gluten-Free Option: Substitute the all-purpose flour with a 1:1 gluten-free baking flour blend that contains xanthan gum. You might need to add a touch more liquid if the dough seems too dry, as GF flours absorb differently.
- Vegan/Vegetarian Option: For a vegan version, use a plant-based milk (like almond or soy), replace the egg and egg yolks with flax eggs (1 tbsp ground flaxseed + 3 tbsp water per egg, let sit for 5 mins), and use vegan butter.
- Nutritious Additions: While doughnuts are a treat, you can add a touch more fiber by substituting up to 1 cup of the all-purpose flour with whole wheat pastry flour. For a protein boost, consider a simple protein powder mixed into the glaze or a sprinkle of chopped nuts on top of the wet glaze.
- Spicy Version: Add ¼ teaspoon of cayenne pepper or a pinch of chili powder to your glaze for a surprising kick. This pairs wonderfully with a chocolate glaze variation for a “Mexican Hot Chocolate” feel.
- Other Flavor Tips: Experiment with different glazes! Try a lemon glaze (lemon juice instead of milk), a chocolate glaze (melted chocolate and a little milk), or a maple glaze (maple syrup instead of milk, with extra powdered sugar). Sprinkles are always a fun addition for a festive touch!
Nutritional Information
Approximate values per serving (based on 12 servings):
- Calories: 350-400 kcal
- Protein: 5-7g
- Carbohydrates: 45-50g
- Fat: 18-22g
Please note that these values are approximate and may vary significantly depending on the exact ingredients, oil


