
Introduction
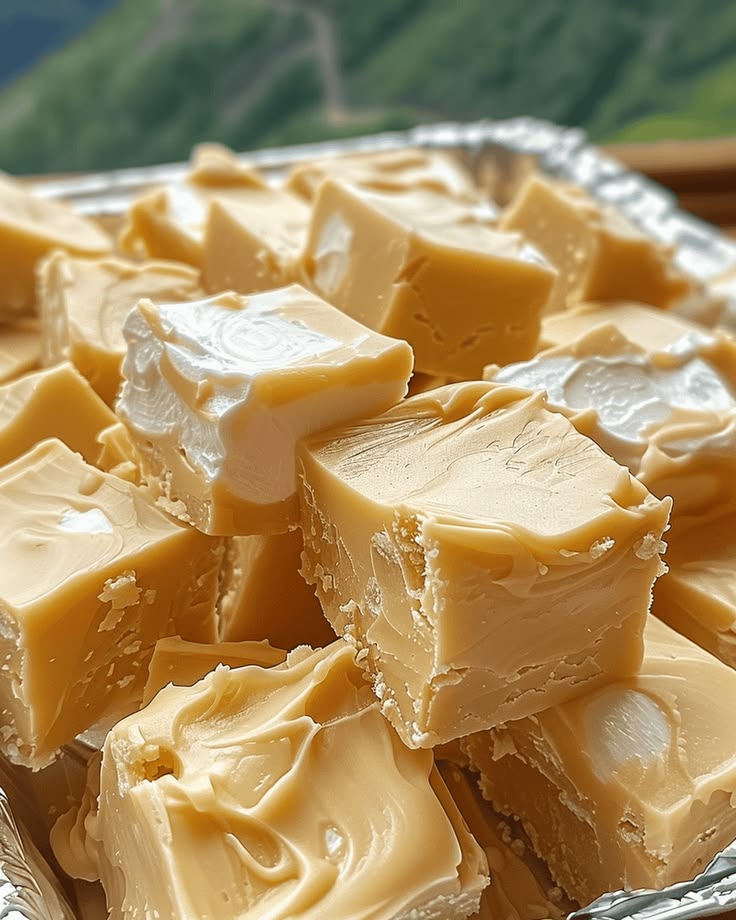
Get ready to whisk yourself away to the magical world of Harry Potter with this enchanting Butterbeer Fudge recipe! This delightful treat captures all the sweet, creamy, and slightly butterscotchy flavors of the famous wizarding drink. It’s a truly special dessert that will bring a smile to any fan’s face, making every bite feel like a visit to the Three Broomsticks.
You might think making fudge is difficult, but this recipe is incredibly easy and surprisingly quick to whip up. With just a few common ingredients and straightforward steps, you’ll have a batch of smooth, dreamy fudge ready to chill in no time. It’s perfect for beginner bakers and seasoned sweet makers alike, promising delicious results with minimal fuss.
So, gather your ingredients and prepare for a little kitchen magic! This Harry Potter Butterbeer Fudge is more than just a dessert; it’s an experience. Invite your friends, put on your favorite wizarding movie, and get ready to enjoy a taste of pure magic right in your own home.
Cooking Time & Prep Time
- Prep Time: 20 minutes
- Cooking Time: 15 minutes
- Total Time: 35 minutes (plus 2-3 hours chilling time)
Small tip: To make the process even smoother, measure out all your ingredients before you start cooking. This is called “mise en place” and it helps prevent any last-minute scrambling!
Ingredients
This recipe makes approximately 36 small pieces of fudge (from an 8×8 inch pan).
For the Fudge Base
- 4 ½ cups granulated sugar
- 1 cup (2 sticks) unsalted butter
- 1 (12-ounce) can evaporated milk
- ½ teaspoon salt
- 1 (7-ounce) jar marshmallow fluff
- 1 (12-ounce) bag white chocolate chips
For the Butterbeer Flavor
- 1 (11-ounce) bag butterscotch chips
- 2 teaspoons vanilla extract
- 1 teaspoon butter rum extract (or cream soda extract for a more authentic Butterbeer taste)
- ½ teaspoon yellow gel food coloring (optional, for a golden butterbeer hue)
Step-by-Step Instructions
-
Step 1: Prepare Your Pan
Line an 8×8 inch square baking pan with parchment paper, leaving an overhang on the sides. This will help you easily lift the fudge out later. Lightly grease the parchment paper with butter or non-stick spray.
Small tip: The overhang acts as “handles” for easy removal once the fudge is set.
-
Step 2: Combine Base Ingredients
In a large, heavy-bottomed saucepan, combine the granulated sugar, unsalted butter, evaporated milk, and salt. Make sure your saucepan is large enough to prevent boil-overs.
Stir these ingredients together over medium heat until the butter melts and the sugar begins to dissolve.
-
Step 3: Bring to a Rolling Boil
Increase the heat to medium-high and bring the mixture to a full, rolling boil. This means the mixture will continue to bubble even when stirred. Stir constantly to prevent scorching.
Once boiling, continue to cook and stir for exactly 5 minutes. If you have a candy thermometer, cook until it reaches 235°F (113°C), the soft-ball stage.
Small tip: Constant stirring is key to prevent the bottom from burning and to ensure even cooking. Don’t walk away from the pot!
-
Step 4: Remove from Heat and Add Flavorings
Immediately remove the saucepan from the heat. Carefully add the marshmallow fluff, white chocolate chips, butterscotch chips, vanilla extract, butter rum extract (or cream soda extract), and the optional yellow food coloring to the hot mixture.
Do not stir yet. Let the residual heat from the fudge base begin to melt the chips and fluff for a minute or two.
-
Step 5: Stir Until Smooth
Using a sturdy spoon or spatula, stir vigorously until all the marshmallow fluff and chocolate chips are completely melted and the mixture is smooth and creamy. Work quickly, as the fudge will start to set as it cools.
Ensure there are no lumps and the color is uniform throughout. The mixture should be thick and glossy.
Small tip: If your fudge seems a little too thick to stir, you can return it to very low heat for just a few seconds, stirring constantly, to help melt everything. Be careful not to overcook.
-
Step 6: Pour into Prepared Pan
Pour the hot fudge mixture evenly into your prepared 8×8 inch pan. Use your spatula to spread it out smoothly to the edges.
You can gently tap the pan on the counter a few times to release any air bubbles and ensure an even top surface.
-
Step 7: Chill and Set
Let the fudge cool at room temperature for about 30 minutes, then transfer the pan to the refrigerator. Chill for at least 2-3 hours, or until the fudge is completely firm and set.
Patience is important here! A properly chilled fudge will be much easier to cut.
-
Step 8: Cut and Serve
Once fully set, use the parchment paper overhang to lift the fudge out of the pan and onto a cutting board. Use a sharp, warm knife to cut the fudge into 36 small squares (6 rows by 6 rows).
Clean your knife between cuts for the neatest edges. Serve and enjoy your magical Butterbeer Fudge!
Tips & Variations
- Gluten-Free Option: This recipe is naturally gluten-free! Just be sure to double-check the labels on your white chocolate chips, butterscotch chips, and marshmallow fluff to ensure they are certified gluten-free. Most major brands are, but it’s always good to confirm.
- Vegan Option: To make this fudge vegan, substitute unsalted butter with a high-quality plant-based butter (like Miyoko’s Kitchen or Earth Balance sticks). Use a can of full-fat coconut cream or sweetened condensed coconut milk instead of evaporated milk. For marshmallow fluff, look for vegan marshmallow crème or melt down vegan marshmallows. Ensure your white and butterscotch chips are also dairy-free.
- Add More Texture or Flavor: For a delightful crunch and a touch of protein, fold in ½ cup of chopped pecans or walnuts along with the chocolate chips. You could also add a sprinkle of flaky sea salt on top before chilling for a delicious sweet and salty contrast.
- Spicy Butterbeer Kick: For those who love a bit of heat with their sweet, add a tiny pinch (⅛ teaspoon) of cayenne pepper to the fudge mixture along with the extracts. It won’t make it fiery, but it will add a subtle warmth that enhances the butterscotch notes.
- Different Flavor Profiles: Experiment with other extracts! A few drops of caramel extract can deepen the butterscotch flavor, or try a hint of rum extract for a more “adult” butterbeer taste. You can also swirl in some melted milk chocolate or dark chocolate for a marbled effect before chilling.
Nutritional Information
Approximate values per serving (based on 36 servings):
- Calories: 260 kcal
- Protein: 2g
- Carbohydrates: 47g
- Fat: 8g
Note: These values are approximate and may vary depending on the specific brands and exact amounts of ingredients used. This fudge is a treat to be enjoyed in moderation.
Health Benefits
While Butterbeer Fudge is undoubtedly a treat, some of its core ingredients do offer small health benefits when considered individually and in a balanced diet.
Evaporated milk, for example, is a concentrated source of dairy. It provides calcium, which is essential for strong bones and teeth, and vitamin D, which aids in calcium absorption. It also contributes a small amount of protein, important for muscle repair and overall body function.
Butter, used in moderation, contains fat-soluble vitamins like Vitamin A, D, E, and K2. Vitamin A is crucial for vision and immune function, while Vitamin E is an antioxidant. Vitamin K2 plays a role in bone health and heart health, though the amount in a single serving of fudge is quite small.
Even vanilla extract, derived from vanilla beans, contains antioxidants, which help protect the body’s cells from damage. While the quantity used in fudge is minimal, it’s a pleasant reminder of the natural goodness found in many ingredients.
Ultimately, the main “benefit” of this fudge comes from the joy and comfort it brings. Enjoying a delicious treat in moderation can be good for your mental well-being, providing a moment of happiness and a break from daily stresses. It’s a delightful way to engage your senses and share a special moment.
Serving Suggestions
- Magical Dessert Platter: Serve small squares of Butterbeer Fudge alongside other Harry Potter-themed treats like Golden Snitch cake pops or Cauldron Cupcakes for an unforgettable party spread.
- Cozy Movie Night Treat: Enjoy a few pieces with a warm mug of tea, coffee, or even a homemade Butterbeer drink while watching your favorite wizarding movie marathon.
- Thoughtful Edible Gift: Package the fudge in decorative boxes or cello bags with a ribbon. It makes a wonderful homemade gift for friends, teachers, or fellow Harry Potter enthusiasts during holidays or special occasions.
- Sweet Snack: It’s the perfect size for a quick sweet bite after a meal or as an afternoon pick-me-up.
Storage Tips
Store your Butterbeer Fudge in an airtight container at room temperature for up to 1 week, or in the refrigerator for up to 2 weeks. Keeping it in the fridge will make it firmer. You can also freeze the fudge for up to 3 months; simply wrap individual pieces tightly in plastic wrap before placing them in an airtight freezer-safe container. To enjoy, let frozen fudge thaw at room temperature for about 30 minutes. Reheating is not recommended, as fudge is best enjoyed at room temperature or slightly chilled.
Conclusion
There you have it – your very own batch of enchanting Harry Potter Butterbeer Fudge! This recipe truly delivers on its promise of bringing a little bit of wizarding world magic right into your kitchen. It’s wonderfully creamy, perfectly sweet, and bursting with that iconic butterbeer flavor that fans adore


