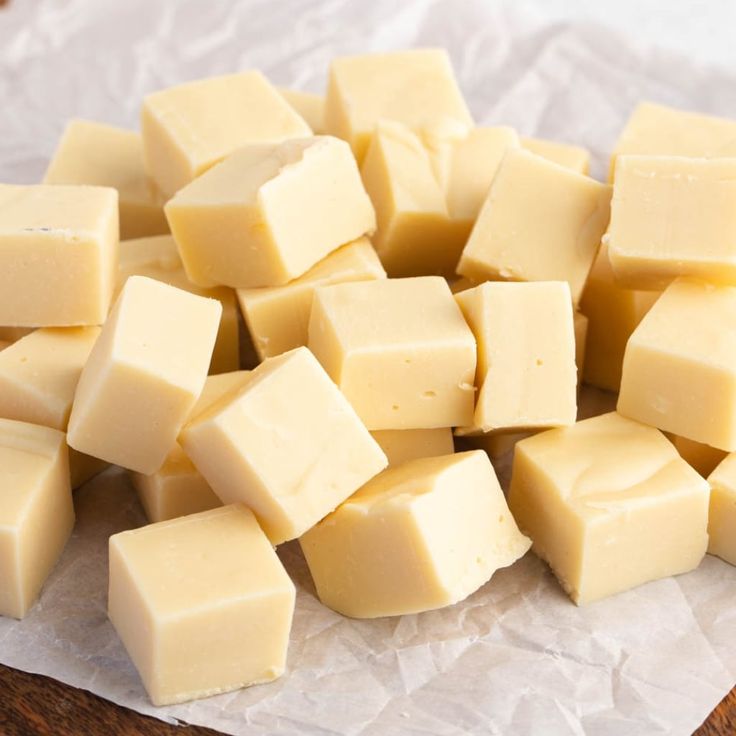

Introduction
Are you ready to create something truly magical in your kitchen? Today, we’re diving into the wonderful world of homemade white chocolate! This isn’t just any white chocolate; it’s a creamy, dreamy, melt-in-your-mouth delight that tastes infinitely better than anything you’ll buy at the store. Its rich cocoa butter flavor and smooth texture make it a special treat for any occasion.
You might think making chocolate at home sounds complicated, but I promise you, it’s surprisingly easy and quick! With just a few simple ingredients and a little bit of patience, you’ll have a batch of gorgeous white chocolate ready in no time. Forget about tempering nightmares; we’re keeping things beginner-friendly and utterly delicious.
So, clear your counter, gather your ingredients, and get ready to impress yourself and everyone you share it with. This recipe is a game-changer for dessert lovers and a fantastic way to customize your sweet treats. Let’s make some homemade white chocolate!
Cooking Time & Prep Time
- Prep Time: 15 minutes
- Cooking Time: 5 minutes (active melting)
- Total Time: 20 minutes
Small tip: Having all your ingredients measured and ready before you start melting will make the process incredibly smooth and stress-free.
Ingredients
This recipe makes approximately 10 small servings or 2 medium white chocolate bars.
For the White Chocolate Base:
- 1 cup (about 200g) food-grade cocoa butter, chopped or in wafers
- 1/2 cup (about 60g) powdered sugar (confectioners’ sugar), sifted
- 1/2 cup (about 60g) whole milk powder, sifted
- 1 teaspoon pure vanilla extract
- Pinch of fine sea salt
Optional (for a smoother texture):
- 1/2 teaspoon soy or sunflower lecithin granules (food grade)
Step-by-Step Instructions
Step 1: Prepare Your Workspace and Molds
Start by getting everything organized. Line a small baking sheet with parchment paper or silicone mat, or have your chocolate molds ready. Make sure they are clean and completely dry. This preparation ensures a smooth process once the chocolate is melted.
Small tip: Silicone molds are fantastic for easy unmolding. If using a baking sheet, consider a shallow dish with parchment for a thicker bar.
Step 2: Gently Melt the Cocoa Butter
Set up a double boiler. Fill a saucepan with about an inch or two of water and bring it to a gentle simmer. Place a heatproof bowl over the saucepan, ensuring the bottom of the bowl does not touch the water. Add the chopped cocoa butter to the bowl. Stir occasionally until the cocoa butter is completely melted and clear.
Small tip: Keep the heat low to medium-low. You want a gentle melt, not a rapid boil, to prevent scorching the cocoa butter.
Step 3: Sift and Combine Dry Ingredients
While the cocoa butter melts, in a separate medium-sized bowl, sift together the powdered sugar, whole milk powder, and a pinch of salt. Sifting is crucial here to prevent any lumps in your finished white chocolate. Whisk them together thoroughly so they are evenly distributed.
Small tip: Don’t skip the sifting! Lumps of sugar or milk powder will create an unpleasant grainy texture in your smooth chocolate.
Step 4: Gradually Incorporate Dry into Wet
Once the cocoa butter is fully melted, remove the bowl from the heat (or keep it over the very low simmering water if you need to maintain warmth). Slowly add the sifted dry ingredients to the melted cocoa butter, about a tablespoon at a time. Whisk continuously and gently after each addition until fully combined and smooth. This gradual addition helps prevent clumping.
Small tip: Patience is key here. Adding the dry ingredients too quickly can make the mixture seize or become clumpy.
Step 5: Add Vanilla and Lecithin (if using)
Stir in the vanilla extract until it is fully incorporated into the mixture. If you are using lecithin, add it now and stir well until it dissolves and the mixture is noticeably smoother. Lecithin acts as an emulsifier, helping to create a silkier texture and preventing separation.
Small tip: Lecithin is optional but highly recommended for a truly professional, smooth white chocolate texture.
Step 6: Pour into Molds
Carefully pour the warm white chocolate mixture into your prepared molds or onto the parchment-lined baking sheet. If using a baking sheet, spread it evenly with an offset spatula to your desired thickness. Gently tap the molds or baking sheet on the counter a few times to release any air bubbles.
Small tip: Work relatively quickly but carefully, as the white chocolate will start to set as it cools.
Step 7: Chill to Set
Transfer the molds or baking sheet to the refrigerator. Chill for at least 30-60 minutes, or until the white chocolate is completely firm and solid. You can also place it in the freezer for about 15-20 minutes for a quicker set, but keep a close eye on it.
Small tip: Ensure the chocolate is fully set before attempting to unmold it; otherwise, it might break.
Step 8: Unmold and Enjoy
Once the white chocolate is firm, carefully remove it from the molds. If you used a baking sheet, break or cut it into pieces. Your beautiful homemade white chocolate is now ready to be enjoyed! Store any leftovers properly.
Small tip: If using silicone molds, gently peel the mold away from the chocolate rather than forcing the chocolate out.
Tips & Variations
- Gluten-Free Option: This homemade white chocolate recipe is naturally gluten-free! All the core ingredients (cocoa butter, powdered sugar, milk powder, vanilla, salt) are typically gluten-free. Just ensure any optional additions like flavorings or inclusions are also certified gluten-free.
- Vegan Option: To make this white chocolate vegan, simply substitute the whole milk powder with an equal amount of plant-based milk powder, such as oat milk powder, rice milk powder, or soy milk powder. Ensure your cocoa butter is pure and not blended with dairy.
- Add More Healthy Fats or Fiber: Boost the nutrition by stirring in finely chopped nuts like pistachios or almonds, or seeds such as chia or hemp seeds, just before pouring into molds. You can also swirl in some dried cranberries or goji berries for an extra fiber and antioxidant kick.
- Spicy Version: For a surprising kick, add a tiny pinch (1/8 to 1/4 teaspoon) of cayenne pepper or a small amount of finely ground chili flakes to the melted chocolate mixture along with the vanilla extract. It creates a delightful sweet-and-spicy contrast.
- Flavor & Color Fun: Get creative with flavors! Add a few drops of food-grade essential oils like peppermint or orange, or try different extracts such as almond or coffee. You can also add natural food colorings to make vibrant, colorful white chocolate pieces for special occasions.
Nutritional Information
Approximate values per serving (based on 10 servings):
- Calories: 220 kcal
- Protein: 2g
- Carbohydrates: 15g
- Fat: 18g
Note: These values are approximate and can vary depending on the specific brands and exact amounts of ingredients used.
Health Benefits
Homemade white chocolate, especially when made with quality ingredients, offers some surprising benefits. It’s not just a delicious treat; it can contribute positively in small ways.
The star ingredient, cocoa butter, is rich in healthy fats. These include oleic acid, a monounsaturated fat also found in olive oil, and stearic acid, a saturated fat that research suggests has a neutral effect on cholesterol levels. These fats are essential for overall health and can contribute to satiety.
Cocoa butter also contains antioxidants, primarily polyphenols. While not as concentrated as in dark chocolate, these compounds help combat free radicals in the body. Antioxidants are crucial for cellular health and can contribute to reducing oxidative stress.
Beyond internal benefits, cocoa butter is renowned for its skin-nourishing properties. It’s a common ingredient in moisturizers and lotions due to its ability to hydrate and improve skin elasticity. Consuming it as part of white chocolate can contribute to a healthy glow from within.
Finally, the milk powder in the recipe provides a source of calcium and a small amount of protein. Calcium is vital for strong bones and teeth, while protein is essential for muscle repair and growth. Enjoying this treat in moderation can be part of a balanced diet.
Serving Suggestions
- As a Sweet Treat: Enjoy small pieces on their own with a cup of coffee or tea.
- Dessert Topping: Shave or melt your homemade white chocolate to drizzle over fresh berries, ice cream, cakes, or brownies.
- Baking Ingredient: Chop it up and use it in cookies, muffins, or as a delicious addition to trail mix.
- Main or Side Dish: While white chocolate isn’t a main or side dish, it makes a fantastic dessert centerpiece. Arrange it on a platter with fresh fruit for a beautiful presentation.
- Meal Prep Ideas: Make a larger batch and store it in an airtight container. It’s perfect for quick, portion-controlled sweet cravings throughout the week.
Storage Tips
Store your homemade white chocolate in an airtight container at cool room temperature for up to 1 week, or in the refrigerator for up to 2-3 weeks. If you want to keep it longer, it can be frozen for up to 3 months. Wrap it tightly in plastic wrap before placing it in a freezer-safe bag or container. To reheat for melting purposes (like for a dip or drizzle), gently melt it in a double boiler or in the microwave in short bursts, stirring frequently, until smooth.
Conclusion
And there you have it – your very own batch of luscious, homemade white chocolate! Isn’t it incredible how simple ingredients can transform into such a delightful confection? This recipe proves that you don’t need fancy equipment or expert skills to create something truly special and delicious in your own kitchen. The rich flavor and smooth texture are far superior to anything store-bought.
I genuinely hope you take the leap and try making this recipe. The process is so rewarding, and the taste is absolutely worth every minute. Plus, knowing exactly what goes into your treats makes them even more enjoyable. You’ll be amazed at how easy it is to achieve such a luxurious result.
So go ahead, whip up a batch (or two!), share it with your family and friends, or simply savor it


