
Introduction
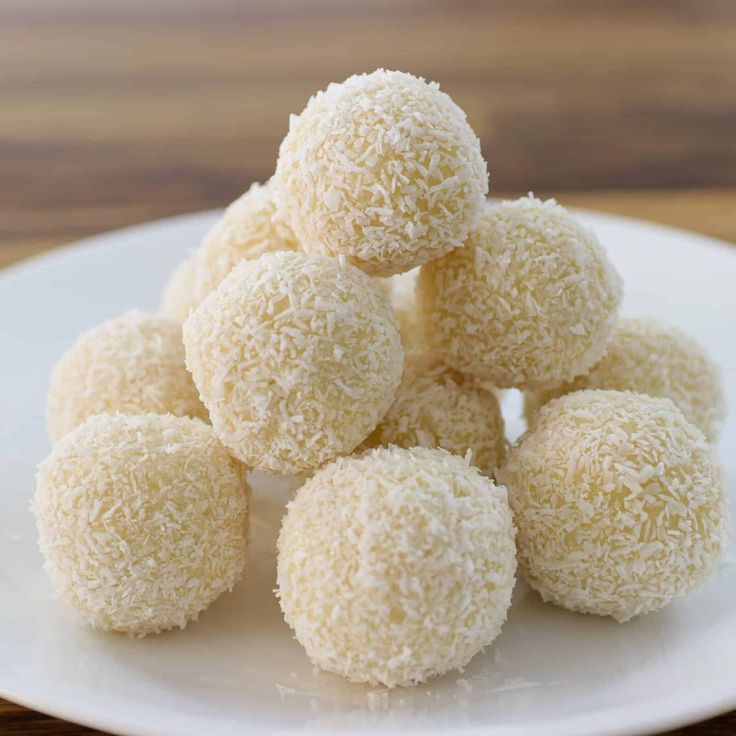
Get ready to discover a truly magical treat that will melt in your mouth and charm your taste buds! Our No Bake White Chocolate Truffles are little bites of heaven. They are incredibly creamy, wonderfully sweet, and have that luxurious feel that makes any occasion special. Imagine a smooth, rich white chocolate center, often coated in something delightful like cocoa powder or sprinkles. They are simply irresistible!
The best part? You don’t need to turn on your oven for these beauties. This recipe is designed for ease and speed, using simple ingredients you can find at any grocery store. With just a few steps, you’ll create elegant, delicious truffles that look like they came from a fancy chocolatier. They are perfect for last-minute gifts, holiday platters, or just a sweet treat for yourself.
So, why wait? Join us in the kitchen, or rather, the no-bake zone, and let’s whip up a batch of these glorious white chocolate truffles. They’re fun to make, even more fun to eat, and guaranteed to bring smiles all around. You’ll be amazed at how simple it is to create such a decadent dessert!
Cooking Time & Prep Time
- Prep Time: 25 minutes
- Chill Time: 60 minutes (minimum)
- Total Time: 1 hour 25 minutes
Small tip: The chilling time is super important! Don’t rush it, as a well-chilled mixture is much easier to roll into perfect truffles.
Ingredients
This recipe makes approximately 20 delicious truffles.
For the Truffle Mixture:
- 12 oz (340g) good quality white chocolate, finely chopped or in chips
- 4 oz (113g) full-fat cream cheese, softened
- 1 teaspoon pure vanilla extract
- Pinch of salt
For the Coatings:
- 1/2 cup powdered sugar
- 1/4 cup unsweetened cocoa powder
- 1/4 cup colorful sprinkles
- 1/4 cup finely chopped toasted nuts (like almonds or pistachios)
- Optional: Melted dark chocolate for drizzling
Step-by-Step Instructions
-
Step 1: Melt the White Chocolate
Place the finely chopped white chocolate or white chocolate chips into a heatproof bowl. You can melt it over a double boiler (a bowl set over a pot of simmering water, not touching the water) or in the microwave. If using the microwave, heat in 30-second intervals, stirring well after each, until smooth and fully melted. Be careful not to overheat white chocolate, as it can seize.
Small tip: White chocolate can be delicate. Low and slow melting is key to a smooth, lump-free mixture.
-
Step 2: Combine with Cream Cheese and Flavoring
In a separate medium bowl, beat the softened cream cheese with the vanilla extract and a pinch of salt until it’s light and fluffy. Slowly add the melted white chocolate to the cream cheese mixture, mixing until it’s completely smooth and well combined. Make sure there are no lumps.
Small tip: Ensure your cream cheese is truly softened to room temperature for the smoothest mixture. This prevents lumps.
-
Step 3: Chill the Truffle Mixture
Cover the bowl with plastic wrap and refrigerate the mixture for at least 1 hour, or until it’s firm enough to roll. This step is crucial for the truffles to hold their shape. You can even chill it for a couple of hours or overnight.
Small tip: If the mixture feels too sticky to roll, pop it back into the fridge for another 15-30 minutes. Patience here pays off!
-
Step 4: Roll the Truffles
Once the mixture is firm, use a small cookie scoop or a spoon to portion out about 1-tablespoon sized amounts. Roll each portion between your palms to form smooth, round balls. Try to make them as even in size as possible for a professional look.
Small tip: If your hands get too warm and the mixture becomes sticky, rinse them with cold water and dry them completely before continuing.
-
Step 5: Coat and Decorate
Place your chosen coatings (powdered sugar, cocoa powder, sprinkles, chopped nuts) into separate shallow dishes. Roll each truffle in your desired coating until it’s fully covered. You can make a variety for a beautiful presentation!
Small tip: For a quick and even coating, drop a few truffles into a dish of coating, then gently shake the dish to coat them.
-
Step 6: Final Chill and Serve
Arrange the coated truffles on a parchment-lined baking sheet or plate. Refrigerate them for another 15-30 minutes to allow the coatings to set and the truffles to firm up completely. Once chilled, they are ready to serve and enjoy!
Small tip: For the best texture and flavor, serve truffles slightly chilled, but not rock hard directly from the fridge.
Tips & Variations
- Gluten-Free Option: This recipe is naturally gluten-free! Just ensure all your ingredients, especially sprinkles, are certified gluten-free if cross-contamination is a concern.
- Vegan Option: To make these truffles vegan, use a high-quality vegan white chocolate and a plant-based cream cheese alternative (like almond or cashew-based cream cheese). The taste will be slightly different but still delicious.
- Fiber & Protein Boost: For a healthier twist, finely grind a tablespoon or two of flax seeds or chia seeds and mix them into the truffle base along with the vanilla. You can also roll the truffles in finely ground nuts or seeds for extra protein and healthy fats.
- Spicy Kick: For a surprising warmth, add a tiny pinch of cayenne pepper or chili powder to the cocoa powder coating. It creates a lovely sweet-and-spicy contrast!
- Flavor Fun: Experiment with different extracts! A few drops of almond extract, peppermint extract, orange zest, or even a teaspoon of espresso powder can transform the flavor profile. You can also add food coloring to the white chocolate mixture for festive colors.
Nutritional Information
Approximate values per serving (based on 20 servings):
- Calories: 180 kcal
- Protein: 2g
- Carbohydrates: 18g
- Fat: 12g
Note: Values may vary depending on specific brands and exact amounts of ingredients used, especially coatings.
Health Benefits
While these are a sweet treat, some of the main ingredients do offer nutritional benefits when consumed in moderation.
White chocolate, though often seen as less nutritious than dark chocolate, still contains cocoa butter. Cocoa butter is a source of antioxidants, which help protect your body’s cells from damage. It also provides some healthy fats that can contribute to satiety.
Cream cheese, a dairy product, is a good source of calcium. Calcium is essential for strong bones and teeth, nerve function, and muscle contraction. It also provides some protein, which is vital for building and repairing tissues.
Vanilla extract, derived from vanilla beans, contains small amounts of antioxidants. These compounds can help reduce inflammation and provide protective effects in the body. Plus, its delightful aroma can have a calming effect!
If you choose to incorporate nuts into your truffles, you’re adding a boost of healthy fats, fiber, and protein. Nuts like almonds or pistachios are packed with vitamins and minerals like Vitamin E, magnesium, and potassium, contributing to heart health and overall well-being.
Serving Suggestions
- Elegant Dessert Platter: Arrange these truffles on a beautiful platter alongside fresh berries, small cookies, or other mini desserts for a stunning presentation at parties or gatherings.
- Coffee or Tea Companion: Enjoy a truffle or two with your afternoon coffee, espresso, or a warm cup of herbal tea. The sweetness pairs wonderfully with a hot beverage.
- Thoughtful Homemade Gift: Package these truffles in a decorative box or bag with a ribbon. They make a fantastic homemade gift for friends, family, or teachers during the holidays or special occasions.
- Sweet Snack: Keep a batch in the fridge for a delightful pick-me-up whenever you need a little sweet indulgence.
Storage Tips
Store your No Bake White Chocolate Truffles in an airtight container in the refrigerator for up to 1 week. If you’ve made a big batch, these truffles freeze beautifully! Place them in a single layer on a parchment-lined tray until solid, then transfer them to a freezer-safe bag or container for up to 1 month. To enjoy after freezing, simply thaw them in the refrigerator overnight or on the counter for about 30 minutes until they reach your desired creamy texture. There’s no need to reheat them; they are best served chilled or at room temperature.
Conclusion
There you have it – a truly simple yet incredibly elegant recipe for No Bake White Chocolate Truffles! These little spheres of joy are proof that you don’t need complicated techniques or fancy equipment to create something truly special. Their rich, creamy texture and sweet white chocolate flavor are sure to impress everyone who tries them.
Whether you’re new to baking (or no-baking!) or a seasoned pro, this recipe is a delightful adventure. It’s quick, it’s fun, and the results are absolutely delicious. Imagine the smiles when you present a plate of these homemade delights, knowing how easily they came together.
So, go ahead, gather your ingredients, and treat yourself and your loved ones to these wonderful truffles. They’re perfect for sharing, celebrating, or simply enjoying a moment of pure, sweet bliss. Happy no-baking!


