
Introduction
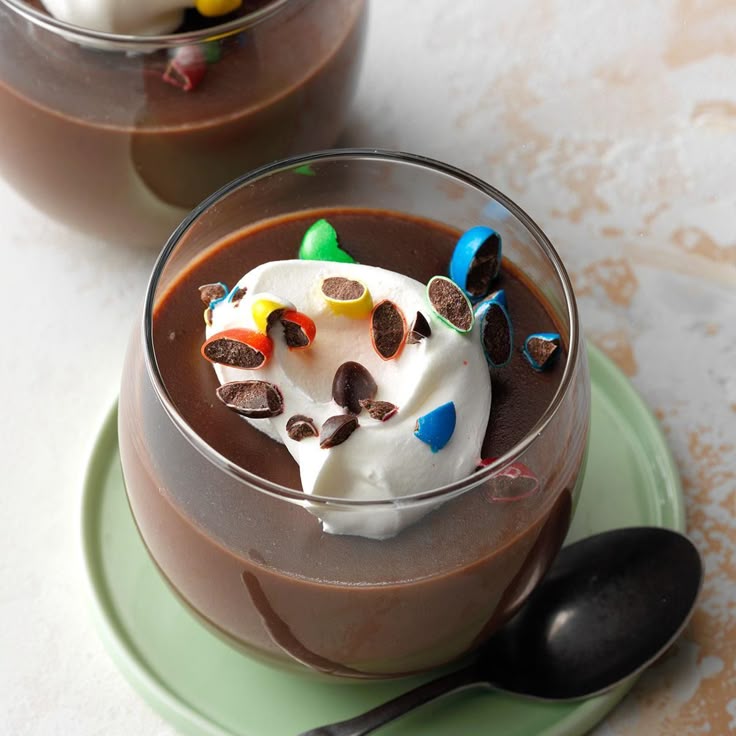
There’s something truly magical about a bowl of homemade chocolate pudding. It’s a classic dessert that brings a wave of comfort with every creamy, rich spoonful. Imagine a dessert so smooth and deeply chocolatey, it melts in your mouth, leaving behind a delightful sweetness. This isn’t just any chocolate pudding; it’s the kind that tastes like a warm hug, perfect for any day of the week.
You might think making pudding from scratch is complicated, but it’s surprisingly simple and quick! Forget those instant mixes. With just a few basic pantry ingredients and about 10 minutes of active cooking on your stovetop, you can create a dessert that tastes gourmet. It comes together effortlessly, making it an ideal treat when you crave something special but are short on time. The hardest part is waiting for it to chill!
So, are you ready to transform simple ingredients into an extraordinary dessert? This recipe will guide you through every step, ensuring a perfect, velvety chocolate pudding every time. Gather your ingredients, put on your apron, and let’s make some delicious memories together. Your taste buds will thank you, and your family will be asking for seconds!
Cooking Time & Prep Time
- Prep Time: 15 minutes
- Cooking Time: 10 minutes
- Chilling Time: 2-4 hours
- Total Time: Approximately 25 minutes (plus chilling)
Small tip: The chilling time is essential for the pudding to set properly and develop its full, rich flavor. Don’t rush this step for the best results!
Ingredients
This recipe makes 4 generous servings.
- For the Chocolate Pudding:
- 3 cups (720ml) whole milk (or 2% milk)
- 1/2 cup (100g) granulated sugar
- 1/4 cup (25g) unsweetened cocoa powder
- 1/4 cup (30g) cornstarch
- 1/4 teaspoon salt
- 2 tablespoons (28g) unsalted butter, cut into small pieces
- 1 teaspoon pure vanilla extract
- Optional Garnishes:
- Whipped cream
- Chocolate shavings or mini chocolate chips
- Fresh berries (strawberries, raspberries)
Step-by-Step Instructions
-
Step 1: Prepare the Dry Ingredients
In a medium-sized heavy-bottomed saucepan, combine the granulated sugar, unsweetened cocoa powder, cornstarch, and salt. Whisk these dry ingredients together thoroughly. Make sure there are no lumps of cocoa powder or cornstarch. This step ensures a smooth pudding texture later on.
Small tip: Whisking dry ingredients well prevents clumps and ensures even distribution of flavor and thickening agents.
-
Step 2: Gradually Add Milk
Slowly pour about 1/2 cup of the milk into the dry mixture, whisking continuously. Create a smooth paste first. Once smooth, gradually add the remaining milk, whisking constantly until the mixture is completely combined and smooth. This method helps to avoid lumps when the full amount of liquid is added.
Small tip: Adding milk slowly at the beginning helps to dissolve the cornstarch and cocoa without forming lumps.
-
Step 3: Cook the Pudding Base
Place the saucepan over medium heat. Cook the mixture, whisking constantly, especially scraping the bottom and sides of the pan. Continue to cook until the mixture thickens significantly. This usually takes about 5-8 minutes after it starts to simmer. It should be thick enough to coat the back of a spoon.
Small tip: Constant whisking is key here to prevent burning on the bottom and to ensure even thickening. Don’t stop stirring!
-
Step 4: Remove from Heat and Add Flavor
Once the pudding has reached your desired thickness, remove the saucepan from the heat immediately. Stir in the unsalted butter and pure vanilla extract. Keep stirring until the butter has completely melted and is fully incorporated into the pudding, making it extra smooth and glossy.
Small tip: Adding butter and vanilla off the heat preserves their delicate flavors and prevents the butter from separating.
-
Step 5: Strain for Extra Smoothness (Optional)
For an exceptionally smooth pudding, pour the hot mixture through a fine-mesh sieve into a clean bowl. This step catches any small lumps that might have formed despite your best whisking efforts. It’s optional but highly recommended for a truly silky texture.
Small tip: If you want restaurant-quality smoothness, don’t skip the straining step. It makes a noticeable difference!
-
Step 6: Chill the Pudding
Cover the surface of the pudding directly with plastic wrap. This prevents a skin from forming on top as it cools. Place the bowl in the refrigerator and chill for at least 2-4 hours, or until thoroughly set and cold. The longer it chills, the firmer it will become.
Small tip: Pressing the plastic wrap directly onto the pudding’s surface is crucial for preventing a rubbery skin from forming.
-
Step 7: Serve and Enjoy
Once chilled, remove the plastic wrap. Give the pudding a quick stir with a spoon to loosen it slightly if desired. Spoon the chocolate pudding into individual serving dishes. Garnish with whipped cream, chocolate shavings, or fresh berries, and serve immediately. Enjoy your homemade delight!
Small tip: A light stir before serving can restore its creamy texture if it has set very firmly.
Tips & Variations
- Gluten-Free Option: This recipe is naturally gluten-free as it uses cornstarch, not flour, as a thickener. Always double-check your cocoa powder and other ingredients to ensure they are certified gluten-free if needed for severe allergies.
- Vegan/Vegetarian Option: To make this pudding vegan, simply substitute the whole milk with a plant-based milk like almond milk, soy milk, or oat milk. Use a vegan butter alternative in place of regular butter. The cooking process remains the same.
- Protein Boost: While not traditional, you can stir in a scoop of unflavored or chocolate-flavored collagen powder or a small amount of your favorite protein powder (ensure it mixes well) with the dry ingredients. Alternatively, top your pudding with a sprinkle of chopped nuts like almonds or walnuts for added protein and healthy fats.
- Spicy Chocolate Pudding: For a delightful kick, add a tiny pinch (1/8 to 1/4 teaspoon) of cayenne pepper or chili powder along with the cocoa powder and sugar. This creates a “Mexican hot chocolate” flavor profile that is surprisingly delicious.
- Flavor Enhancements:
- Espresso: Add 1/2 teaspoon of instant espresso powder with the dry ingredients to deepen the chocolate flavor.
- Orange Zest: Stir in 1/2 teaspoon of fresh orange zest with the vanilla for a bright, citrusy note.
- Mint: Replace half of the vanilla extract with 1/2 teaspoon of mint extract for a refreshing mint chocolate pudding.
- Darker Chocolate: For a richer, less sweet pudding, increase the cocoa powder by 1-2 tablespoons and slightly reduce the sugar by 1-2 tablespoons.
Nutritional Information
Approximate values per serving (based on 4 servings, using whole milk and butter):
- Calories: 320 kcal
- Protein: 9g
- Carbohydrates: 48g
- Fat: 12g
Please note that these values are approximate and can vary depending on the specific brands and types of ingredients used (e.g., skim milk vs. whole milk, different sugar amounts).
Health Benefits
Even though it’s a delightful dessert, homemade chocolate pudding can offer some surprising benefits thanks to its core ingredients. It’s all about enjoying in moderation!
Cocoa Powder: The star of our pudding, unsweetened cocoa powder, is rich in antioxidants called flavanols. These compounds are known to help protect your cells from damage, reduce inflammation, and may even improve heart health. Flavanols can also enhance blood flow to the brain, potentially boosting cognitive function and mood. A little chocolate can indeed make you feel good!
Milk: Milk is a powerhouse of nutrients. It provides essential calcium, which is vital for strong bones and teeth. It’s also a good source of Vitamin D, which works with calcium to support bone health, and potassium, important for blood pressure regulation. Furthermore, milk offers high-quality protein, which is essential for muscle repair and growth, keeping you feeling satisfied.
Energy Boost: The combination of carbohydrates from sugar and milk provides a quick source of energy. This can be a nice pick-me-up, especially after a long day or as a delightful end to a meal. The natural sugars from milk (lactose) and added sugar contribute to this energy supply.
Comfort and Mood: Beyond the physical nutrients, there’s a significant psychological benefit to enjoying a comforting dessert like chocolate pudding. The act of making and savoring a homemade treat can reduce stress and boost your mood. Food isn’t just fuel; it’s also an experience that can bring joy and satisfaction.
Serving Suggestions
- Classic Toppings: Serve your chilled pudding with a generous dollop of freshly whipped cream and a sprinkle of chocolate shavings or mini chocolate chips.
- Fruity Freshness: Add a burst of color and tartness with fresh berries like sliced strawberries, raspberries, or blueberries. They beautifully complement the richness of the chocolate.
- Crunchy Texture: For a delightful contrast in texture, top with crushed cookies (like Oreos or graham crackers), chopped toasted nuts (pecans or walnuts), or even a sprinkle of granola.
- As a Dessert: This chocolate pudding is a perfect standalone dessert for any occasion, from a casual weeknight treat to a special dinner party finale. It’s usually not considered a main or side dish.
- Meal Prep Ideas: Prepare a batch of pudding and portion it into small, individual jars or ramekins. Cover them tightly and store in the fridge for easy grab-and-go desserts throughout the week.
Storage Tips
Your homemade chocolate pudding will keep wonderfully in the refrigerator for 3-4 days. Always make sure it’s covered tightly with plastic wrap pressed directly onto the surface to prevent a skin from forming and to keep it fresh. Freezing is generally not recommended for this type of pudding, as the texture can become grainy and watery upon thawing due to the cornstarch. If you wish to reheat it, gently warm it in a saucepan over low heat, stirring constantly, adding a splash of milk if it seems too thick. However, it’s truly best served cold.
Conclusion
And there you have it – a truly classic, utterly delicious homemade chocolate pudding recipe! It’s incredible how a few simple ingredients can come together to create such a smooth, rich, and deeply satisfying dessert. This pudding isn’t just food; it’s a delightful experience, bringing back nostalgic memories and creating new ones with every spoonful. It proves that the best things in life, and in the kitchen, are often the simplest.
Now that you have all the steps and tips, there’s nothing stopping you from whipping up this fantastic treat. Don’t be intimidated; the process is straightforward, and the reward is immense. You’ll be amazed at how easy it is to achieve that perfect velvety texture and intense chocolate


