
Introduction
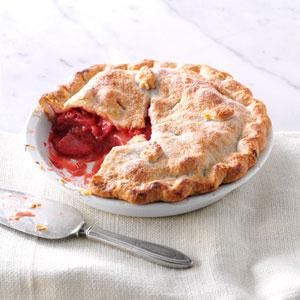
There’s nothing quite like a slice of homemade Strawberry Pie to brighten your day! This classic dessert captures the very essence of summer in every bite. Imagine plump, juicy strawberries nestled in a sweet, vibrant glaze, all tucked into a perfectly flaky pie crust. It’s a true celebration of fresh flavors, bursting with natural sweetness and a hint of tang.
You might think making a pie from scratch is a big undertaking, but this Strawberry Pie recipe is surprisingly simple and quick. We’re talking minimal cooking, mostly just assembly, and letting the fresh ingredients shine. With a pre-baked crust, you’ll be amazed at how fast this beautiful dessert comes together. It’s a fantastic recipe for beginners and seasoned bakers alike, promising delicious results without a lot of fuss.
So, get ready to experience the joy of baking and tasting this irresistible treat. Whether it’s for a family gathering, a special occasion, or just a sweet craving, this Strawberry Pie is sure to impress. Give it a try, and let the delightful flavors transport you to a sunny strawberry patch!
Cooking Time & Prep Time
- Prep Time: 35 minutes
- Cooking Time: 15 minutes (for glaze setting)
- Total Time: 50 minutes
Small tip: To save even more time, you can prepare the pie crust a day in advance or use a good quality store-bought pre-baked crust.
Ingredients
This recipe makes 8 generous servings.
- For the Pie Crust:
- 1 (9-inch) pre-baked pie crust (store-bought or homemade)
- For the Strawberry Filling:
- 6 cups fresh strawberries, hulled and halved (or quartered if very large)
- For the Glaze:
- 1 cup granulated sugar
- 1/4 cup cornstarch
- 1 cup cold water
- 1/2 cup mashed strawberries (about 4-5 medium berries)
- 1 tablespoon fresh lemon juice
- 1/2 teaspoon vanilla extract
Step-by-Step Instructions
Step 1: Prepare the Pie Crust
First, ensure your pie crust is fully baked and cooled. If you’re using a store-bought crust, follow the package directions for pre-baking. If making your own, blind bake it until golden brown and let it cool completely on a wire rack. A cool crust is essential for a crisp base.
Small tip: A completely cool crust prevents the bottom from getting soggy when the filling is added.
Step 2: Prepare the Fresh Strawberries
Wash all 6 cups of fresh strawberries thoroughly under cold water. Gently pat them dry with a paper towel. Hull each strawberry by removing the green leafy top and the small white core. Halve or quarter the larger strawberries so they are all roughly similar in size. Set them aside in a large bowl.
Step 3: Make the Glaze Base
In a medium saucepan, combine the granulated sugar and cornstarch. Whisk them together until there are no lumps. Gradually pour in the cold water, whisking constantly to create a smooth mixture. Add the 1/2 cup of mashed strawberries to the saucepan. This will give your glaze a beautiful natural color and extra strawberry flavor.
Step 4: Cook the Glaze
Place the saucepan over medium heat. Bring the mixture to a gentle boil, stirring continuously with a whisk or spoon. Continue to cook and stir for about 1-2 minutes after it starts boiling, until the glaze thickens and becomes clear. It should be thick enough to coat the back of a spoon.
Small tip: Stirring constantly is key to prevent the cornstarch from clumping and sticking to the bottom of the pan.
Step 5: Finish the Glaze
Remove the saucepan from the heat. Stir in the fresh lemon juice and vanilla extract. The lemon juice brightens the flavor and adds a lovely tartness that balances the sweetness. The vanilla adds a warm, comforting note to the glaze. Let the glaze cool slightly for about 5-10 minutes.
Step 6: Combine Berries and Glaze
Pour the slightly cooled glaze over the prepared fresh strawberries in the large bowl. Gently fold the strawberries into the glaze using a rubber spatula. Be careful not to mash the berries; you want them to remain mostly intact. Ensure all the berries are evenly coated with the glossy glaze.
Small tip: Work quickly but gently here. You want the glaze to still be pourable but not scalding hot, and you want to avoid bruising the delicate strawberries.
Step 7: Fill the Pie
Carefully spoon the strawberry and glaze mixture into your cooled, pre-baked pie crust. Arrange the strawberries nicely, creating a lovely mound in the center. You can pile them high for a truly impressive presentation. Ensure the glaze fills any gaps between the berries.
Step 8: Chill and Serve
Place the filled pie in the refrigerator. Chill for at least 3-4 hours, or until the glaze is completely set and firm. This chilling time is crucial for the pie to hold its shape when sliced. Once set, your Strawberry Pie is ready to be enjoyed!
Tips & Variations
- Gluten-Free Option: Easily make this pie gluten-free by using a certified gluten-free pre-baked pie crust. The filling itself is naturally gluten-free.
- Vegan/Vegetarian Option: This recipe is already naturally vegan and vegetarian! Just ensure your pie crust is made without animal products (e.g., butter or lard). Many store-bought crusts are suitable.
- More Fruit or Fiber: For extra fiber, sprinkle a thin layer of finely crushed whole-grain oats or graham cracker crumbs on the bottom of the cooled pie crust before adding the filling. You can also mix in a cup of raspberries or blueberries with the strawberries for a mixed berry pie.
- A Hint of Spice: For an unexpected twist, add a tiny pinch (about 1/8 teaspoon) of freshly ground black pepper or a dash of cardamom to the glaze while it’s cooking. It adds a subtle warmth and complexity that complements the strawberries beautifully.
- Flavor Boost: Enhance the glaze with a teaspoon of orange zest for a brighter, citrusy note. Alternatively, a tiny splash of balsamic vinegar (about 1/2 teaspoon) stirred into the finished glaze can deepen the strawberry flavor, making it incredibly rich and complex.
Nutritional Information
Approximate values per serving (based on 8 servings):
- Calories: 385 kcal
- Protein: 3 g
- Carbohydrates: 65 g
- Fat: 15 g
Please note: These values are approximate and may vary depending on the specific ingredients and brands used for the pie crust and other components.
Health Benefits
This Strawberry Pie, while a delightful dessert, also packs some wonderful health benefits thanks to its star ingredient: fresh strawberries!
- Rich in Vitamin C: Strawberries are an excellent source of Vitamin C, a powerful antioxidant that supports your immune system, helps with collagen production for healthy skin, and protects your cells from damage.
- Antioxidant Powerhouse: Beyond Vitamin C, strawberries contain a variety of other antioxidants like anthocyanins (which give them their red color) and ellagic acid. These compounds help fight inflammation and may reduce the risk of chronic diseases.
- Good Source of Fiber: Strawberries provide dietary fiber, which is crucial for digestive health. Fiber helps keep you feeling full, aids in bowel regularity, and can contribute to healthy blood sugar levels.
- Minerals for Well-being: These delicious berries also offer essential minerals such as manganese, which is important for bone health and metabolism, and potassium, which supports blood pressure regulation.
Serving Suggestions
- Classic Toppings: Serve slices of Strawberry Pie with a generous dollop of freshly whipped cream. A scoop of premium vanilla bean ice cream is also an incredible pairing, allowing it to melt slightly into the pie.
- Garnish with Freshness: A sprig of fresh mint or a few extra whole strawberries on the side of each plate adds a touch of elegance and freshness.
- Dessert Centerpiece: This pie makes a stunning dessert for any occasion, from casual summer barbecues to more formal holiday meals. It’s too grand to be a side dish, truly shining as the star of your dessert course.
- Meal Prep Ideas: While best made fresh, you can prepare the glaze a day ahead and store it in the refrigerator. Hull and halve the strawberries just before assembling to ensure maximum freshness.
Storage Tips
Store any leftover Strawberry Pie in an airtight container or covered tightly with plastic wrap in the refrigerator. It will keep well for 3-4 days. Due to the fresh fruit and gelatinous glaze, this pie does not freeze well; the texture of the strawberries can become mushy upon thawing. It is best served chilled, so no reheating is necessary. Simply take it out of the fridge and enjoy!
Conclusion
And there you have it – a truly spectacular Strawberry Pie that’s as delightful to make as it is to eat! This recipe proves that you don’t need complicated techniques or exotic ingredients to create something truly memorable. It’s all about celebrating the simple, fresh flavors of ripe strawberries, encased in a tender, flaky crust and bathed in a sweet, glistening glaze.
This pie is more than just a dessert; it’s a taste of sunshine, a comforting classic, and a guaranteed crowd-pleaser. The ease of preparation means you can whip up this stunning treat without any stress, leaving you more time to savor the moments and the delicious results. It’s perfect for any time you want to add a touch of homemade sweetness to your day.
So, don’t hesitate! Gather your ingredients, follow these simple steps, and create your very own Strawberry Pie. Share it with your family and friends, watch their faces light up with joy, and make some wonderful memories around this beautiful, delicious dessert. Happy baking!


