
Introduction
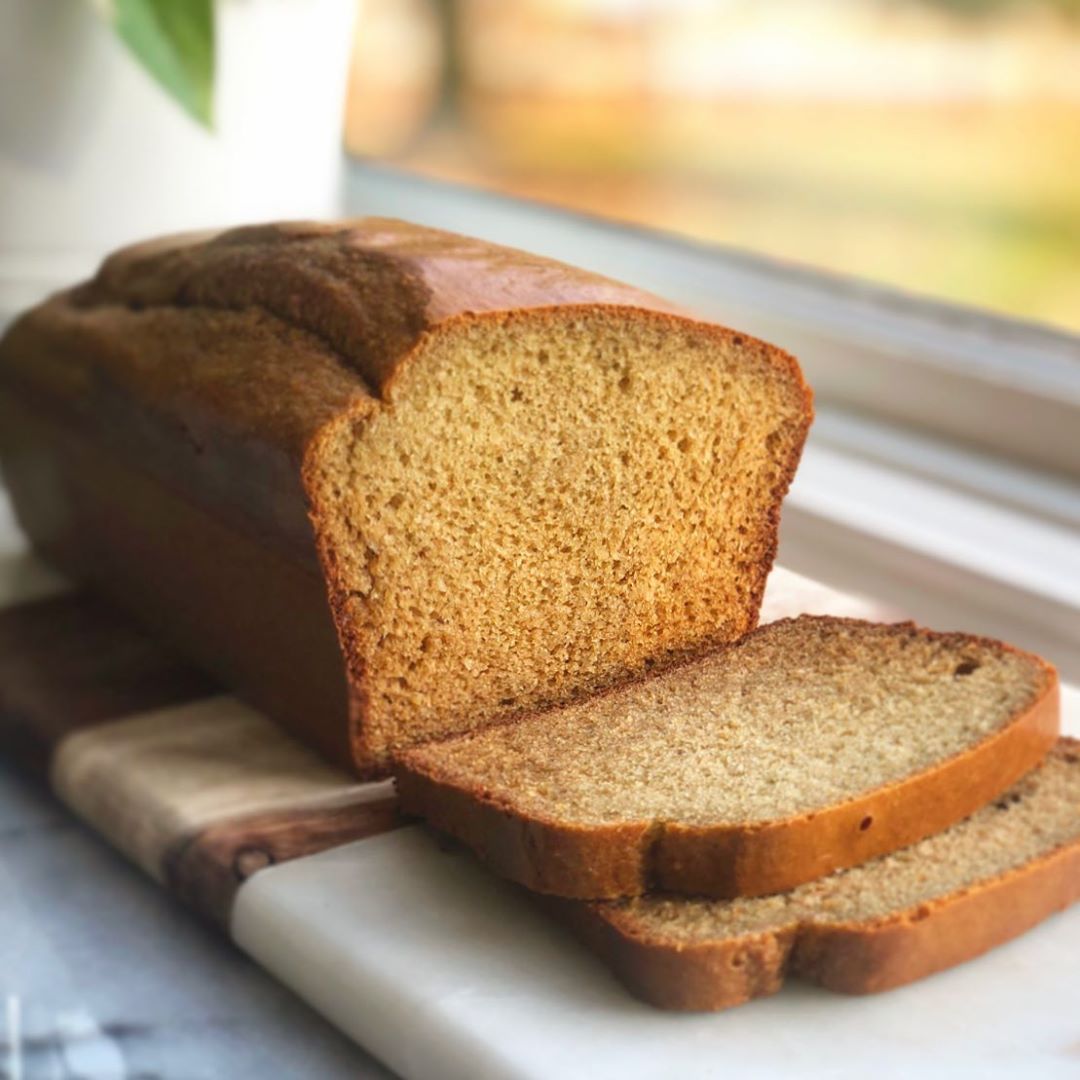
Get ready to bake a game-changer for your kitchen! This Cassava Flour Sandwich Loaf is wonderfully soft, surprisingly tender, and has a subtle, earthy flavor that makes it perfect for any meal. It’s a fantastic gluten-free alternative to traditional wheat bread, but honestly, everyone will love it. Imagine perfectly toasted slices for breakfast or hearty sandwiches for lunch!
You might think baking bread is complicated, but this recipe is designed to be straightforward and forgiving. We’re using simple ingredients and clear steps to ensure you get a beautiful, delicious loaf every time. There’s no complex kneading or tricky techniques involved. Just a bit of mixing, rising, and baking, and your home will be filled with the irresistible aroma of freshly baked bread.
So, whether you’re new to baking, looking for a delicious gluten-free option, or just want to try something new, this Cassava Flour Sandwich Loaf is calling your name. Give it a try, and prepare to impress yourself and your family with this delightful homemade bread. Let’s get baking!
Cooking Time & Prep Time
- Prep Time: 20 minutes
- First Rise: 60 minutes
- Second Rise: 30 minutes
- Cooking Time: 45 minutes
- Total Time: 155 minutes (2 hours 35 minutes)
Small tip: While the dough is rising, you can clean up your kitchen or prepare other ingredients for your meal. This makes the overall process feel much quicker!
Ingredients
This recipe makes one standard 9×5 inch loaf, yielding approximately 12 servings.
- For the Dry Ingredients:
- 2 ½ cups (300g) cassava flour
- 2 tablespoons psyllium husk powder (essential for structure)
- 1 ½ teaspoons active dry yeast
- 1 teaspoon salt
- 2 tablespoons granulated sugar (or maple syrup granules)
- For the Wet Ingredients:
- 1 ¼ cups (300ml) warm water (105-115°F / 40-46°C)
- ¼ cup (60ml) olive oil (or melted coconut oil)
- 1 large egg, room temperature
- 1 tablespoon apple cider vinegar
- For the Topping (Optional):
- 1 tablespoon olive oil or melted butter
- Sesame seeds or poppy seeds
Step-by-Step Instructions
Step 1: Activate the Yeast
In a large mixing bowl, combine the warm water, granulated sugar, and active dry yeast. Stir gently and let it sit for about 5-10 minutes. The mixture should become foamy, showing that your yeast is active and ready to go.
Small tip: Ensure your water is not too hot, as it can kill the yeast. It should feel warm to the touch, like a baby’s bath.
Step 2: Combine Dry Ingredients
While the yeast is activating, in a separate medium bowl, whisk together the cassava flour, psyllium husk powder, and salt. Make sure these dry ingredients are well combined. This helps distribute the psyllium husk evenly for better loaf structure.
Step 3: Mix Wet Ingredients
Once your yeast mixture is foamy, add the olive oil, room temperature egg, and apple cider vinegar to it. Whisk these wet ingredients together until they are fully incorporated. This creates a smooth base for your dough.
Step 4: Form the Dough
Pour the wet ingredient mixture into the bowl with the dry ingredients. Using a sturdy spoon or a stand mixer with a paddle attachment, mix everything together until a thick, sticky dough forms. It will be quite thick, not like traditional wheat dough.
Small tip: Do not overmix. Mix just until combined, about 2-3 minutes. Overmixing can make the final bread dense.
Step 5: First Rise
Cover the bowl with plastic wrap or a clean kitchen towel. Place the bowl in a warm spot in your kitchen for about 60 minutes. The dough should visibly increase in size, becoming light and airy.
Small tip: A warm oven (turned off, with just the light on) or a sunny spot on your counter works perfectly for rising dough.
Step 6: Prepare Loaf Pan
While the dough is rising, grease a 9×5 inch loaf pan thoroughly with butter or cooking spray. You can also line it with parchment paper for easy removal. This prevents the bread from sticking.
Step 7: Shape and Second Rise
Gently transfer the risen dough into the prepared loaf pan. You can wet your hands slightly to help smooth the top. Cover the loaf pan loosely with plastic wrap or a kitchen towel and let it rise again in a warm spot for another 30 minutes. It should puff up nicely.
Step 8: Preheat Oven and Bake
Preheat your oven to 375°F (190°C) during the last 10 minutes of the second rise. If desired, brush the top of the risen loaf with a little olive oil or melted butter and sprinkle with sesame or poppy seeds. Bake for 45 minutes, or until the top is golden brown and the internal temperature reaches 200-210°F (93-99°C).
Small tip: If the top browns too quickly, you can loosely tent the loaf with aluminum foil for the last 10-15 minutes of baking.
Step 9: Cool and Serve
Once baked, remove the loaf from the oven and let it cool in the pan for about 10-15 minutes. Then, carefully remove it from the pan and transfer it to a wire rack to cool completely before slicing. Slicing too early can result in a gummy texture. Enjoy your homemade bread!
Tips & Variations
- Gluten-Free Option: This recipe is already naturally gluten-free thanks to cassava flour! Ensure all your other ingredients (like yeast) are certified gluten-free if you have severe sensitivities.
- Vegan Option: To make this loaf vegan, substitute the egg with a “flax egg” (1 tablespoon ground flaxseed mixed with 3 tablespoons water, let sit for 5 minutes). Use melted coconut oil instead of olive oil for richness.
- Add More Goodness: Stir in ½ cup of shredded carrots, zucchini, or finely chopped spinach into the dough before the first rise for added vegetables. For protein, you could add ¼ cup of hemp hearts or a scoop of unflavored protein powder (adjust liquid if needed).
- Savory Herb Loaf: Incorporate 1-2 tablespoons of dried Italian herbs, rosemary, or a mix of your favorite fresh herbs (finely chopped) into the dry ingredients for a fragrant, savory bread.
- Cheesy Garlic Bread: Mix in ½ cup of shredded dairy-free or regular cheese and 1 teaspoon of garlic powder with the dry ingredients. Brush with melted garlic butter before baking for an extra flavor boost.
Nutritional Information
Approximate values per serving (based on 12 servings):
- Calories: 180 kcal
- Protein: 3g
- Carbohydrates: 30g
- Fat: 6g
Note: Nutritional values may vary depending on specific brands and exact ingredient amounts used.
Health Benefits
This Cassava Flour Sandwich Loaf isn’t just delicious; it also offers some great health benefits, thanks to its main ingredients.
Cassava flour itself is naturally gluten-free, making this bread a fantastic option for those with celiac disease or gluten sensitivities. It’s a good source of carbohydrates, providing energy to fuel your day. Cassava is also rich in vitamin C, which is an important antioxidant and supports your immune system.
The psyllium husk powder in this recipe is a powerful source of dietary fiber. Fiber is crucial for digestive health, helping to promote regularity and prevent constipation. It can also contribute to feelings of fullness, potentially aiding in weight management, and may help manage blood sugar levels.
Olive oil, a healthy fat, is known for its monounsaturated fatty acids. These healthy fats are good for heart health, helping to lower bad cholesterol levels and reduce the risk of heart disease. It also provides antioxidants.
Overall, this loaf offers a wholesome alternative to traditional wheat bread, supporting digestion, providing essential nutrients, and fitting into various dietary needs without sacrificing taste or texture.
Serving Suggestions
- Classic Sandwiches: Use thick slices for your favorite deli meats, cheeses, or roasted vegetables. It holds up beautifully!
- Toasted Breakfast Treat: Toast and spread with avocado, jam, nut butter, or a fried egg for a hearty start to your day.
- Soup Dipper: This bread is perfect for soaking up delicious soups and stews.
- Garlic Bread: Slice, spread with garlic butter, and toast for an amazing side dish with pasta or salads.
- Croutons: Cube stale bread, toss with olive oil and herbs, then bake until crispy for homemade salad croutons.
Storage Tips
Store your Cassava Flour Sandwich Loaf in an airtight container at room temperature for up to 3-4 days. For longer storage, you can freeze individual slices or the whole loaf. Wrap it tightly in plastic wrap, then aluminum foil, and freeze for up to 2-3 months. To reheat, thaw at room temperature, then toast or warm slices in the oven or microwave until soft and warm.
Conclusion
There you have it – a truly remarkable Cassava Flour Sandwich Loaf that proves gluten-free baking can be both simple and incredibly delicious. This bread is soft, versatile, and packed with wholesome goodness. It’s perfect for everything from your morning toast to a robust sandwich at lunch, and it truly shines as a side with dinner.
Don’t be shy about trying this recipe. The process is straightforward, and the results are so rewarding. The smell of fresh bread baking in your kitchen is one of life’s simple pleasures, and with this recipe, you can enjoy it often. Plus, it’s a fantastic way to introduce a new, healthy staple into your diet.
So go ahead, gather your ingredients, and bake this amazing bread. Share it with your family and friends; they’ll be amazed that something so tasty can be so good for them. Happy baking, and enjoy every delightful slice!


