
Introduction
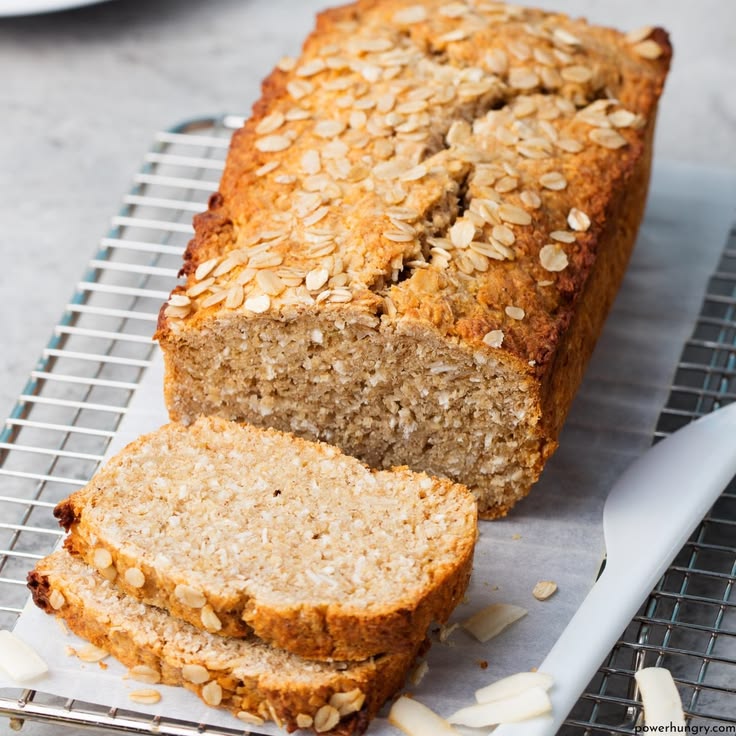
Get ready to meet your new favorite quick bread: Chickpea Flour Protein Bread! This amazing creation is a savory, satisfying, and incredibly versatile loaf that’s packed with plant-based protein. It has a delightful, slightly dense yet tender texture, a wonderfully earthy flavor, and a golden crust that makes every bite a joy. It’s truly special because it’s naturally gluten-free and a fantastic alternative to traditional wheat-based breads.
What makes this bread even better is how simple it is to whip up. Forget long proofing times or complicated kneading. This recipe comes together in one bowl with just a few basic ingredients and a quick mix. You’ll have it in the oven in no time, making it perfect for busy weeknights, meal prep, or whenever you crave a wholesome, homemade treat without the fuss.
Whether you’re looking for a healthier bread option, a delicious way to boost your protein intake, or simply a new recipe to love, this Chickpea Flour Protein Bread is a winner. It’s comforting, nourishing, and so easy to make. Don’t wait – let’s get baking and discover the magic of this incredible bread together!
Cooking Time & Prep Time
- Prep Time: 15 minutes
- Cooking Time: 40-45 minutes
- Total Time: 55-60 minutes
Small tip: Gather all your ingredients before you start mixing. This makes the whole process smoother and quicker!
Ingredients
Makes 8 servings
- For the Bread:
- 2 cups (240g) chickpea flour (besan)
- 1 teaspoon baking powder
- ½ teaspoon baking soda
- 1 teaspoon fine sea salt
- ½ teaspoon garlic powder
- ¼ teaspoon black pepper
- 1 ½ cups (360ml) warm water
- 2 tablespoons olive oil, plus extra for greasing
- 1 tablespoon apple cider vinegar
- Optional Flavor Boosters:
- 2 tablespoons nutritional yeast (for a cheesy flavor)
- 1 tablespoon dried rosemary or mixed Italian herbs
- ¼ cup chopped fresh spinach or kale
Step-by-Step Instructions
-
Step 1: Preheat Oven and Prepare Loaf Pan
Preheat your oven to 375°F (190°C). Lightly grease a standard 9×5 inch loaf pan with olive oil. You can also line it with parchment paper, leaving an overhang on the sides, for easy removal. This ensures your bread won’t stick.
Small tip: Parchment paper makes clean-up a breeze and guarantees your loaf comes out perfectly.
-
Step 2: Combine Dry Ingredients
In a large mixing bowl, whisk together the chickpea flour, baking powder, baking soda, salt, garlic powder, and black pepper. If you’re using nutritional yeast or dried herbs, add them now. Whisk well to ensure all ingredients are evenly distributed.
Small tip: Whisking dry ingredients thoroughly prevents pockets of leavening agents and ensures an even rise.
-
Step 3: Mix Wet Ingredients
In a separate small bowl or measuring cup, combine the warm water, olive oil, and apple cider vinegar. The warm water helps to activate the chickpea flour and create a smoother batter. Make sure the ingredients are well combined.
Small tip: Use warm, but not hot, water. It should be comfortable to the touch.
-
Step 4: Combine Wet and Dry Ingredients
Pour the wet ingredient mixture into the bowl with the dry ingredients. Stir with a whisk or a spatula until just combined. Be careful not to overmix the batter. A few small lumps are perfectly fine.
Small tip: Overmixing can develop the gluten-like properties in chickpea flour too much, leading to a tougher bread. Mix just until no dry flour remains.
-
Step 5: Add Optional Veggies (If Using)
If you’re adding fresh spinach or kale, gently fold it into the batter now. Stir until the greens are just incorporated. This is a great way to sneak in some extra nutrients.
Small tip: For best results with greens, chop them finely so they distribute evenly throughout the loaf.
-
Step 6: Pour Batter into Loaf Pan
Pour the batter evenly into your prepared loaf pan. Gently tap the pan on the counter a couple of times to release any large air bubbles. This helps create a more uniform crumb.
Small tip: Ensure the batter is spread evenly in the pan to encourage even baking.
-
Step 7: Bake the Bread
Place the loaf pan in the preheated oven. Bake for 40-45 minutes, or until the top is golden brown and a wooden skewer or toothpick inserted into the center comes out clean. Baking times can vary depending on your oven.
Small tip: Don’t open the oven door too early, especially in the first 30 minutes, to prevent the bread from sinking.
-
Step 8: Cool Before Slicing
Once baked, remove the loaf pan from the oven. Let the bread cool in the pan for about 10-15 minutes. Then, carefully remove the bread from the pan and place it on a wire rack to cool completely before slicing. This prevents a gummy texture.
Small tip: Cooling completely is crucial for the best texture and easy slicing. Patience is key here!
Tips & Variations
- Gluten-Free Option: This recipe is naturally gluten-free as chickpea flour is made from ground chickpeas. Always double-check your baking powder and baking soda labels to ensure they are certified gluten-free if you have a severe allergy.
- Vegan/Vegetarian Option: This recipe is already 100% vegan and vegetarian-friendly! It uses plant-based ingredients exclusively, making it perfect for those following a plant-based diet.
- Add More Vegetables or Protein: Boost the nutrition by folding in ½ cup of finely grated carrots, zucchini (squeezed dry), or chopped bell peppers. For extra protein, consider adding ¼ cup of hemp seeds or sunflower seeds to the batter.
- Spicy Version: For a kick, add ½ teaspoon of red pepper flakes or a pinch of cayenne pepper to the dry ingredients. You could also stir in 1-2 tablespoons of finely chopped jalapeño or serrano peppers.
- Other Flavor Tips: Experiment with different herbs like fresh dill or thyme. A tablespoon of sesame seeds sprinkled on top before baking adds a lovely nutty flavor and crunch. You can also mix in a tablespoon of nutritional yeast for a subtle “cheesy” undertone.
Nutritional Information
Approximate values per serving (based on 8 servings):
- Calories: 190 kcal
- Protein: 9g
- Carbohydrates: 27g
- Fat: 5g
Note: Nutritional values may vary depending on specific brands and quantities of ingredients used.
Health Benefits
This Chickpea Flour Protein Bread is not just delicious; it’s also packed with amazing health benefits! It’s a fantastic way to nourish your body.
Chickpea Flour Power: The star ingredient, chickpea flour (besan), is a nutritional powerhouse. It’s naturally high in plant-based protein, which is essential for muscle repair and growth, and helps you feel full and satisfied. It’s also rich in dietary fiber, promoting healthy digestion and helping to regulate blood sugar levels, preventing those energy crashes.
Rich in Micronutrients: Chickpea flour provides a good source of important vitamins and minerals. You’ll find folate, which is crucial for cell growth and function, and iron, vital for energy and preventing fatigue. It also contains magnesium and potassium, important for heart health and nerve function.
Gluten-Free Goodness: For those with gluten sensitivity or celiac disease, this bread is a fantastic option. It allows you to enjoy a satisfying bread alternative without any of the discomfort associated with gluten, making it gentle on the digestive system.
Heart-Healthy Fats: The olive oil in this recipe contributes healthy monounsaturated fats. These fats are known to support cardiovascular health, help reduce bad cholesterol levels, and provide anti-inflammatory benefits. It’s a much healthier fat choice compared to many processed oils.
Serving Suggestions
- With Soups and Salads: This bread is perfect for dipping into a warm bowl of lentil soup or alongside a fresh, vibrant salad. Its hearty texture holds up beautifully.
- As a Savory Toast: Slice it thick and toast it lightly. Top with avocado, a sprinkle of everything bagel seasoning, or some hummus and fresh herbs for a quick and nutritious breakfast or snack.
- Mini Sandwiches: Cut into smaller squares or thin slices to make open-faced mini sandwiches. Top with roasted vegetables, a slice of vegan cheese, or a spread of your favorite pesto.
- Meal Prep Essential: Bake a loaf at the beginning of the week and slice it up. It’s ready to grab for quick snacks, add to lunchboxes, or serve with dinner throughout the week.
Storage Tips
Store leftover Chickpea Flour Protein Bread in an airtight container at room temperature for up to 3 days. For longer storage, keep it in the refrigerator for up to 5-7 days. This bread also freezes beautifully! Slice the cooled loaf, then place the slices in a freezer-safe bag or container with parchment paper between slices to prevent sticking. It will keep in the freezer for up to 2-3 months. To reheat, simply toast slices from frozen or thaw at room temperature and warm gently in the oven or microwave.
Conclusion
There you have it – a truly wonderful and versatile Chickpea Flour Protein Bread that’s as good for you as it is delicious! It’s amazing how a few simple ingredients can come together to create such a comforting and satisfying loaf. This bread is a testament to the power of plant-based cooking, offering a fantastic gluten-free and high-protein option for any meal.
We truly hope you give this recipe a try. It’s so easy to make, even for beginner bakers, and the results are incredibly rewarding. Imagine the aroma filling your kitchen as it bakes, and the joy of slicing into a warm, homemade loaf.
Don’t keep this delicious secret to yourself! Share your freshly baked Chickpea Flour Protein Bread with family and friends. It’s perfect for sharing, and everyone will appreciate a wholesome, flavorful treat. Happy baking, and enjoy every protein-packed bite!


