
Introduction
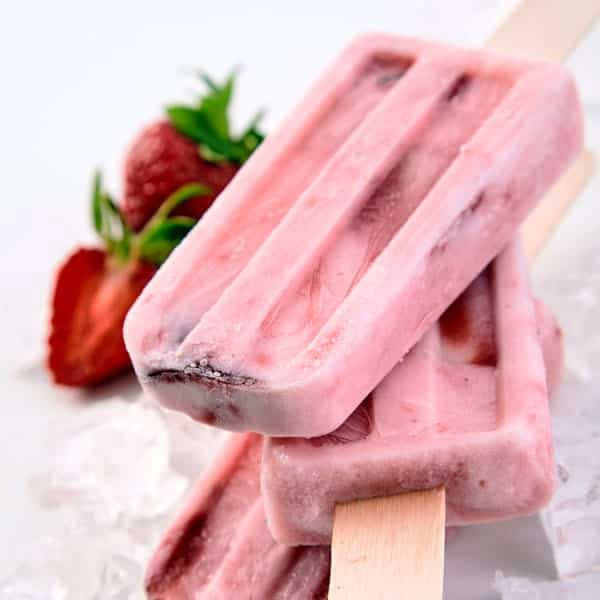
Get ready to meet your new favorite summer treat! These Strawberry Yogurt Popsicles are an absolute dream. They are creamy, bursting with fresh strawberry flavor, and wonderfully refreshing. Imagine a healthy dessert that feels like a decadent indulgence – that’s exactly what these popsicles deliver. They are sweet, tangy, and have a beautiful vibrant color that just screams happiness.
The best part? Making these delightful popsicles is incredibly easy and quick. You only need a few simple ingredients and a blender. There’s no complicated cooking or baking involved. Just a few minutes of prep work, and then your freezer does all the heavy lifting. It’s the perfect project for a warm afternoon, and even kids can help out with the mixing and pouring.
So, if you’re looking for a guilt-free way to cool down, satisfy your sweet tooth, and enjoy the taste of fresh summer berries, you’ve come to the right place. These Strawberry Yogurt Popsicles are truly a joy to make and even more joyful to eat. Let’s dive in and create some frosty magic together!
Cooking Time & Prep Time
Prep Time: 15 minutes
Freezing Time: 4-6 hours (or overnight)
Total Time: 4 hours 15 minutes (mostly inactive)
Small tip: For faster freezing or an extra thick consistency, use frozen strawberries straight from the freezer. This also helps make the mixture colder and less prone to ice crystals.
Ingredients
This recipe makes approximately 6 servings (standard popsicle molds).
- 2 cups fresh or frozen strawberries, hulled
- 1 cup plain Greek yogurt (full-fat or low-fat)
- 2-4 tablespoons honey or maple syrup, to taste
- 1 teaspoon vanilla extract
- Pinch of salt (optional, but enhances flavor)
Step-by-Step Instructions
-
Step 1: Prepare the Strawberries
Start by washing your fresh strawberries thoroughly. If using fresh, hull them by removing the green tops. You can leave them whole or roughly chop them, as they will be blended. If using frozen strawberries, there’s no need to thaw them beforehand.
Small tip: For an extra pretty swirl, reserve about 1/4 cup of finely diced strawberries to mix in after blending, before pouring into molds.
-
Step 2: Blend the Mixture
Combine the hulled strawberries, Greek yogurt, honey or maple syrup, vanilla extract, and the pinch of salt into a blender. Secure the lid tightly. Blend until the mixture is completely smooth and creamy. There should be no large chunks of strawberry remaining.
Small tip: Start with 2 tablespoons of sweetener, then taste and add more if you prefer a sweeter popsicle. Natural sweetness of strawberries can vary!
-
Step 3: Taste and Adjust
Carefully remove the blender lid and taste a small spoonful of the mixture. This is your chance to adjust the sweetness or add a little more vanilla if desired. Blend again briefly if you make any adjustments.
Small tip: If the mixture seems too thick for your molds, you can add a tablespoon of milk (dairy or non-dairy) to thin it slightly, but avoid making it too watery.
-
Step 4: Pour into Molds
Carefully pour the strawberry yogurt mixture into your popsicle molds. Fill each mold almost to the top, leaving a small space for expansion as they freeze. If you reserved diced strawberries, gently stir them into the mixture before pouring.
Small tip: Use a small funnel if your mold openings are narrow to prevent spills and make cleanup easier.
-
Step 5: Insert Sticks
Place the popsicle sticks into the center of each filled mold. If your molds have lids with stick slots, secure the lids before inserting the sticks. Ensure the sticks are standing upright and centered.
Small tip: If your sticks tend to tilt, you can use aluminum foil over the top of the mold, poke a small hole, and insert the stick through the hole to keep it straight.
-
Step 6: Freeze Solid
Carefully transfer the filled popsicle molds to the freezer. Allow them to freeze for at least 4-6 hours, or preferably overnight, until they are completely solid. This ensures they hold their shape perfectly.
Small tip: Placing the molds on a flat baking sheet before freezing can make it easier to transfer them without spilling, especially if they are wobbly.
-
Step 7: Enjoy Your Popsicles!
Once frozen solid, remove the popsicles from the freezer. To release them easily, run the bottom of the mold under warm water for 10-20 seconds. Gently pull on the stick to remove the popsicle. Serve immediately and enjoy your delicious, homemade treat!
Small tip: Don’t twist the stick to remove; a gentle, steady pull works best after warming the mold.
Tips & Variations
- Gluten-Free Option: This recipe is naturally gluten-free! All the ingredients used are free from gluten, making it a safe and delicious treat for those with gluten sensitivities or celiac disease.
- Vegan or Vegetarian Option: To make these popsicles vegan, simply substitute the Greek yogurt with your favorite plain plant-based yogurt (almond, coconut, or soy yogurt work wonderfully). Use maple syrup instead of honey for the sweetener.
- Add More Vegetables or Protein: Boost the nutrition by blending in a handful of fresh spinach (the strawberry flavor will completely mask it!), or a scoop of unflavored or vanilla protein powder. This is a great way to sneak in extra goodness.
- A Hint of Spice: For an adventurous twist, add a tiny pinch of freshly ground black pepper or a 1/4 teaspoon of finely grated fresh ginger to the blender. It won’t make it “spicy” hot, but will add a subtle, warming complexity to the fruit flavor.
- Layered Popsicles: Create a fun layered effect! Blend half the mixture as written, then blend the other half with a different fruit (like blueberries or bananas). Pour one layer, freeze for an hour, then add the next layer and continue freezing.
- Chocolate Chip Delight: Stir in a tablespoon or two of mini chocolate chips into the mixture before pouring into molds for a delightful crunch and chocolatey surprise.
Nutritional Information
Approximate values per serving (based on 6 servings):
- Calories: 95-110 kcal
- Protein: 4-6g
- Carbohydrates: 18-22g
- Fat: 1-2g
Please note: These values are approximate and can vary depending on the specific brands and amounts of ingredients used, especially the type of yogurt and amount of sweetener.
Health Benefits
These Strawberry Yogurt Popsicles are not just tasty; they’re packed with wholesome ingredients that offer fantastic health benefits!
Strawberries are true nutritional powerhouses. They are incredibly rich in Vitamin C, which is crucial for immune function and healthy skin. They also provide a good amount of manganese, potassium, and antioxidants like anthocyanins, which give them their vibrant red color and help fight inflammation.
Greek yogurt is an excellent source of protein, which helps with satiety and muscle repair. It’s also loaded with probiotics, beneficial bacteria that support a healthy gut microbiome, aiding digestion and overall well-being. Plus, it provides essential calcium for strong bones and teeth.
Using honey or maple syrup as a natural sweetener means you’re avoiding refined sugars. Both honey and maple syrup offer trace minerals and antioxidants, making them a slightly healthier alternative when used in moderation.
Overall, these popsicles are hydrating, rich in vitamins and minerals, good for your gut, and a fantastic way to enjoy a sweet treat without the guilt. They support immune health, digestion, and provide sustained energy, making them a smart choice for any time of day.
Serving Suggestions
- Refreshing Snack: Enjoy these popsicles on their own as a perfect refreshing snack on a hot day. They are hydrating and satisfying.
- Healthy Dessert: Serve them after lunch or dinner as a light and healthy dessert option. They’re sweet without being overly heavy.
- Breakfast Treat: Believe it or not, these make a fun and quick breakfast on the go, especially for kids! It’s essentially fruit and yogurt in a fun, frozen form.
- Poolside Perfection: Hand them out at your next pool party or backyard BBQ. They’re a crowd-pleaser for all ages.
- Meal Prep Idea: Make a large batch at the beginning of the week. Store them individually wrapped in the freezer, and you’ll have a healthy treat ready whenever a craving strikes.
Storage Tips
Once completely frozen, you can keep the popsicles in their molds in the freezer for up to 2-3 months. For longer storage or to free up your molds, remove the frozen popsicles from their molds and wrap each one individually in plastic wrap or


