
Introduction
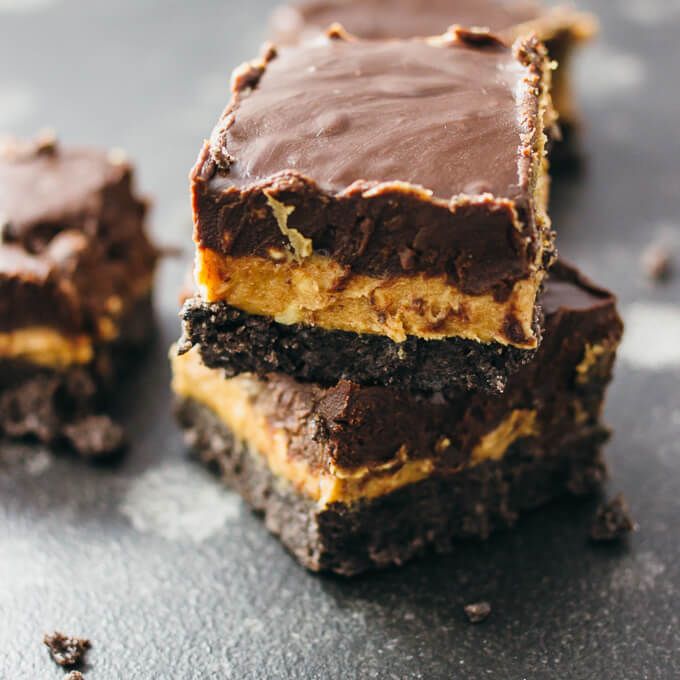
Get ready for a treat that will make your taste buds sing! These No Bake Peanut Butter Oreo Bars are pure magic. They combine the irresistible crunch of Oreo cookies with a creamy, dreamy peanut butter filling. Then, a rich chocolate topping finishes them off beautifully. It’s a dessert that’s rich, satisfying, and utterly delicious.
The best part? There’s no oven required! This recipe is incredibly easy and quick to put together. You just need a few simple ingredients and a little time for chilling. It’s perfect for busy days or when you want a fantastic dessert without all the fuss. Anyone can make these bars, no special baking skills needed.
Imagine biting into layers of chocolatey cookie, smooth peanut butter, and a hint of sweet chocolate. These bars are perfect for parties, potlucks, or just a sweet craving at home. So, gather your ingredients and get ready to create something truly special. You are going to love these!
Cooking Time & Prep Time
- Prep Time: 20 minutes
- Chill Time: 2 hours (minimum)
- Total Time: 2 hours 20 minutes
Small tip: You can prepare these bars a day in advance. This allows for extra chilling time and even better flavor development.
Ingredients
This recipe makes approximately 16 generous servings.
For the Oreo Crust:
- 24 Oreo cookies (about 1 standard package)
- 1/2 cup (1 stick) unsalted butter, melted
For the Peanut Butter Filling:
- 1 cup (2 sticks) unsalted butter, softened
- 1 cup creamy peanut butter (smooth)
- 3 cups powdered sugar, sifted (plus more if needed)
- 1/4 cup milk (whole or 2%)
- 1 teaspoon pure vanilla extract
For the Chocolate Topping:
- 1.5 cups semi-sweet chocolate chips
- 1/4 cup creamy peanut butter
Step-by-Step Instructions
-
Step 1: Prepare the Oreo Crust
Start by crushing your Oreo cookies. You can do this in a food processor until fine crumbs form. If you don’t have a food processor, place the cookies in a large Ziploc bag and crush them with a rolling pin. Aim for very fine crumbs.
Small tip: Make sure there are no large chunks of cookies left for the best crust texture.
-
Step 2: Form the Crust Base
In a medium bowl, combine the crushed Oreo crumbs with the 1/2 cup of melted butter. Mix them well until all the crumbs are moistened. Press this mixture firmly and evenly into the bottom of a 9×13 inch baking dish. Use the back of a spoon or your hands to ensure it’s compact. Place the dish in the refrigerator while you prepare the filling.
-
Step 3: Make the Peanut Butter Filling
In a large mixing bowl, beat the softened 1 cup of butter and 1 cup of creamy peanut butter together. Use an electric mixer on medium speed until the mixture is light and fluffy. This usually takes about 2-3 minutes. Scrape down the sides of the bowl as needed.
-
Step 4: Add Remaining Filling Ingredients
Gradually add the 3 cups of sifted powdered sugar to the peanut butter mixture, beating on low speed until combined. Then, add the milk and vanilla extract. Increase the speed to medium-high and beat until the filling is smooth and creamy. If the mixture seems too thick, you can add another tablespoon of milk. If it’s too thin, add a little more powdered sugar.
Small tip: Sifting the powdered sugar prevents lumps and ensures a super smooth filling.
-
Step 5: Layer the Filling
Spread the peanut butter filling evenly over the chilled Oreo crust. Use an offset spatula or the back of a spoon to create a smooth, consistent layer. Try to get it as flat as possible. Place the dish back into the refrigerator to chill for at least 30 minutes. This helps the filling set before adding the topping.
-
Step 6: Prepare the Chocolate Topping
In a microwave-safe bowl, combine the semi-sweet chocolate chips and the 1/4 cup of creamy peanut butter. Microwave in 30-second intervals, stirring well after each, until the mixture is completely melted and smooth. Be careful not to overheat the chocolate, as it can seize.
Small tip: Alternatively, you can melt the chocolate and peanut butter in a double boiler over simmering water for more controlled melting.
-
Step 7: Add the Chocolate Topping
Pour the melted chocolate mixture over the chilled peanut butter layer. Gently spread it evenly across the top using an offset spatula. Work quickly, as the chocolate will start to set when it hits the cold filling. Return the dish to the refrigerator for at least 2 hours, or until the bars are completely set.
-
Step 8: Slice and Serve
Once fully chilled and set, remove the dish from the refrigerator. Let it sit at room temperature for about 10-15 minutes before slicing. This makes cutting easier and prevents the chocolate from cracking too much. Use a sharp knife to cut into 16 squares. Wipe the knife clean between cuts for neat slices. Enjoy your delicious No Bake Peanut Butter Oreo Bars!
Tips & Variations
- Gluten-Free Option: Simply use gluten-free sandwich cookies (like gluten-free Oreos) for the crust. Ensure all other ingredients are certified gluten-free.
- Vegan/Vegetarian Option: For a vegan version, use plant-based butter (sticks, not spread), plant-based milk (almond or oat milk work well), and vegan sandwich cookies. Ensure your chocolate chips are dairy-free. This recipe is already vegetarian.
- Add Protein Boost: Stir a scoop of unflavored or vanilla protein powder into the peanut butter filling. You might need to add a touch more milk to maintain the desired consistency.
- Spicy Kick: For a unique flavor, add a tiny pinch (1/8 teaspoon) of cayenne pepper to the chocolate topping mixture. It creates a subtle warmth that complements the sweetness.
- Nut-Free Alternative: If you have a peanut allergy, substitute the peanut butter with an equal amount of sunflower seed butter (SunButter) or another nut-free spread.
- Extra Crunch: Fold in 1/2 cup of mini chocolate chips or chopped peanuts (if no allergies) into the peanut butter filling before spreading for an added textural element.
Nutritional Information
Approximate values per serving (based on 16 servings):
- Calories: 550 kcal
- Protein: 7g
- Carbohydrates: 55g
- Fat: 35g
Note: These values are estimates and may vary depending on the specific brands and exact quantities of ingredients used.
Health Benefits
While these bars are a delicious treat, some of their main ingredients offer surprising health benefits!
Peanut butter, a star ingredient, is a good source of plant-based protein. Protein is essential for building and repairing tissues in your body. It also helps you feel full and satisfied, which can be helpful for managing appetite.
Peanuts are packed with healthy fats, primarily monounsaturated and polyunsaturated fats. These “good” fats are known to support heart health when consumed in moderation. They can help lower bad cholesterol levels and reduce the risk of heart disease.
Beyond fats and protein, peanuts also provide important vitamins and minerals. They are a good source of Vitamin E, a powerful antioxidant that protects cells from damage. You’ll also find B vitamins like niacin and folate, along with minerals such as magnesium, potassium, and zinc, all vital for various bodily functions.
Even a little dark chocolate, if used in the topping, can offer benefits. Dark chocolate contains antioxidants called flavonoids, which may help improve blood flow and lower blood pressure. So, while these bars are a decadent dessert, they do bring a few nutritional perks to the table!
Serving Suggestions
- Serve these bars chilled, straight from the refrigerator, for the best texture.
- They are perfect on their own as a rich dessert or snack.
- Cut them into smaller squares for a party platter or dessert buffet.
- Pair them with a glass of cold milk or a cup of hot coffee for a delightful afternoon treat.
Storage Tips: Store any leftover No Bake Peanut Butter Oreo Bars in an airtight container in the refrigerator for up to 5-7 days. These bars also freeze beautifully! Wrap individual bars tightly in plastic wrap, then place them in a freezer-safe bag or container for up to 2-3 months. Thaw them in the refrigerator overnight or at room temperature for about 30 minutes before enjoying. No reheating is necessary for these delicious bars.
Conclusion
And there you have it – a recipe for the most incredibly delicious No Bake Peanut Butter Oreo Bars! They are truly a crowd-pleaser, combining classic flavors in a delightful, easy-to-make package. The rich, creamy, and chocolatey layers make every bite a moment of pure joy.
This recipe proves that you don’t need to be an expert baker to create something spectacular. With simple steps and no oven required, anyone can whip up these amazing bars. They are perfect for satisfying your sweet tooth or impressing guests with minimal effort.
So go ahead, give this recipe a try! Make a batch for yourself, share them with your family, or bring them to your next gathering. Watch as smiles appear with every bite. Happy no-baking!


